Powered by Blogger.

Easy to Make Leather Key Chain

Several weeks ago, I found a woman at a garage sale who was selling a big bag of leather pieces. I didn't really have a project in mind, but I also had a hard time passing up the bag of leather scraps because I knew that I would regret it. It didn't take long for project ideas to start popping into my head, like this one. In under 10 minutes I whipped up these personalized leather key chains and I want to show you how you can easily make your own, even if you don't find a garage sale with scrap leather at it!
key chain, handmade gifts,


I ended up sending some of my leather scraps to my partner for the recent thrift store challenge but I kept a few to play with too. I've seen small pieces of leather at craft stores or there is this leather. 


I used my sharp rotary cutter and a straight edge {like this} to help me cut a large rectangle that was an inch wide and a smaller rectangle that was 1/2" wide. Both were six inches long.


I used two different key chain clips. I like the lobster claw clasps for my small purse so that I can clip my keys to the outside but I also get the benefit of having a traditional key chain ring clip on there too.


I found this leather rivet setter kit at my local craft store, but you can order it here too. If you have never used rivet's don't be intimidated! They are so easy to use. I actually used a sharp box cuter to make a hole on both sides so that the rivet would go through easier. Then I used a hammer and the rivets were set.


I used my stamping kit to create my initials on one of the key chains. It was far easier than I thought that it would be.
keychain, personalized gift, fathers day gift, graduation gift, christmas gift

I think that these would make great gifts for just about any one in your life, so tuck this one away for Father's Day next year, or for Christmas or for those birthdays. You could even make one just because.

handmade leather keychain

dislaimer: this post may have affiliate links. By clicking on them and purchasing through them, I may receive a small commission. These small purchases help me to continue to keep writing content and creating at Holy Craft. Thank you!

Easy to Make Watercolor Cloth Napkins

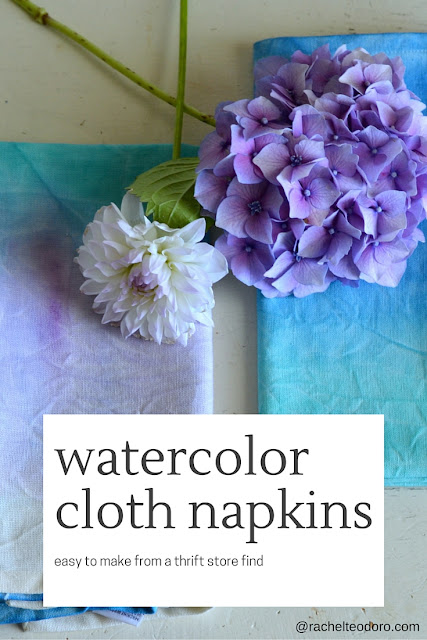
Last week, I gave you all a little sneak peek to this project when I revealed my embroidery hoop chandelier. I was part of a thrift store challenge, where another blogger went shopping at a thrift shop {on a budget of course!} and sent me a box of goodies that I could create with. I saw a few things in the box that automatically shifted my brain into creative mode, the embroidery hoops were one of them, the plain cloth napkins were the other.  I'm excited to share with you how I used paint in my cabinet to create these watercolor napkins.

craft tutorial using cloth napkins and paint


I started by gathering my supplies. I love garage sales, and tend to hoard craft supplies. There is nothing worse than being stalled out in the creative process because you have to go hunt down supplies at six hundred different stores!

Obviously, the paint brush was from a garage sale and as you can see, my thrift store napkins were $2.99 {and gifted to me}. I always have a stash of paint on hand in various colors because you never know when you are going to need it. I think I picked these up as samples at SNAP blogging conference this year. As you can see, I hadn't settled on the color palate I was going to use just yet. I ended up using only 3 colors, but the glory of this project is that you can use any paint you want to match any color palate that you have. I also used paper bowls that I could throw away because that makes clean up easy!


You want to start by wetting down your napkins. You don't want them dripping wet, just damp. I rung out the extra water.


I took a few drops of my paint and added it to my bowls. I used water to dilute the paint and used my brush to stir it in. I knew I wanted the blue to be bold, so I didn't dilute that one quite as much as I did the purple. Think 3-4 drops of paint to 1 cup of water. You will have to experiment on your own to get the winning combination for your project.


I have a work surface that is made for crafts, so I didn't cover it up, {You can read more about our removable table top here} but if you aren't so lucky, you might want to lay wax paper down to protect your surface. I found that the paint wiped right up with no issues.

I started at the bottom of the napkin, laid it out flat, and began brushing my paint on using the same up and down direction. I sort of eye balled it on how far I went up on each napkin with each color.


After adding the blue, I added the green and blended them at their meeting point. Then I added my final color. I didn't want to go all the way to the top, I wanted to leave some of the natural off white color on the napkins.


I took each napkin and laid them outside to dry in the sun. It was a hot day, so it didn't take long at all. You could also throw them on low in your dryer.


 I love how they turned out!


Each one is a little different and unique.


This was such an easy inexpensive project and I was able to use materials I had on hand. Those are my favorite kinds of projects! 

earth friendly, paint, how to,

dislaimer: this post may have affiliate links. By clicking on them and purchasing through them, I may receive a small commission. These small purchases help me to continue to keep writing content and creating at Holy Craft. Thank you!

Open Your Child's Eyes to Poverty- 5 Ways You Can Get Started

I'm raising three white children in a middle class home in a suburb of Seattle, WA. We live in a gated neighborhood where there is nary a sign of any real want. Sure, we see tents along the highway in the city where homeless camps have been set up and we pass by, make eye contact and smile at those men and women holding signs at the intersection, but how do we really help our kids grasp the reality of poverty when we are so far removed from it.

Several years ago, I read a quote by Shane Claiborne, in his book Irresistible Revolution that says "the problem is not that American Christians do not care about the poor. The problem is that American Christians do not know the poor"

How true is this! We care when we know. When we hear about true need and crisis, American people are quick to step up and help when they can. But how do we get to know the poor and the needs of those in poverty?

Poverty in America looks very different than poverty in developing and third world countries. My hope is that our children will have a larger world view that includes people to the ends of the earth. So how do we open our children's eyes to poverty? I'm sharing five ways today that I hope will help you know where to start.

parenting, world vision, africa, uganda, homelessness, poor


I've been fortunate enough to have traveled to several developing nations like Uganda and Zambia with World Vision and have seen the work being done in communities that are dealing with extreme poverty {those living on less than $1.25 a day}. When I've come home, I've shared stories of the people that I have met and my children have heard from me how different their lives are from those children on the other side of the world. 

But it doesn't take traveling out of the country to have a conversation with your children about poverty. 

Be Prepared

Kids ask questions all the time. Sometimes those questions come when you are least prepared to give an answer. When my kids were much younger, I was approached by a homeless man outside of the store asking me for a few dollars. I smiled at the man as I juggled bags of groceries and kids in my arms and responded that I don't carry cash. When my kids and I got in the car they asked why I lied to the man. 

Be prepared for a response. If we tell our kids to help those in need, but when someone in need asks for help and you don't help them, what explanation are you going to give to them. I could have been taken off guard and launched into a whole explanation about bad choices and addiction {which isn't always the case} but instead I told them that we don't give money directly to someone on the street, but that we do give money to community programs that can help those in need. 

Talk About It

Don't be afraid to have a discussion about poverty. None of us has all of the answers, if we did, there wouldn't be poverty. The goal of talking about poverty is to encourage empathy. Express how it makes you feel sad that those people living in a tent don't have a warm bed to sleep in at night. Talk about how happy you are that your children have a doctor to go to when they are sick and that they have clean water to drink and that not all children have those things.

Do Something for Someone Else

Last year, I wrote Top 5 Reasons Why You Should Volunteer as a Family and Where to Start. It's always been very important for us to serve together as a family. Your kids may have their own ideas of how they want to help. Be open to listening to those ideas. Maybe they want to donate some of their unused toys to a homeless shelter or while they are school supply shopping they want to buy supplies for a child at their school who might not otherwise have any. 

Maybe you want to put together blessing bags as a family so that when you see a homeless man or woman on the side of the road, you have something to give to them. A blessing bag is a Ziploc bag and can include non perishable food items like granola bars and water bottles as well as personal care items like a toothbrush and shampoo. Or you might want to spend an afternoon as a family at a food bank sorting items or make peanut butter and jelly sandwiches that you can distribute to the homeless nearby. 

Experience It

Turn off your water for the day and see how difficult it is to not have a home with running water. Take a walk with buckets to your local water source {it could be a drainage pond or a puddle nearby} and walk home with the water. Eat a simple meal of beans and rice or even consider skipping a meal {elementary age kids can skip breakfast} to see what it really feels like to be hungry. Consider getting your older kids involved in the 30 hour famine. Spending some time experiencing the effects of poverty can help open your kids heart and mind to a new understanding of the poor. 

Our sponsored child Moses at his home in Uganda

Sponsor a Child 

One of the greatest things we have done as a family is to sponsor a child through World Vision. We started sponsoring Moses more than 5 years ago and we now sponsor a young girl named Sheila as well. World Vision has children available for sponsorship in nearly 100 countries. 

When we started sponsoring Moses we got a packet of information about him and his family and the area that he lives in. There was also information and even videos of our sponsored children on the website that we could watch. We write to our sponsored children and they write back to us. We love to receive pictures and letters and hear how their life is improving because of our monthly donation of $35. It's been a great way for our children to think about someone their age that is growing up in very different circumstances. You can find out more about child sponsorship here.

We have also found these books helpful to share with our children as they have gotten older.  

Under the Overpass is a book about two guys who decided to break free from their middle class lifestyles and see what it was really like to live on the streets for five months. It was an eye opening view for how we respond to those men and women that we see on the streets.

Same Kind of Different as Me by Ron Hall and Denver Moore 
A story of two men from two very different backgrounds forming an unlikely friendship.

Interrupted by Jen Hatmaker
This was a great book sharing how to live on mission right where you are.

The Hole in Our Gospel by Rich Sterns
The message in this book challenged me to live differently and opened my eyes to change my world view.

We enjoyed watching this documentary on Netflix as well.

Living on $1 a Day Follow the journey of three guys living on $1 a day in rural Guatemala. 

I would love to hear about some of the ways that your family helps to open your child's eyes to poverty in your backyard and around the world. 

dislaimer: this post may have affiliate links. By clicking on them and purchasing through them, I may receive a small commission. These small purchases help me to continue to keep writing content and creating at Holy Craft. Thank you!

Embroidery Hoop Chandelier

A few months ago, a team of bloggers decided to get together for a thrift store challenge. The challenge was set to get paired up with a blogger who would send you a box of thrift store find(s) under $15 and you had the liberty to create whatever you wanted to create with those items. In case you missed it, you can read more about the challenge here.  

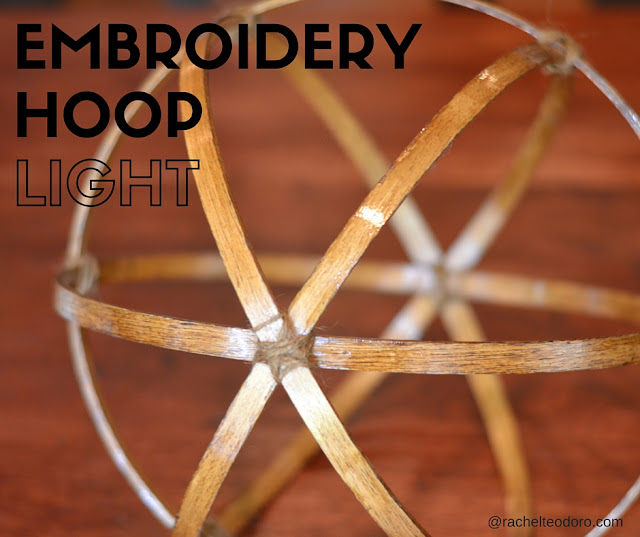
Today, I'm going to show you what I created with one of the items in my box. It's a project I've been wanting to make for quite some time. I'm so glad the challenge finally gave me the kick in the pants to make this embroidery hoop light. I love how it turned out and it's been a great addition to our back patio on our warm summer nights.

outdoor lighting, thrift store challenge, orb light


Let me take a second to refresh your memory. These are the items I received in my thrift store challenge box from Carol at Refurbish 360 Blog. I had a few ideas in my mind, but I kept going back to my original idea of making an embroidery hoop light. In fact, I had already purchased the lighting package from IKEA last year with this project in mind. I just hadn't gotten around to doing it just yet.


I started by using some Minwax stain in Bombay Mahogany. The same stain we used when we made our removable plank top table last year.  I put on two coats of the stain. I also had my IKEA lighting kit {if you don't have an IKEA close by, this light kit is really reasonably priced as well} and twine on hand. You will also need a lightbulb {I love the look of the Edison bulbs.} This one is a fantastic deal.


After your hoops are dry, start by sliding all of the embroidery hoops inside one another. I used three on the inside and then one went down to support the middle. Start wrapping your twine around to hold your first meeting point together.


Slip the middle ring around and wrap that in place at the meeting points as well.


Once you have all your meeting points wrapped, take our your light kit and decide how far down you want your light to hand inside your hoop. You will take your twine and slip it around like shown at the spot you want it to meet with your hoop.


As you can see, the twine was placed about two inches up from the light base.


Secure the cord to the side of the embroidery hoop point that you consider the top.


My husband helped me find larger twine to wrap the cord and secure the lighting wire in place.


He is more of a boy scout than I am and knots are second nature to him. He ended up leaving a loop at the top so that there was a place to hang the light on our patio when it was complete.


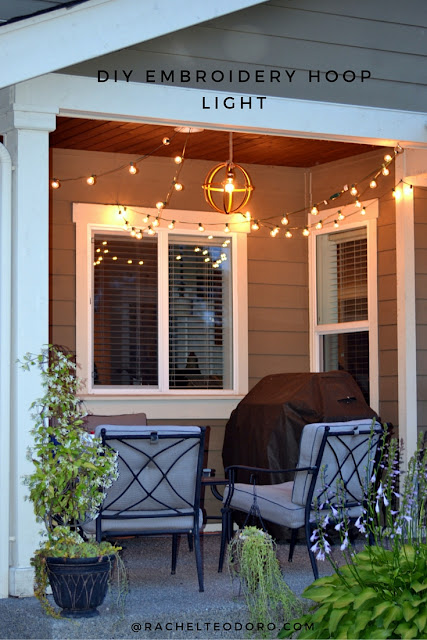
After the light was complete, it found it's place outside on our back patio.


I think it looks pretty great above this seating area.


Having this lighting has made us linger just a little bit longer outside and enjoy the warm nights just a little bit longer.


In fact, we have even fired up the charcoal BBQ and created some signature S'mores and enjoyed some amazing family time out back.


I was so happy to finally get this project that's been floating around in my head made. It's one of those things that I have enjoyed so much now, I wonder why I didn't make it sooner!

back patio lighting, thrift store challenge,

I also took the set of napkins that Carol sent and made some watercolor cloth napkins. I will have the full tutorial on that soon, but in the meantime, here's a sneak peak.


Take a second today to check out some of the other Thrift Store Challengers and see what they came up with!

dislaimer: this post may have affiliate links. By clicking on them and purchasing through them, I may receive a small commission. These small purchases help me to continue to keep writing content and creating at Holy Craft. Thank you!

How to Clean Your White Converse {or Canvas} Shoes

I recently picked up a pair of white converse shoes at a garage sale for $2. They were filthy dirty but my 14 year old daughter insisted that I buy them so that we could match since she has a pair of her own. Who can say no to being a "twinsie" with their teen daughter? Not me, that's who. So I picked the shoes up in the hopes that I could revive them from their dingy dirty state that they were in to a clean looking white pair the way God intended. Or at least, the way Converse intended them to look.

converse, toms, keds, whiten shoes,

It's hard to get a really good look at the before and after, but I think they cleaned up really nicely. In fact, I'm pretty darn impressed with myself and wanted to share my tricks with you.  It's nearly impossible to keep white shoes looking white for long, so if you own a pair of white canvas shoes, this cleaning technique may be your new go to.

magic cleaning solution to whiten shoes


I started by removing the laces in my shoes. I could buy a new pair of white laces for a few bucks but I'm cheap and I like to salvage what I have, so I decided to take my laces out and see if I could make them look new again. I ended up putting them in a small plastic bowl filled with a mixture of the same cleaning concoction that I will be telling you about. It worked great and the laces looked new again too!


I have a sink in my laundry room, but if you don't you could use a bucket. I put a quarter scoop of Oxiclean, a quarter cup of laundry detergent and a cap full of bleach into my sink filled with about a gallon of cold water. You want to use cold water so that you don't set any of your stains. I used my toothbrush to swish and mix around my cleaning mixture.


Use your toothbrush to start scrubbing. I started with the rubber around the edges


and then worked my way up to the canvas.


I scrubbed the shoe on the left and hadn't gotten to the shoe on the right yet. You could soak your shoes upside down in your cleaning bath for a bit if the stains are really set in. I actually didn't have the time to do that and think that the end result still turned out great.


I took my toothbrush and dipped it into another scoop full of my Oxiclean. I used that to scrub around the canvas on my shoes before I threw them into my washing machine. I washed the shoes on cold with a small amount of liquid bleach and a little bit of laundry detergent.


Once the shoes are washed, you don't want to dry them in your dryer, you want to let the sun do the final step of whitening them. I read that some people find that their canvas shoes turn yellow as they dry in the sun. I didn't want that, so I took paper towels, wet them down until they were moist and laid them on top of the canvas.


After a few hours, your shoes will be dry and they will look almost as good as new!

I was really impressed with the process and have no idea why I almost didn't buy this pretty sweet looking pair of Converse. I'm so glad my daughter talked me into it. Now we can be twinning!

TOMS, canvas, keds

dislaimer: this post may have affiliate links. By clicking on them and purchasing through them, I may receive a small commission. These small purchases help me to continue to keep writing content and creating at Holy Craft. Thank you!
Back to Top