Showing posts with label Halloween. Show all posts

M&M Candy Corn Cookies

A few weeks ago, I mentioned that I was hoping to make some changes here at Holy Craft. Good changes.  Nothing that will send you in a panic I hope. 

One of those changes is that I want to start offering some yummy recipes for all of you.  I have shared recipes with you over the years, but nothing consistently.  One of the reasons is because my kids are quick to eat everything in zero point two seconds! The other is because while I cook out of necessity, it's not really my favorite thing to do. 

Lucky for you, I know someone who loves to be in the kitchen!  I'm so excited to introduce to you Holy Craft's new recipe contributor Kate.  Kate is a super fun mom of two littles names Trevi and Harvey.  She's married to my husband's cousin Brett, and they are temporarily making a home in Pittsburgh while Brett is in school to be a nurse anesthetist.  

I am so excited for Kate to be sharing her talents here and I know you will be too! Especially if you whip up these yummy M&M candy corn cookies that she's sharing.  It's sure to be love at first sight! Take it away Kate!


Orange, white, black, chocolate, sweet treats, candy corn: what do these things all have in common? 
Halloween!

I am about to share with you the best chocolate chip cookie recipe you’ll have see! I promise you’ll never need a cookie recipe after you try this one. And the best part about it is that it can be modified into a ton of different cookies. My favorite is to add each seasonal M&M flavor.


Candy Corn M&M Cookies
2 sticks butter at room temp
2 cups brown sugar
2 eggs
2 tsp vanilla
1 tsp salt
½ tsp baking soda
1 ½ cups flour {add more if the mixture seems too sticky}
3 cups of old fashioned rolled oats
chocolate chips {depending on your love of chocolate} Mine is over the top!
Candy corn M&M’s {or whatever seasonal M&M you love!}

Preheat oven to 350 degrees. 

Beat butter and brown sugar until fluffy in a stand mixer or with hand mixer. Add eggs and mix well between. Add vanilla and mix. Stop mixer and add salt, baking soda, oatmeal and mix. Add flour and mix until just combined. Add chocolate chips and mix until incorporated well. Scoop out cookies on a parchment lined cookie sheet. 


Press M&M’s into the top and bake for 10 minutes or until just under-cooked but edges are getting brown. 


Allow cookies to cool on baking sheet for 5 minutes. Transfer to a paper towel to cool. I put mine directly into the freezer after cooled for the very best cookie experience ever. You’ll never go back once you try them frozen!


These cookies are perfect for Halloween because they can be eaten on the go, handed out to little monsters and princesses who come to your door, served at a party or just stashed in your freezer for when the mood strikes! Save yourself from eating the waxy candy corn and grab a delicious home cooked chocolate chip cookie with all the same flavors and so much more!

0

Seriously easy Halloween costumes that won't break the bank


I love Halloween.  It's my second favorite holiday behind Christmas. Free candy tops my list of favorite things with dressing up a close second.

It's easy to drop hundreds of dollars on the perfect costume but I'm here to show you how you can shop smart for costumes and not break the bank!


I spent a few years of early motherhood thinking that I would make my kids Halloween costumes. Talk about time consuming!

I would spend hours at store after store hunting for the right materials. It felt like I was looking for a needle in a hay stack sometimes.  It seemed like I could always find what I was looking for when I wasn't looking for it!

Through the years my husband has convinced me that my time is worth something. I can't spend days and hours searching for the perfect color t-shirt or taking hours to craft the perfect hat for a costume. It's just not worth it. Which is why I love stores like Spirit Halloween. Spirit Halloween has everything you could think of that you would need to complete the perfect costume.

If you want to buy a complete costume already packaged up, Spirit Halloween has it, but in order to not break the bank, I want to show you how you can pull together some pretty awesome costumes using easy to find accessories from the Spirit Halloween store.

I'm a big fan of using what you have, so I took inventory of the dress up and regular clothing items that we had. I hit the store, and I put together a few outfits using inexpensive accessories that I had found at Spirit Halloween.

This survival bow and arrow created several outfits and has the possibility of many more!  My daughter dressed up in clothing we had in the closet and used the bow and arrow as her accessory to become Katniss Everdeen from The Hunger Games. I could easily replicate this outfit for myself and you could too!  The skirt that I made my daughter for Valentine's day years ago, when paired with a pink top and a bow and arrow, turned her into the cutest cupid I have seen! My son had a skeleton costume that he's worn for years in his dress up box. Add the bow and arrow and now he's a Minecraft skeleton.


Probably my favorite costume of the day was this lumberjack {or is he a hipster?} beard. We had the plaid shirt in his closet and the black beanie in our winter clothes.  Another shirt from the closet, some aviator glasses and a mustache made for super 70's guy. The same mustache could be used for so many different costume ideas.

One thing my daughter loved were the face decals. When paired with a purple wig, she could be Mal from The Descendants. Or she could put a pointy hat on and be a witch. These spider decals and a black cape made for a pretty cute scary vampire.


While we are talking about capes, I bought this inexpensive adult size cape and it works for so many different costumes. A child or an adult could wear it so it will get a lot of use at our house. One year, I had a friend pay me to make a cape for her son. The fabric costs more than this cape. Trust me, just buy one! It's far cheaper and less time consuming!

A candy corn hat {we've had it for years} with the cape, makes for a cute candy corn witch. A purple wig, some decals and the cape could pass for a vampire or a witch. Of course we can't forget about Batman!

Batman is wearing his long johns {see...using what we have!} underneath the cape. He paired it with a batman mask, gloves and a belt.  And finally, those face decals again with the cape are a Halloween standard!
Aviator glasses are super hot this year, but they also make for some really cool costumes. This SWAT team costume is a Spirit Halloween store exclusive, and you probably remember the glasses with the mustache from above. A leather jacket or a navy suit jacket paired with the aviator glasses could make a pretty cool pilot costume.
While my son had his long johns to wear under many of the costumes above, my daughter needed a black dress as a staple item. This Morticia dress was fairly inexpensive and had the flexibility of being used lots of different ways. You've seen most of them before, but I also added the same Batman accessories that my son had with the dress and suddenly we had bat girl.  How cute is that?!

While we are talking about accessories, really, that's all you need sometimes to create the perfect outfit. I created a Minion costume using glasses and a yellow beanie from Spirit Halloween.  I had the yellow shirt and suspenders in my closet, though I could have bought both at Spirit. For more flexibility if you had overalls or a denim jumper, you could wear those with the hat and beanie for the same look but a totally different costume.

Harry Potter is holding a stick {yep, it looks like a wand...came straight from the yard!} and has glasses and a tie. The white shirt, grey sweater and grey pants were all in his closet. In fact, he loved the look so much that I had to pry it off of him later that day for family pictures!


I put together a ton of fun costumes that didn't cost a lot of money. The key is using what you have and shopping for those WOW accessories that make the outfit.  Don't waste your time going from store to store looking for the perfect accessory or outfit. I've done that and wasted hours of my time. Make your one stop shop at Spirit Halloween {or shop on-line!}.
If you didn't download the 20% off coupon, you should do it now!  Then head to the Spirit Halloween store.  You can find the one nearest you here

disclaimer: this is a sponsored post written by me on behalf of Spirit Halloween.  All opinions are 100% my own. I wouldn't share something that I didn't love. Promise.
0

Boo! Unfinished letters, finished with mod podge and scrapbook paper

I love a quick craft that doesn't cost me a whole lot of money.  Those are my favorite!  Mostly because it gives me a chance to have a little creative outlet without breaking the bank on supplies.

I'm sure you have seen this little image making it's way around the craft circles.  It is so true though!


That said, I try to keep my craft costs low by buying most of my supplies at garage sales and with coupons at the craft store. Because we all know that we could spend a pretty penny buying supplies!

I was lucky enough to find some unfinished letters that spelled Boo at a garage sale. I'm guessing the gal had the same idea as I did, but never got around to it. It took me 10 minutes, some scrapbook paper and some mod podge to create a fun little addition to my Halloween decor that's already around the house.


I gathered my supplies and headed outside to snap some miserable pictures for this tutorial. Seriously, what the heck?! That ship has sailed to re photograph them, so bear with me!


The rest of this tutorial is going to fly by because it's super duper easy! I traced the backwards version of the letters in pencil on the back of my paper and carefully cut around it. Paint your mod podge on the unfinished letter and then lay your cut paper on top of the letter. Seal your paper with another layer of mod podge on top. That's it!


It takes longer to let the letters dry than it does to actually make them.  You can embellish your letters with glitter or ribbon or bows. You could even hang them on a large frame vertically.  That would be really cool.  I stuck with the minimalist approach and left them as is.


$2 in supplies and 10 minutes later, I have a quick project that helped me feel just a little bit accomplished.
Do you ever buy craft supplies at garage sales? If so, what do you look for?
0

How to shop smart for your kids Halloween costume

Halloween is my favorite holiday behind Christmas. I love free stuff and candy, so there isn't much better in life than combining those two loves.  

I've also always been a big fan of dressing up. I actually don't know too many kids who don't love pretending they are someone or something else and expressing that with some fun costume and accessories. 
My kids are getting older and we don't have a dedicated toy room filled with plastic toys anymore {hallelujah!} but we do have a few tubs full of dress up clothes. If we have kids over anytime of the year, all of them tend to gravitate towards our dress up bucket.
I love getting dress up items at garage sales, but I also use this time of the year to stock up on those accessories that make the outfits at our local Spirit Halloween store. {You can find a Spirit store near you here.}

Our local store is HUGE! Spirit has not only kids costumes but adult costumes and accessories. Pretty much anything that you could think of that you would need.

Before I shop, I always take inventory of what I have at home. Is there something my kids are requesting that we might not have?  Is there a hot new character they want to be {Minions anyone...}?

I am not one of those people that grabs a complete costume in a bag. I have far more fun putting together something from things I have and then using accessories to pull it all together.  So, I hit the accessory aisles and there was plenty to choose from!


I tried to stay focused on the list of things that I had at home {I seriously wanted to grab the aviator hat and glasses, but since I didn't have a leather bomber jacket at home that would have made the outfit, I had to pass}.  It's all about shopping smart. Use what you have, and pick up accessories that you might not have.


I was glad to see that Spirit had a whole aisle of basic items. Like girls black body suits and tights. The best costumes start with basic layers. Spirit is the one stop shop for all things Halloween.  I like to remember that my time is worth something and while I could make every single item of their costumes, sometimes it's worth it to spend a little bit of money and save my sanity!

I know I've heard stories of moms going out to look for that one hard to find item that their kids want to complete their costume. My guess is, they could have saved a lot of time just by popping into Spirit because if they don't have it, it probably doesn't exist! You can also pick up Halloween decor and party supplies all in one spot!  Time saved is money saved!


This is the haul of some things I bought, and some things that got sent to me as part of a surprise package from Spirit. I managed to make over 15 different Halloween costumes for boys, girls and adults using just these supplies.  Come back next week to see how I styled the costumes using basic clothes and costumes and accessories from Spirit Halloween store.


In the meantime, you all know how much I love to save money.  I've got a 20% off coupon just for you!  Go! Shop smart!

disclaimer: this is a sponsored post for Spirit Halloween store.  All opinions are 100% my own. I wouldn't write about it, if I didn't love it.
0

Fabric pumpkin tutorial

I've been on a role lately creating and crafting pumpkins for my fall decor.
Last week I shared with you a whole week of pumpkin projects from birch candle holders made from a faux pumpkin, to ruffle pumpkins and a few other projects in between.
This week I'm sharing with you a tutorial for fabric pumpkins.


It's been over a year since I picked up some designer fabric swatches from the Goodwill outlet in Seattle. Like any good hoarder crafter, I didn't know what I was going to do with the swatches at the time, but I kept them in a box ready to use when inspiration struck. They were great pieces of fabric, just not quite big enough to make a pillow, so I was stuck...until, I decided one day to make a fabric pumpkin. That's what everyone does with $280 a yard fabric right?!


I started by taking the fabric and cutting a rectangle.
You can make your pumpkins as big or as small as you would like.
Turn the fabric inside out and stitch up one side.
The other side will be on your fold, so no stitch needed.


 Turn your fabric inside out and move your seam down the middle.


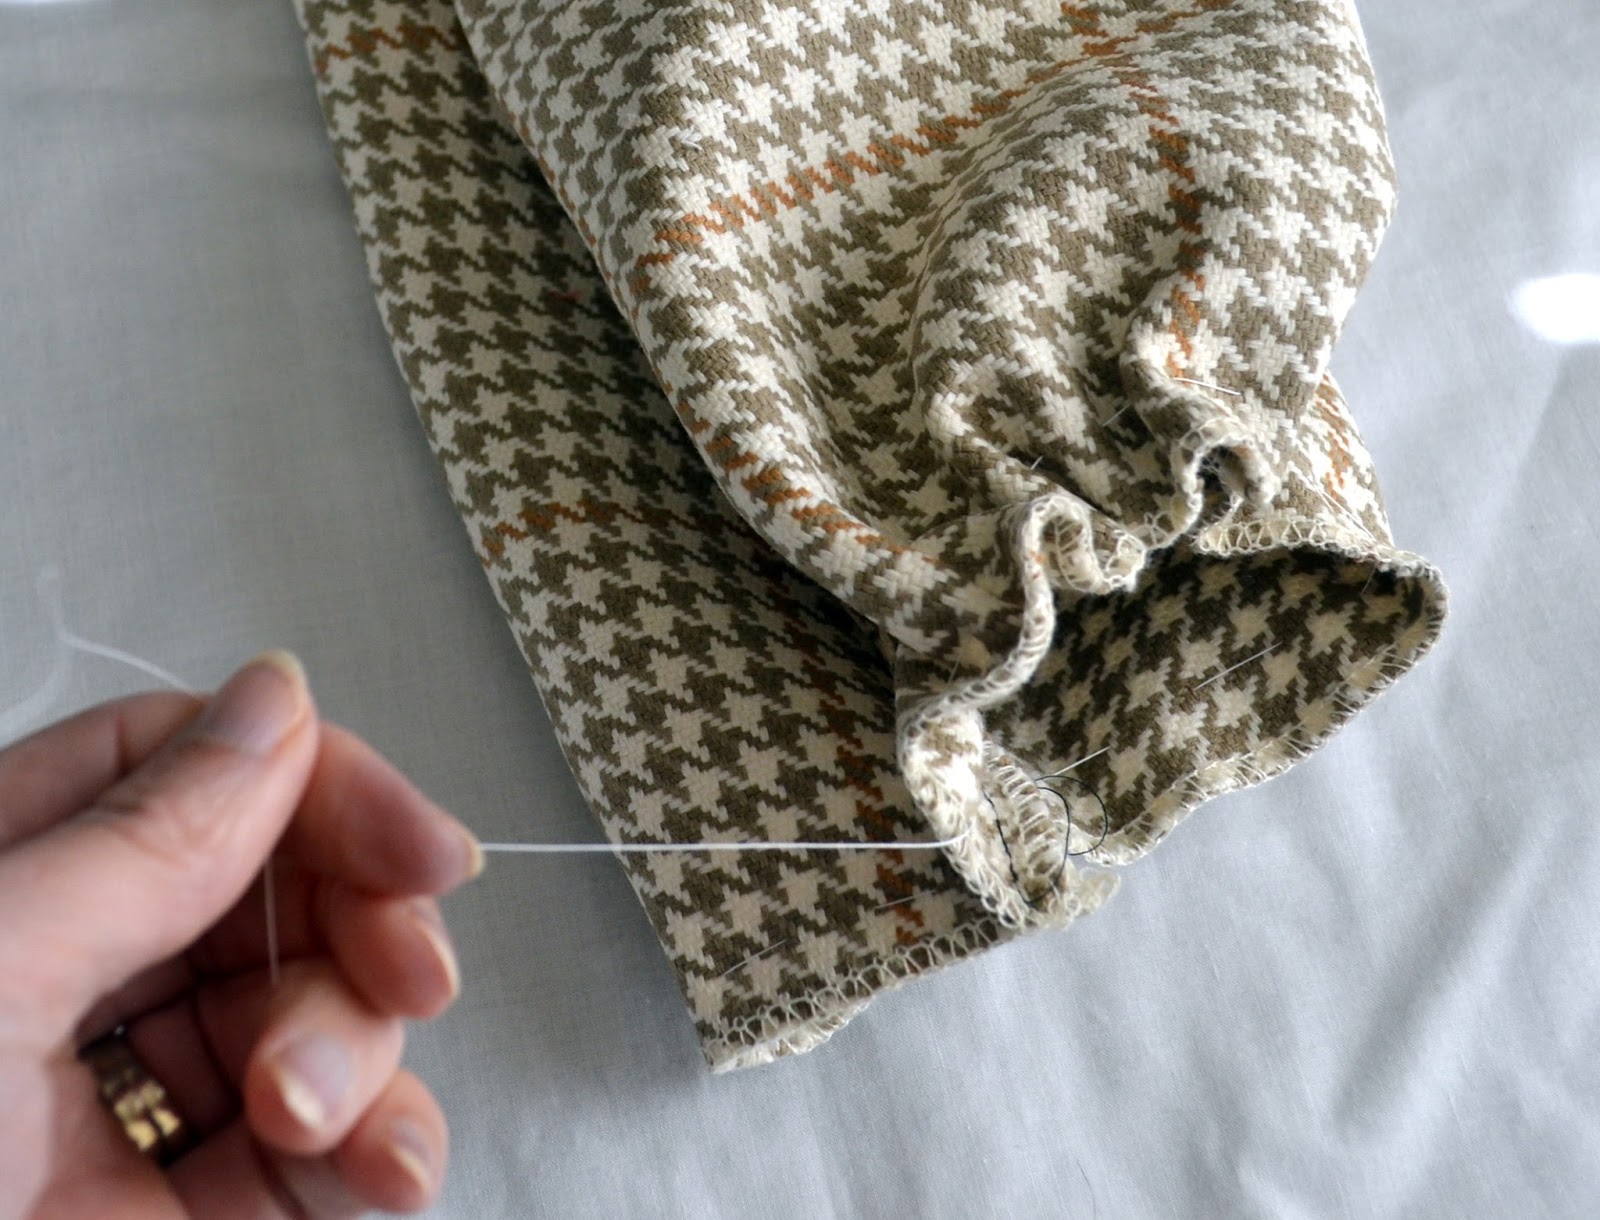
Take a long piece of thread and a needle and about a half inch from the bottom start making a wide stitch around the whole length of the bottom.


Once you sew all the way around the bottom gently pull your thread gathering the ends of your fabric.


From the inside of your pumpkin reach down to the base and pull the unfinished ends into the inside of the pumpkin and with your leftover thread stitch the ends together on the inside.


Fill your fabric tube with stuffing and repeat the same process on the top of your pumpkin that you did on the bottom.  This time, use an even longer piece of thread since you will be making the pumpkin segments with it.


Once your top is gathered squish together your pumpkin and push your needle and thread all the way through the bottom.  Once it goes through the bottom pull it up through the top.  Repeat this process as you make the various segments on your pumpkin.
Finish the end by knotting it.
Add a twig through the top for a stem.


They aren't perfect, but they are fun don't you think?!


0

ruffle pumpkin tutorial

Welcome back to Halloween craft week at Holy Craft.
I've been sharing a few of my favorite crafts that I have worked on from this season.


The first in the series was this birch candle holder made from a decorative pumpkin.


Then I showed you these glass knob pumpkins


and yesterday you saw these gussied up crows.


Today is our final day in Halloween craft week and I wanted to end it with a tutorial.


I ended up scoring about three yards of muslin in the free box this summer.
It didn't take me much time to figure out what to do with it.
I cut it up in about two inch strips
{muslin will tear, so you only need to make a small cut and then tear the rest}
I made multiple pumpkins, but one pumpkin will take 6 strips of 55" long muslin.


I used my sewing machine to ruffle the strips of muslin.
Simply turn the dial on the tension to the highest setting and the stitch length to the longest length.
Sew a straight line down the muslin, then pull one of the end strings gently ruffling your fabric.


I used a dollar store pumpkin and cut the stem off.


Using a hot glue gun, start in the center of your pumpkin and use the pumpkin's lines as a guide.


I found that it was easiest to make the ruffled pumpkins is you made them in segments.
I took my first muslin ruffle and started at the top, then worked my way to the bottom before coming up and around the top not quite halfway around the pumpkin.
Once your segments are created, go up and down as closely as possible gluing your muslin ruffles in place.


This is the segment completed.


Continue in the same way creating another segment on your pumpkin.
Filling in all of the orange space as much as possible.


I found a stick on a walk that I used as the stem.
Simply push the stem in to the top and it will stay in place.


I hope you had as much fun as I did sharing my Halloween crafts with you this week.
Don't forget to enter to win the Michael's #trickyourpumpkin sweepstakes on instagram.


0
Back to Top