Showing posts with label gardening. Show all posts

Easy to Make Garden Markers

This post is part of a social shopper marketing insight campaign with Pollinate Media Group® and Sharpie Paint Marker, but all my opinions are my own. #pmedia #SharpiePaintCreate http://my-disclosur.es/OBsstV

Every summer for as long as I can remember, I have planted a vegetable garden. Some summers we have quite the bounty, other summers, not so much. I usually have a helper or two in the garden. My kids love to watch the seeds that we plant sprout up and turn into food that they can eat. It's such a great learning process for them and it does get them to eat their veggies. There is something about growing your own food that will make even the pickiest of eaters try the fruit of their labor.  
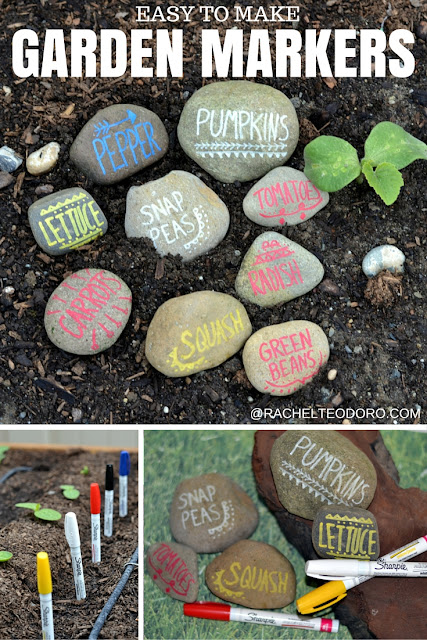
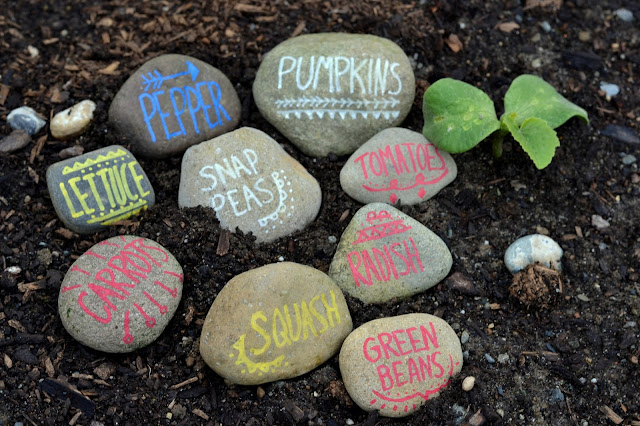
Before those little seeds sprout up though, it's always nice to mark the place that we planted them so that we know what we are looking for as those sprouts pop through the ground. With the help of my youngest son, we collected rocks from our local beach and I used new Sharpie oil based paint markers to write on them. It's such an easy, inexpensive and fun way to liven up that garden.
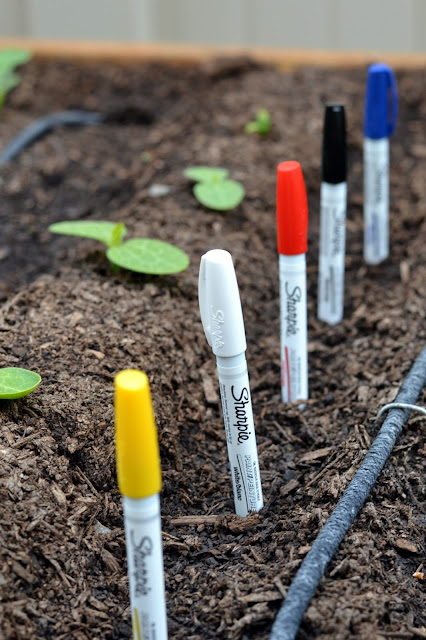
Sharpie oil based paint pen markers

I started with a variety of colors of Sharpie markers from Michaels. Don't forget to check your local paper or go on-line for coupons while supplies last!

paint pens

And then, I just simply doodled on the beach rocks that we found.

Sharpie paint markers

It was as easy as that. The oil based markers are permanent so they are resistant to water and fading and they will hold up all season long. If painting on rocks isn't your thing, these Sharpie paint markers will also write on metal, pottery, wood, rubber, glass, plastic and so much more! The possibilities are endless!

Sharpie oil based paint pens

I sure hope growing this garden was as easy as it was to paint these garden markers!

sharpie paint pens

 What's growing in your garden? I want to hear it!

This post is part of a social shopper marketing insight campaign with Pollinate Media Group® and Sharpie Paint Marker, but all my opinions are my own. #pmedia #SharpiePaintCreate http://my-disclosur.es/OBsstV
0

Driftwood succulent planter


It's no secret that I am crushing hard on this succulent trend. I bought a whole huge flat of succulents at a garage sale this summer and they have done so well that many of them are growing new blooms. I needed somewhere to plant these new shoots and happened to have a large piece of driftwood that I found on the beach this summer.

With a little help from my handy husband, I was able to make a driftwood planter for my succulents that I am in love with!  The best part is, it cost me next to nothing!


Want to know how?


My kids all go to summer camp on Whidbey Island in Washington. You have to take a ferry to get there, and on one particular drop off, the line for the ferry had a wait time of over three hours! Instead of waiting in my car, I got out and wandered over to the beach and found some pretty large pieces of driftwood.  I put them in my garden a few months ago and hadn't thought about them since.


Almost five years ago, my husband and I used a hole saw and created a bird book. That bird book sits on my counter in my laundry room, and I happened to glance over at it and thought, "self, why don't you use that hole saw and drill some holes in the driftwood you got this summer and make a planter."


So, I recruited my husband to drill three holes in one of the larger pieces of driftwood. The hole saw is 3" in diameter so you really do need a fairly wide piece of driftwood.  You also want to make sure that your hole doesn't go all the way through your driftwood because you want your plants to sit inside of it.


Because we didn't want the hole to go all the way through, Mike had to get smart with how he removed the inside of the cut circle.  He used a chisel and a hammer to remove the cut part.


Once the holes are drilled out, this is what your driftwood will look like.


I used some moss that I had on hand and used my hot glue gun to glue the moss into the bottom of the hole. Once the moss was in place, I planted my succulents inside each of the holes.


You can use your planter outside in your garden


Or inside on your table.


I really love how it turned out! Now to get stuck in a ferry line again so I have a reason to go on a driftwood hunt!

Check out some of my other driftwood crafts:
Driftwood Sailboat
Driftwood beach signs
 Driftwood star
 
0

How to plant a bulb in a Ball jar

Our winter this year has been extremely mild.  I'm not complaining because we have seen far more sun in our normally dark dreary rainy season than we normally do.  

I'm pretty sure all this sun is to blame for my latest gardening itch.  Though I'm in no hurry to weed my gardens outside so I'm just going to pretend that it's still too cold to do that and stick to my indoor plants {indoor plants beware! I am sort of a black thumb!  You can read my confession about killing cacti here}.

When I found an Amaryllis bulb kit for $2.99 at the Grocery Outlet {love that place!} I decided to give it a go and try planting a bulb in a vintage Ball jar.


The Amaryllis kit came with it's own pot and dirt cake, but I knew that I Amaryllis would grow quite well without dirt, so I decided to save the pot and dirt for another project {ranunculus bulbs...see!  I told you I was on a kick!}.

I bought this jar of decorative rocks for $1 at a garage sale this summer and I had the Ball jar passed on to me from my husband's grandmother.


Simply add the rocks two thirds of the way up the jar and then fill the jar with water.  The bulb will sit in the lukewarm water for a few hours {as pictured below} and then pour the water out until it's just touching the roots of the bulb.

You don't want the water level going higher than the base of the bulb.  You don't want to soak the bulb or it will rot.  Place your jar in a sunny location and wait for your Amaryllis to bloom.


Follow me on Instagram at HolyCraft1.  Promise I will post a picture when my bulb blooms. That is, if I don't end up killing it like I do everything else.
Have you ever tried to grow a bulb in a jar?  How did it work out for you?
0

Confession time

Can I make a confession? 
I'm not very good at gardening but I really want to be.
I like plants and flowers but I can't seem to keep anything alive.
I killed cactus. 
And an aloe plant.  
I think that's some kind of special.
I blame it on lack of natural light in our house so I'm trying round two of houseplants.
This guy took the place of my aloe that I killed.  Actually, I'm blaming my daughter on killing the aloe.  I told her it was good for healing wounds and she kept hacking away at that thing until there was nothing left.
This guy is in my laundry room {lets pretend the humidity will help}. I moved him closer to the window in hopes that he will get some more sun than the hacked up plant by the laundry room sink did.
 

This is the pot that my cacti were in.
They died a slow death.

I'm trying something new and am only going to water them with fresh lukewarm tap water and not the soapy hot bathwater I was watering the cacti with.
So far so good.

Any other tips?
I really want to not kill everything I touch. 
I'm starting to take it personally.
0

Is it dead yet? A gardening tip that will save you money!

If you are like most homeowners
{and some apartment dwellers}
the first signs of spring have you rushing out to plant flowers around the house.

For the past few years, I have planted annuals in the pots in the front and back of my house.
Sometimes they grow and bloom all summer,
sometimes they die in just a few weeks.

If a plant isn't hardy at my house, 
it's probably not going to live for long!


I manage to feed all of my children on a fairly consistent basis,
watering and fertilizing plants isn't usually high on my radar.

Which is why I only buy plants from stores that have a return policy.
And quite honestly, most do,
though not everyone takes the store up on their return policy.

The annual geraniums that I purchased at Home Depot have a 90 day return policy.
Before I even left the store parking lot, I calculated the date 90 days from the day I purchased them,
minus 5 days
{because life is busy and I have to give myself a grace period!}
I entered that date into my phone with the event title 
"is it dead yet?"

When that date comes, I can check my plants and know if they are in the return window.
If they are, I can take my receipt
{that you stash in your monthly receipt envelope}
and my dead plants and exchange them for something living.

Perennials have a year long return policy at most stores.
This is fantastic to know if you are doing a major landscaping project in your yard.
Some plants don't like the ground they are planted in, 
the soil may not drain well, or the winter was harsh.
Regardless, the store is happy to return your plant, 
usually no questions asked,
if you have your receipt and you are within your return time window.
It's happened to all of us.
Next time set a reminder.
Is it dead yet?
0

Garage Sale Finds Friday-Garden Edition

Welcome back to another edition of Garage Sale Finds Friday.
Where I share with you my favorite garage sale finds.

Earlier this week, I was watering a few plants in my yard when I got to thinking that there are an awful lot of plants that I have gotten at garage sales.

In fact, one of my favorite places to get plants is at garage sales.
You can usually find some great deals on plants at garage sales and they are usually some of the healthiest plants I have seen.
Landscaping adds up, so it's nice to save when you can.

Today, I am going to share with you some of the plants that I have picked up at garage sales over the past few years.  I may not know their names, but I know what I like.

When the builder built our house they used spider plants in the landscaping.
Spider plants are the kind of plants that I like {spikey looking and green all year long}
but they are meant for a pot because they shoot out all of these starts and then those starts start taking over the whole garden.
It was a mess!

So after hours of back breaking labor
{by my husband not by me}
we
  {I would like to take some ownership for my fine delegation of the removal of said plants}
removed the spider plants and put these grasses {$6 total} from a garage sale
in their place.

We
{again I'm taking credit for the foresight to remove the plants and the quick replacement of something more awesome}
planted these spiky guys {no idea what they are called}
with the petunias in their place.

Originally the plants were potted and used as decor for either side of a doorway, however, I unplanted them
and used them as individual plants in the front garden.
Cost for both plants with their petunias?
$10


I sort of have a love obsession with Hostas.
I don't know what it is, I just love how green and full they are.
{I hate their flowers though and will chop them off as soon as they bloom!}
Maybe it's because they are so low maintenance?
I rarely pass a Hosta up at a garage sale.
This guy cost me $5


 I also bought this group of three Hostas for $10


Continuing the trend of spiky grassy green plants, 
I love lilies!
Especially day lilies.
I'm sure these aren't all lilies, but let me remind you, I never claimed to be a master gardener!
I think there is a lemon lily or two in there.
I love that they bloom and stay green most of the spring and summer.
The fact that they have a flower that is gorgeous is a bonus!


I don't know what kind of plant this is.
It has cool pods on it though.
It may be a grass.
I like grasses too.
And also trash day.


What's that you say?
You have more lilies?
Yes, yes I do.
I typically pay around $2 for each plant and this whole side of my side yard is filled with garage sale plants.
If you put a gun to my head and I had to estimate how much I spent on this whole side yard landscaping I would tell you around $20 for everything you see.

The thing I love about buying garage sale plants is that not only can you find them cheap, you can also find mature sized plants without paying mature size prices.


 It's been a few years, but I showed you this little wooden planter that I bought as part of one of my first garage sale finds Friday's.
Well, it's got hens and chicks planted inside and is part of my backyard landscaping.
The hens and chicks were free from a friend at our old house and yes, I did dig them up and move them to our new house so sue me.

Earlier this year I decided I was finally ready to plant a vegetable garden.
However, mentioning that in May didn't seem to be enough time for my husband to whip together a raised vegetable garden bed for me.
{man, if only I knew how to work power tools...I could take over the world!}
I decided I wasn't going to have a veggie garden, but my 7 year old son wasn't so convinced.

Owen got very excited at Boy Scouts about growing seeds, so he decided on his very own to plant a garden.
It hasn't had the best drainage, or the best soil.
Lots of things have died {or been eaten by the dog}
but he's stuck with watering it nearly every day.

The $5 we spent on tomato plants seems to be paying off.
We will hopefully have some tomatoes from our garden soon!

And finally, my latest purchase was this deep purple Lilac bush.
I love Lilac's in the spring and this hearty guy {he's nearly four feet tall}
set me back $15 but I think he's worth it!
I can't wait to see it grow every year and make a beautiful bouquet in the spring from it's flowers.

And of course, the hosta that's photo bombing?
Yep, that's from a garage sale too.

That's a lot of garage sale plants!
Do you ever buy plants from somewhere other than a nursery?
Do share.
I love a good deal!
0

Living Well on Less series-saving money on your lawn and garden

It's another month, and another opportunity to share with you 
a few ways that our family is able to live well on less.
In case you missed the previous posts in this series, you can find them here:
Saving money on travel and entertainment
Save money on clothes for the whole family
15 tips to save money on your food bill
saving money on your cell phone
how to survive without cable
I've had a few blog readers suggest that I offer up some tips for ways to save money on your lawn and garden, and I am happy to oblige!
My husband and I bought our first house when I was 22 and we have learned a lot through the years!
There are lots of extra expenses of home ownership that are inevitable, but over time, we have found some tips and tricks to keep the costs low.
Yard waste container
I don't know if the yard waste bin is a west coast trend or if it happens all over the country, but every month our trash collection agency charges us an extra $10 for our yard waste bin.  We usually only fill up our yard waste bin in the summer when we are weeding and putting in grass clippings, so around October every year, I call our trash collection agency and tell them to cancel our yard waste service.  I just recently restarted the service this month, so from October-April we save $70.  Many people don't realize they can do this.  Look into it if you aren't using your bin.
While we are talking about garbage collection, when we bought our first house, our trash service already had a large 60 gallon container that we were being charged for.  I quickly learned that we could get a smaller can and a lower garbage bill {we saved $10 a month switching to a smaller can}.  We rarely filled our garbage bin full and our family of five can easily make do with a 30 gallon container.  

When we bought our first house, the homeowners were downsizing to a condo and didn't need their nearly new lawnmower.  We purchased it from them for $100.  It served us well until my husband mowed over a boulder, and a replacement lawnmower was found at a garage sale {again, a nearly new lawnmower in great condition}.  That said, garage sales and second hand are a great place to buy like new lawn equipment.   Mowing your own grass can save you upwards of $100 a month or more!
The only lawn maintenance I hire out is once a year {usually in March or April}, I ask the lawn service that is already in the neighborhood servicing our neighbors lawn, if they can edge my lawn for me.  I pay them $20 cash.  My husband hates doing it, and it's important to me to have it done.  I know some people edge their lawn every time they mow it.  I bought my husband a commercial grade lawn edger {at a garage sale of course!}, and he promptly broke it {coincidence?  I think not!} so it continues to sit broken in my father in law's garage {he's waiting for help to fix the problem...or something}, even though an edged nicely cut green lawn makes his wife happy.  $20 once a year to get my lawn edged keeps me happy...ish.
Lawn Care Services
Several of our neighbors hire out their lawn care maintenance.  You know, the guys who come along in their official looking trucks, reel out their long hoses and start spraying chemicals all over the lawn.  When we first moved in, I had the neighborhood service give me a quote.  I was appalled at how much it was!  After I got that quote, I quickly rationalized that I could get a lawn fertilizer spreader {at a garage sale for $3} and pick up a bag of the best fertilizer in spring, summer and fall, and still not even come close to one lawn application!  So that is what I did!  I spend around $20 on fertilizer each year by looking for sales and rebates and I spread on fertilizer in the spring, summer and fall.
I shared with you a few years ago how we hired a landscape designer at our old house when we re did our yard.  For around $100 a plant expert drew out a plan for our yard and gave us a plant by number version for us to use.  Since I had tried and failed, this advice was priceless.  It gave me the confidence to try my hand at landscape design at our new house.
So with favorite plant names in hand, I headed over to Wal-Mart.  Not my favorite store, but cheap plants with a year long guarantee had me sold.  If you are buying plants, check with the store or nursery that you are buying them at and see what their guarantee is.  Sometimes you buy a plant and it just doesn't like it's new home.  It's nice to know that you can return it for the full price {just keep your receipts}.  Speaking of which, I have a few that need to head back this year!
I know a lot of people like to plant annuals each year.
Annuals can get pretty pricey, so I like to keep the area that I plant them contained to just a small front pot.
If you plant perennials, over time they grow and then can be divided.
You can even find a friend or neighbor and ask them if you can divide their plants for them.
Most people are happy to oblige, especially if you do the dirty work!
 
If you have the space, you can also save money by planting and growing your own vegetables in a garden.
At our old house we had room for a raised bed, at our current house, I'm pretty sure the dog would dig up anything she thought was food or might turn into food in about five seconds!
I love my fresh produce though, so I visit my local farmers market, fruit and veggie stands, my cousins grocery store {Harbor Greens shout out!} and I join in buying bountiful baskets.  I don't think fresh local produce has to be expensive.  You just have to know where to buy it.
Speaking of gardening, you can also compost your lawn clippings, and fruit and vegetable scraps. Compost makes a great addition to any garden and will help those plants grow like wild fire!
Planting trees or making the most of the trees that are in your lawn is another way to save on your utility bill.
Most houses in our area don't have air conditioning, so if you have the shade from trees your are quite lucky!
Plant a tree and in the first few years you can already start to reap the savings on your energy bill.
source
Patio furniture can get pricey.  It goes quickly at yard sales, but if you are persistent you can find it.
Nearly 10 years ago, I bought a set for 75% off in late summer from Fred Meyer.
Stores don't want to keep patio furniture around in the winter {unless you are in a warm state}, so keep your eyes open for sales.
And speaking of seasonal sales, you can also find seasonal sales on plants.
Most nurseries or garden centers don't want to carry plants through the winter, so they deeply discount them.
If you don't have a green thumb, stick with the hardy plants and as always, keep your receipt just in case your plant doesn't make it through the winter!
Those are a few of my tips to save some money on your lawn and garden.
Do you have any tips you can share with me?
0
Back to Top