Showing posts with label one room challenge. Show all posts

Vintage Airplane Boys room week 5 One Room Challenge

Welcome back to week 5 of the Calling it Home One Room Challenge.
For the past 5 weeks I have been working on completing a vintage airplane themed room for my 8 year old son Owen.
In case you missed it you can catch up here:
week 1
week 2
week 3
week 4
Last week I showed you the vintage airplane blueprint canvas that I worked on.
This week, we got the art hung on the walls and the room is starting to come together.

It all started with the poster frames that are seen flanking the window.
I bought those at a garage sale 2/$3 brand new.
They started out a pine wood color, I painted them blue like the rest of the furniture.
I found two vintage posters that I liked
{the New York one is actually paper from Cavallini I got for $4}
add added those to the frames.


I wasn't planning on keeping this United States poster, but my son loves it and it is his room.


 I didn't end up painting this dresser.
I have a few reasons why, 
{it was the first piece of furniture we ever bought as a couple...it's been in every nursery for each baby we have had...it's in good condition...I didn't think it needed to be painted.}
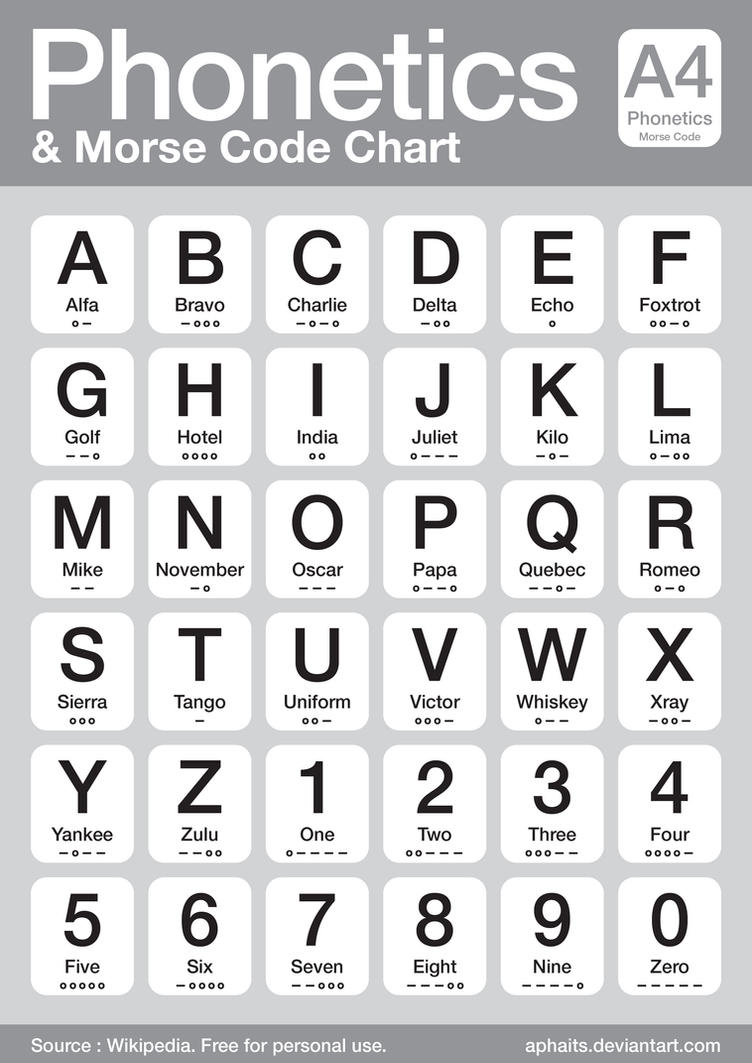
I found a Phonetics alphabet print on-line for free
and this vintage United airplane at a garage sale for $8 from an old Boeing employee.
The wire basket was $1 and it has a vintage fire bell, pen case and movie reel canister inside, all purchased second hand.
It's hard to see, but there is also a vintage copper airplane up there too that I got at a garage sale for 50 cents.


Next to the dresser, I placed a faux gasoline canister that I bought from Hobby Lobby for $35,
a Flying Pig vintage print I found on-line for free, Owen's scrap monster that he designed and sewed 
and a few knick nacks, again, things I found at garage sales for less than a dollar.


The pallet backed bookcase is still one of my favorite things I have ever made.
And next to it are a pair of faux binoculars that I got at Home Goods for $19.


 On the opposite wall you will find Owen's bed and the newly mounted vintage airplane blueprint canvas.


I think it's really starting to come together don't you?


 From the hallway, this is the view into Owen's room after week 5.

There isn't much more to complete.
However, my husband has big plans for a propeller that I am hoping get finished before next week.
Stay tuned!
Thanks for dropping in to see the progress.
0

One Room Challenge Week 4-working on the art work

Welcome back to week 4 of the Calling it Home One Room Challenge.
For the past 4 weeks I have been participating in this 6 week challenge to make over one room.
I have been working on my 8 year old son's vintage airplane room and this week, I focused on creating and collecting art work for Owen's room.


One of the projects that I worked on was this massive
{it's seriously huge!}
vintage airplane blueprint canvas.


I picked up this canvas for $3 at a garage sale.
{I had no idea what a great deal that was until I started pricing out canvases!  YeeHaw!}
It was blank so I used this dark grey paint to dry brush over the plain canvas.


I found a free blueprint on line of a vintage airplane.
And not just any vintage airplane, a B-29, which is the same airplane that my husband's Grandfather flew on during WWII. 
I had it printed as large as I could.
I have heard that you can get an engineer's print at your local copy store for under $5.
I had an inside source who printed this off for me for free.
Which, as you all know, is my favorite word!

I did have to do a little grunt work and cut off the surrounding white edge.

Once my print was cut and ready,
I got out my supplies.
I am lucky enough to have fancy Mod Podge supplies, but you could totally make this work with a simple brush that you have on hand.

But I must say, this Mod Podge roller is pretty rad.
And makes the job super easy!
I started by rolling Mod Podge on to my canvas where my picture would eventually go.
You want to make sure you roll your Mod Podge out smooth.


Next, take your picture and position it on to your canvas.
This is the hardest part.
Because the blueprint was scanned in crooked, the angles were a little wonky, which made eyeballing it a little trickier than normal.
I used a ruler to make sure the edges were all about the same distance from the edge.


Once you have your image positioned, you will spread a layer of Mod Podge over the top of your picture.
This step is not for the super perfectionist.
You will not get a nice flat image even if you work from the center out.
There are wrinkles and bubbles, but I liked the imperfect look for this project and rolled with it.


Once your finish brushing on your top layer of Mod Podge,
let your canvas dry.


I love the end result and can't wait to hang it in it's new permanent location.
{not in my foyer!}

As a re-cap, here is how the past four weeks have broken down.
Week 1
The Plan
Owen's Room
Week 2
Construction
Week 3
Painted furniture, linens, curtains, and rug
Next week, I'm hoping to have the artwork hung and start working on the finishing details for week six.
0

One room challenge Vintage Airplane boys room week 3

I am making progress on my 8 year old son's vintage airplane room and feel like it's finally coming together!  I'm so glad I have had this 6 week One Room challenge to keep me motivated.
In week one I shared my plan for the room.
Owen's Room
Week two I learned how to use power tools and created this pallet backed book case using free materials and things we already owned.
And now here we are.
Week three.
This week, I pulled things together with curtains, a new rug and new bed linens.
Here is a reminder of what the room looked like before and a side by side of what I like to call "during" because I still have three more weeks.
Let's take one more look at what the room looks like now.
The bed and toy box have been moved and the bookcases that were flanking the bed have been made awesome with a new pallet back and they have been stacked.

I found this large wooden airplane model for $20 at a junk fair
I used silver spray paint and gave it a few coats and then my husband hung it up in the corner.


Not only did the bookcase get a makeover,
the $10 bed {got it at a garage sale!} and Ikea toy chest {we've had that since my oldest son was two}
got a coat of paint and some red highlights courtesy of Annie Sloane chalk paint.


I found new sheets for Owen's bed for only $7 on clearance.  I picked up an extra set of sheets and made the curtains out of those.
I made the felt woven pillow
{tutorial here}
and the felt airplane pillow here
I found the quilt on clearance at Bed Bath and Beyond for $20!
Yep, it was super marked down.

And the fuzzy blanket at the bottom has quite the story.
During our great Midwest trip this summer where we visited four states and drove over 1500 miles,
Owen left his beloved pooh bear blanket that he has had since before he was born on the final leg of our trip.
The very last flight!  All of our efforts to find it were futile and we assume that it got left on the airplane when we landed in Salt Lake City.

So all that said, he wanted a fuzzy cozy blanket he could wrap himself up in.
And the little rabbit skin was a little something he picked up {with his own money} when we stopped at Conner Prairie in Indiana {super cool place by the way!}.


I was shopping at Home Goods this past week and could not pass up this rug.
It was $75 and while that seems cheap for a massive rug, I just don't spend that kind of money on decorating, so it was a hard pill for me to swallow.
In fact, the tags are still on it in case I change my mind!
I decided that instead of replacing the light fixture in Owen's room, I would settle on the rug instead.
What do you think?
Should I keep it?


I also scored this super cool airline trunk at a garage sale for $15.
I thought that it would make a great nightstand and it fits perfectly under Owen's low window.
The task lamp was bought at Target for $25 and the wire fan was a garage sale find for $5.
The top of the trunk is the perfect spot for Owen's handmade hobby airplanes.


The trunk has some cool history.
The old owner played trumpet in the US Army and this trunk carried his instrument all over the country.


So that's the final shot of the vintage airplane boys room makeover in week 3.
What do you think?
Should I work on the artwork next?

0

One Room Challenge-week two. Pallet backed bookcase makeover and painting the furniture

Last week, I introduced my 8 year old son's room and came up with an industrial vintage airplane theme for the one room challenge.
As part of the challenge this week, I learned how to use power tools!
Super exciting because I have always wanted to learn how but my husband has been afraid to teach me.
I think I finally wore him down.
Plus, he may have decided that having all of your fingers is over rated.
{side note, I do still have all of my fingers}

Here's a refresher of what Owen's room looked like last week.
The focus this week was on painting the furniture and taking the $5 bookcases you see on either side of Owen's bed and giving them a bit of a FREE makeover.
I love free, so that's my kind of decorating!
Here is the finished result for the pallet backed book case.
I just love it!
I used denim blue paint I had leftover from painting my older son's loft bed
and Annie Sloan red chalk paint to highlight the wood.
Then we stacked the bookcases so they took up less real estate in Owen's room
{of course, bolting them together and securing them to the wall}.

Here is a close up of the fake cardboard backed bookcase before and of the free pallet wood back after.


So how did I do it?
I picked up this pair of cheaply made particle board book cases at a garage sale for $5.
Total.
It was a great deal, and provided more storage for Owen's room, though high quality furniture it is not.


I emptied both bookcases
{a feat all in its own right!}
and took them outside to prepare them for painting.
Paint particle board you ask.
Yep, but I will get to that.


First start by peeling off the back of your bookcases.
I used the back end of a hammer and the poster board back came right off.


Next, you will remove the nails left behind from the backing.
Once those are removed, you are ready to move on to the painting.


I did some research and found that people had good luck using Zinsser primer to prep their particle board pieces so that they would take paint.


I used two bottles of spray paint to coat the bookcases.
In hindsight, I wish I had put the primer on thicker.
But this is what I got done before it started to rain.
Yep, rain.
Straight up on my paint day.
How rude.
{Notice my bookcases are being painted upside down.
I learned that trick in my drab to fab paint class yo.}


 I gathered my bookcases and headed inside to my kitchen because
 that's where all normal people paint am I right?
I put on three coats of the blue paint


and I dry brushed the Annie Sloan red chalk paint on the whole surface.
This same technique was repeated on my son's bed and toy box.


If you follow me on instagram you will know that I hit the jackpot on free wood outside of a local truck delivery location last week.
Here is my haul.


I was all ready to cut things with power tools, when I was told that I had to actually prep the pallet wood.


There were all sorts of rusty nails involved in the making of this book case.
{probably not a bad idea to make sure you are up on your tetanus booster.}
I hammered the nails in from the back because the heads of the nails were buried.


Once you get them pushed through a little, you can use this little leverage trick my hubs gave me.
Put a little board next to your nail and use that to help you pull your rusty nail out.
Isn't science grand?!


Next, as they say, measure twice and cut once.
I measured the back of my book case
and cut my boards to size.
Pallet wood isn't usually even, so I would cut one side to give me a flat end, and then measure and cut the other side after that.


Using a chop saw is serious business!


Once the boards were cut to size, 
you can start laying them out like a puzzle to get them to fit on the back of your book case.


Pallet wood isn't always straight and even, so you will need to be flexible.


What What???
Two power tools in one day?!
It must be heaven!

I got to learn how to use a pneumatic nail gun.
Isn't that super fun?!

I nailed the boards in place, starting at the four corners and working my way down the sides and then on the top and bottom.


Much to my husbands surprise, I didn't put a single nail through the back!
{or through my hand.  Bonus!}

Here is a shot of the book case before anything is in it.
I love the variations of color from the different boards.


We slowly put back Owen's books, legos and some decorations I have purchased at garage sales
{$3 for the red tool box, 25 cent globe, $1 wheel}
at thrift shops
{$4 vintage gas sign}
and at Home Goods
{$6.99 wire baskets}


Here's a sneak peek at the curtains and the new {to him}
airline travel case that Owen is using as a nightstand.


I love how this project came together!

I think week 2 was a success!
Phew!
There is much more in store for next week.
Stay tuned for next week.
I'm hoping some of the goodies I have on order start showing up in my mailbox.

0
Back to Top