Showing posts with label pumpkin. Show all posts

Fabric pumpkin tutorial

I've been on a role lately creating and crafting pumpkins for my fall decor.
Last week I shared with you a whole week of pumpkin projects from birch candle holders made from a faux pumpkin, to ruffle pumpkins and a few other projects in between.
This week I'm sharing with you a tutorial for fabric pumpkins.


It's been over a year since I picked up some designer fabric swatches from the Goodwill outlet in Seattle. Like any good hoarder crafter, I didn't know what I was going to do with the swatches at the time, but I kept them in a box ready to use when inspiration struck. They were great pieces of fabric, just not quite big enough to make a pillow, so I was stuck...until, I decided one day to make a fabric pumpkin. That's what everyone does with $280 a yard fabric right?!


I started by taking the fabric and cutting a rectangle.
You can make your pumpkins as big or as small as you would like.
Turn the fabric inside out and stitch up one side.
The other side will be on your fold, so no stitch needed.


 Turn your fabric inside out and move your seam down the middle.


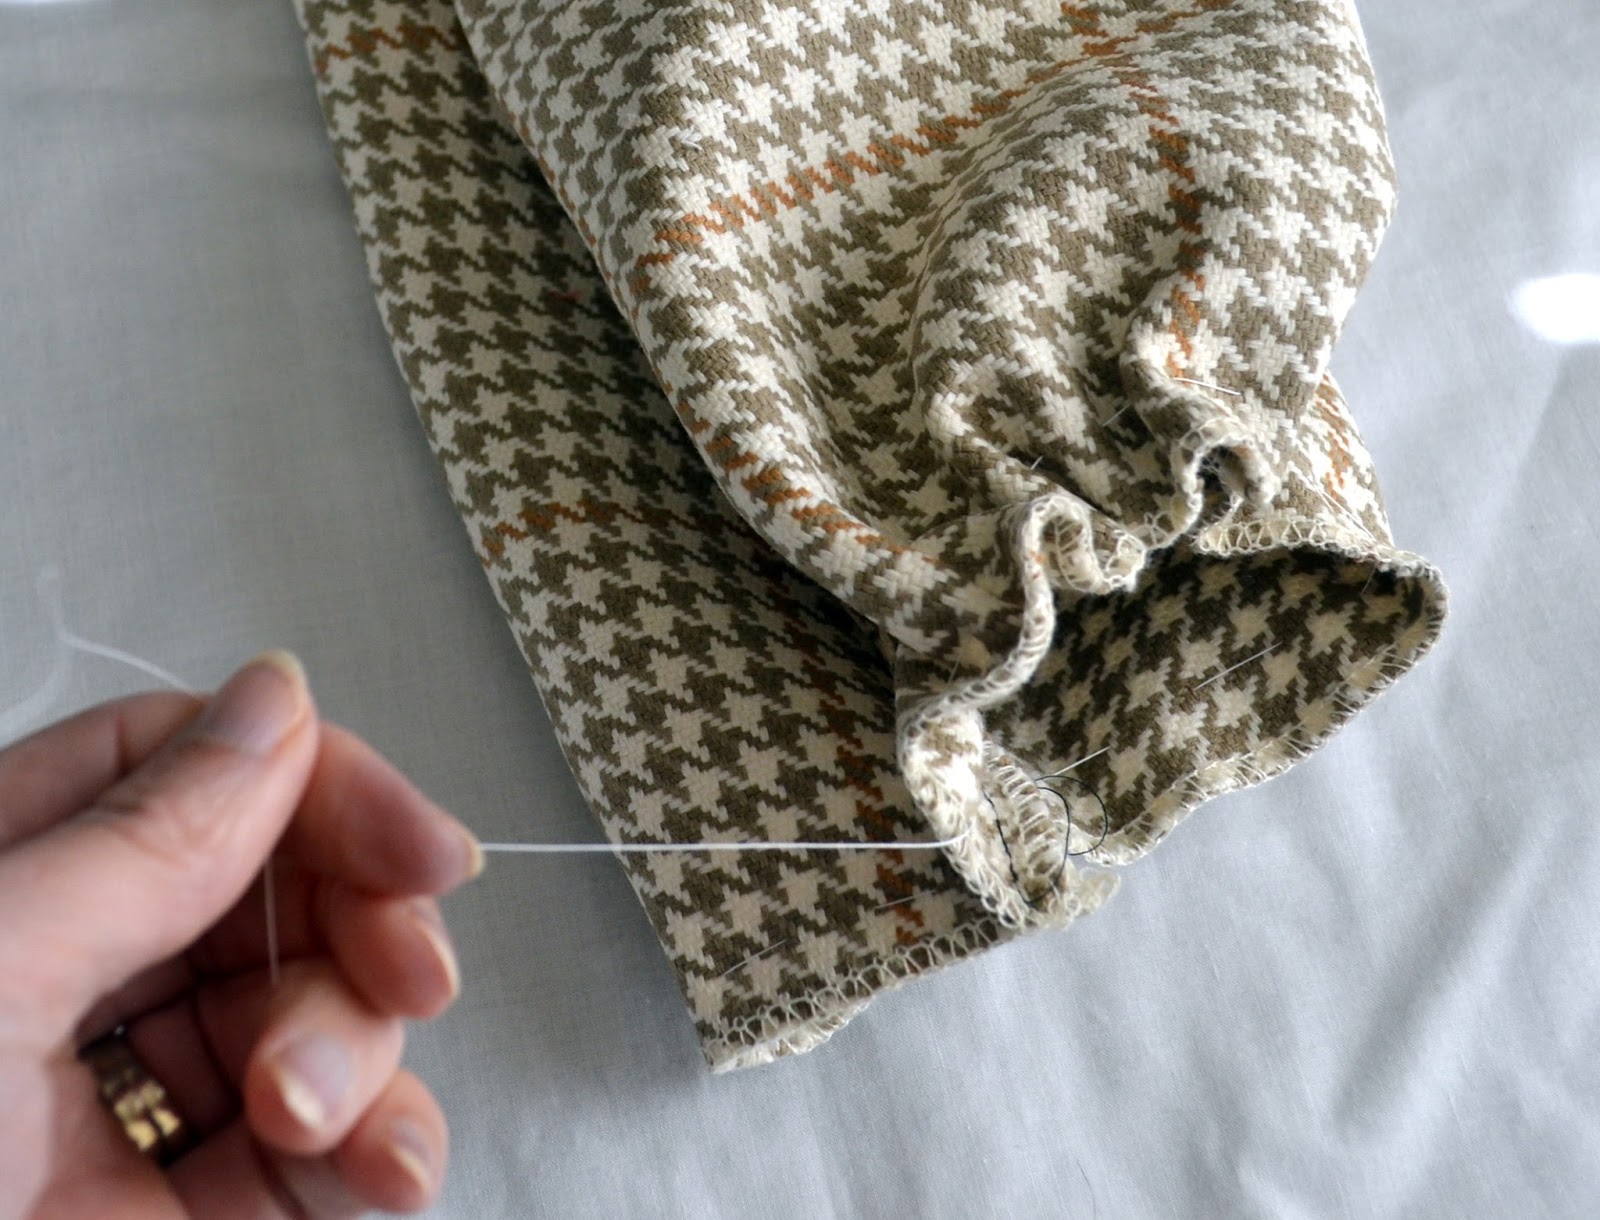
Take a long piece of thread and a needle and about a half inch from the bottom start making a wide stitch around the whole length of the bottom.


Once you sew all the way around the bottom gently pull your thread gathering the ends of your fabric.


From the inside of your pumpkin reach down to the base and pull the unfinished ends into the inside of the pumpkin and with your leftover thread stitch the ends together on the inside.


Fill your fabric tube with stuffing and repeat the same process on the top of your pumpkin that you did on the bottom.  This time, use an even longer piece of thread since you will be making the pumpkin segments with it.


Once your top is gathered squish together your pumpkin and push your needle and thread all the way through the bottom.  Once it goes through the bottom pull it up through the top.  Repeat this process as you make the various segments on your pumpkin.
Finish the end by knotting it.
Add a twig through the top for a stem.


They aren't perfect, but they are fun don't you think?!


0

Birch candle holder from faux pumpkin

The weather has officially turned and summer
{my favorite season}
is officially over.

I have welcomed in the new season with some fall crafting.
This fall I am drawn to candles, book pages, leaves and birch
and will be sharing projects all week with you that contain those elements.


Today's craft is a birch candle holder made from a faux pumpkin.


I started with a decorative pumpkin from Michael's and since decorative pumpkins are flammable, 
I picked up a flameless candle to go inside.


 You will also need birch bark,
{I got mine from a fallen tree from a storm last year}
a box cutter, and some spray adhesive.


I took the lid from the candle and traced around it on the pumpkin so that I could get the diameter right.  


You will need to cut the top and the bottom, since our candle is battery powered.
You want to be able to turn on and off your candle and change your batteries when needed. 


Slip your candle in through the top.
You want a snug fit, so make sure you cut a smaller hole rather than one that is a bit too large.
You can always make it bigger later.


I took my birch bark and spray adhesive outside and sprayed the glue to the pumpkin in small segments.  I stuck the birch bark on top of the spray glue and pressed in place.


Hold your birch back down for a few minutes to make sure it stays secure.
The wood likes to curl, so this step is important.
Cover the entire pumpkin repeating the process.


I love my new birch candle holder.
I love decorations that can easily be used for any holiday and this candle holder can hold it's own from early October until after Thanksgiving.


In partnership with Plaid®, Michael's is hosting a #trickyourpumpkin sweepstakes.
Crafters can submit your own pumpkin creation for a chance to win a $250 Michael's gift card and Plaid® products.

It's easy!
Just follow these three simple steps:
You can enter from now until October 31.
Entries are unlimited!
Enter as many times as you would like for your chance to win.
0

Guest Posting at The Southern Institute today

You can find me sharing my tutorial on book page and twine pumpkins at The Southern Institute today.

Can you believe these pumpkins cost me only $1 to make?
Swing on by and see the full tutorial.

0
Back to Top