21 Camping tips, tricks and hacks

These pictures make it seem like we are a camping family. We are not. We call this faux camping. 
faux camping for a kelty photography shoot
On two different occasions we have worked with local photographer Stephen Matera on two separate campaigns for Kelty camping gear. The funny thing is, we don't camp. We only "camp" with the safety of a photographer nearby and we NEVER spend the night. What are you crazy?! 

We have heard though that there are families that enjoy camping. I know that summer is a popular time to pitch that tent and spend the weekend in nature, so if that's your thing, I have gathered 21 camping tips, tricks and hacks just for you. 


all you need to know to make camping go smoothly


  1. Homemade Fire Starters for Camping - Dukes and Duchesses
  2. Repurposed TicTac Boxes for Travel Spices - Seattle Sundries
  3. Tent Camping With Foam Floor Tiles - A Little Campy
  4. Campfire Potatoes on Grill Recipe - Cleverly Simple
  5. Fire Starter - Over The Big Moon
  6. 10 Reasons to Take Your Kids Camping This Year - The Homespun Hydrangea
  7. DIY Firewood Rack - 50 Campfires
  8. 7 Essentials for C.A.M.P.I.N.G. - Housewives of Frederick County
  9. Brilliant Camp Kitchen Organizer - Starling Travel
  10. Unwritten Camping Rules You Need to Know - Penny Pincher Jenny
  11. DIY Mason Jar Match Holder - 17 Apart
  12. Make Your Own Emergency Toilet - Mom With A Prep
  13. 10 Must Bring Items for Camping This Summer - Making of a Mom
  14. Easy Outdoor Candle Stakes - A Subtle Revelry
  15. 7 Ideas for Campfire Pie Irons - Northern Cheap$Kate
  16. 7 Fun Kids Camping Games - Making of a Mom
  17. DIY Hand Washing Station - Do It and How
  18. 10 Cheap Camping Ideas - Tips for an Inexpensive Camping Trip - Thrifty Jinxy
  19. Easy Fire Starter - Over the Big Moon
  20. 7 Kitchen Hacks For Camping - Just 2 Sisters
  21. 7 Tips for Camping with Little Ones - Making of a Mom
 
Enjoy your time in that tent. I'll stay right here in my nice warm bed!
dislaimer: this post may have affiliate links. By clicking on them and purchasing through them, I may receive a small commission. These small purchases help me to continue to keep writing content and creating at Holy Craft. Thank you!
0

Master Bedroom Makeover in a Historic Mansion

In case you missed it, we've been following along with a young couple as they rehab a historic mansion in small town Indiana. The home was built in 1871 by Bright B. Harris, a scout for the civil war. I introduced you to Dea and gave you a little bit more information in this post

fixer upper, rehab addict, nicole curtis, historic home

You can see the beautiful rehab of the foyer in all it's glory {even decorated for Christmas} here

historic home, rehab addict, fixer upper

A few weeks ago, we were able to take a step inside and see the update of their living room. While they were removing the wallpaper, they found a little surprise that changed the whole design of the room. Come see what they found and how they incorporated it.  It's genius actually.


fixer upper, rehab addict, historic home

Today, I want to take you inside this couple's master bedroom. With Victorian doll wallpaper and floral carpet, I am curious to see how Dea could look past the dated decor and see potential, but she did and the final result is amazing!


The previous owners really seemed to like painted walls, borders and wallpaper but thankfully, Dea has an eye for design and has been able to incorporate some beautiful color and design while still keeping the integrity of the historic home.  

Here's a little side by side of the before and after. It's hard to believe that it's even the same room!


The first step was to remove the wallpaper.  The home has 14 foot tall ceilings and the couple realized pretty early on that owning their own scaffolding would be a good investment. Actually purchasing your own isn't as expensive as you might think.

Last month, Dea helped provide tips for removing wallpaper two different ways.  Before removing the carpet, the couple painted the walls. The carpet acted like a drop cloth so they weren't worried about paint spills.


Before the couple moved into this home, Dea has started work on a quilt that would end up in the master bedroom. I don't know many people under the age of 80 that quilt, but Dea makes me totally want to start!

She also wanted to jazz up a plain duvet cover and pillow shams by adding grosgrain ribbon to them. She had a little help from her pup.


The couple was making progress and working on various furniture placement. The challenge with tall ceilings and large rooms is that furniture can get dwarfed quite quickly and look off scale.


Another challenge with older homes is storage space. Most historic homes don't come with large master closets like we have grown accustomed to. Dea switched out the small settee for this armoire which has a nice grand scale to it and serves to function as a wardrobe for her husband Christian.


I love the way all of the colors blend together in the bedding. The coral with the navy blue is amazing in this space but the real show stopper is that quilt. 


Let's take a closer looks at the pattern and the fabric in the quilt. Seriously, doesn't that make you want to start quilting?


The chalkboard sign that the ring bearer walked down the aisle with at Dea and Christian's wedding has handles on it and has now become a tray on their bed. 

chalk art, wedding, ring bearer


Every room needs a cozy nook for a cup of tea.


Isn't this just the most lovely space?


One more before and after. I am swooning! Another job well done Dea.

In case you missed it and want to check out the other rooms that have been redone, you can find the
foyer here and the sitting room here. Pretend you are sitting in this chair sipping some tea so that you can catch up on what this couple is doing to make their historic mansion come back to life.


dislaimer: this post may have affiliate links. By clicking on them and purchasing through them, I may receive a small commission. These small purchases help me to continue to keep writing content and creating at Holy Craft. Thank you!
0

6 Ways to Get the Most Out Of Your Resort Vacation

About ten years ago, my husband and I went on our very first all inclusive resort vacation. We were instantly hooked. It was so nice to have everything we needed all in one place so that we could truly relax while we were on vacation. We checked into the resort and never left because the resort had everything that we needed. We could eat and drink all that we wanted and we never had to worry about taking our credit cards out or exchanging money in a foreign country. It's the perfect vacation for us and I wanted to share six ways that you can get the most out of your resort vacation.

mexico, wanderlust, travel, Dominican republic, puerto vallarta, family travel, adults only


1. Know What You Are Looking For

You always need to start by having an idea of what you are looking for. Do you want an all inclusive with gourmet food options? Do you want an active nightlife or a quiet place to relax? Do you want lots of activities or the option of excursions nearby? Make a list of your priorities and rank them.
I like beach vacations with lots of sandy beach to walk on in a fairly quiet area.  If we are traveling without kids, we like to not have kids around at the resort at all. Don't get me wrong, we like kids, but when you are away from them, there is something special about needing that solitude away from any squabbling children. We usually go the adults only all inclusive route when it's just the two of us. 
Club Med Ixtapa, Mexico

If you are traveling with the kids it may be important to you to have a five star kids club with the ability to drop your kids off in the morning to have them cared for in the kids club until the end of the day. We discovered that no matter how enticing the kids programs were {trapeze classes, hello!} our kids were not interested in spending time in them, so that priority ranking isn't as high for us, though it may be the highest rank on your list and it may dictate where you spend your time. If I don't have kids, I don't spend too much time in the water, so big waves, and strong currents on the beach aren't deal breakers if we go as a couple, but they are deal breakers if we go as a family. 
Make a list and rank the items that are important to you. If this is your first resort vacation, once you get home, your list may change. You will have items that were higher on your priority list that will drop down, and items that probably weren't on your list at all that will make top priority. 

2. Read Trip Advisor Reviews

There is so much information you can find out by reading reviews on Trip Advisor. These real life accounts based on real experiences are priceless. You will have to remember to take people's review with a grain of salt. I stayed at a resort once where someone wrote a review that the beach was too loud when they were sitting at the pool. You can use these reviews to start narrowing down your resort options based on your priority list you made above. The information you find out about the resort during your research will help you when you get to number 3. 

3. Make Requests

After you read all the reviews you can handle, make a list of requests that you want during your stay. You will usually find a blank box or an e-mail address on the resort site during the time that you are making reservations. You can't make a request unless you have the list from your research. 


The Riu Room at the Riu Palace Pacifico in Puerto Vallarta, Mexico

At one resort we stayed at, there were four large rooms that had an upstairs balcony with a hot tub. The room cost the exact same, but there were only four available. While the resort can't make any promises, they can take note when you make the request. We enjoyed a week in the Riu Room watching the sun rise and set from our corner balcony suite.

Another resort had complaints of hard mattresses, but they did have mattress toppers that you could request before check in. All you have to do is ask, but we wouldn't have known had we not done our research ahead of time.

If you are celebrating something, make sure you mention that as well. We are usually welcomed by chilled wine or a fruit platter or a special anniversary banner. On occasion we have also had a special dinner celebration in the restaurant when we mention that we are celebrating something special.

4. Ask For Upgrades

While you are asking, don't hesitate to ask for an upgrade. If you are staying at a slow time, there may be larger rooms available at no additional charge.  The resort is happy to fill those rooms and give you the best experience possible because they are hoping that you will write a glowing Trip Advisor review.

This may be where number 3 works against you though. If you have mentioned that it's your anniversary and you want a mattress topper and the resort has already prepared your room accordingly, they will hesitate to upgrade you because of your prior requests. 
I always say, you might as well ask. What's the worst thing that they will say? 

Excellence Playa Mujeres Cancun, Mexico

5. Tip {or not}

Most all inclusive resorts have tips included in their resort fees. We rarely tip unless we have the same server over and over again or the experience was above and beyond expectation. I have seen people tipping and they do get much more attention from the wait staff. If this is important to you, tip. It's not important to us, so we don't bother. I can get my own drinks at the bar and I'm on vacation so I'm not usually in any hurry for anything, though some people do like the personalized service, and trust me, as soon as you start flashing that green, the service does get turned up a notch. Though you are staying at a pretty swanky place to start out with. The service is usually top notch without the tips.

6. Bring Your Own Cups

This is always the tip that I give if I hear that someone is going to an all inclusive resort for the first time. We always bring our own insulated cups. I like a nice cold drink while I'm sitting on the beach and by the time the waiter brings me my drink or by the time I'm settled down in my lounge chair with a good book, my drink is warm and the ice is melted. First world problems I know, but it's easy to pack a large insulated cup like this one. I've never had a waiter or bartender not fill my drink in my own cup. In fact, I think it's a sign of an all inclusive resort pro.
You can find more tips for your all inclusive vacation here
In 2011, my husband and I realized that our family time was quickly flying by. We decided to create a family travel bucket list and we are thrilled to be able to cross off the final item on that list this summer. Our kids have had some fun adventures! Have you made a list of places you want to go as a family? I would love to hear what's on your list. Or are you a resort pro? I would love to hear how you make the most of your resort vacations. Comment below or tag me on social media.
dislaimer: this post may have affiliate links. By clicking on them and purchasing through them, I may receive a small commission. These small purchases help me to continue to keep writing content and creating at Holy Craft. Thank you!
0

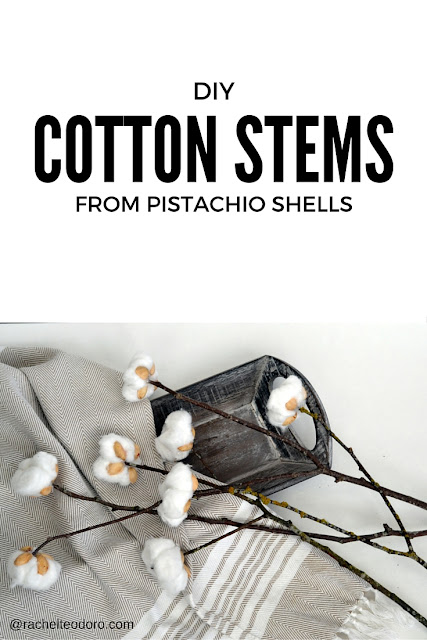
DIY Cotton Stems from Pistachio Shells

I love bringing natural elements into my home. It's even better when I can give them a handmade touch. The farmhouse style has taken us all by storm and when I was visiting Magnolia Market a few months ago, I saw these gorgeous cotton stems that I regretted not buying. Then, while eating some of my lemon pucker pistachios I saw all those shells that I was just going to toss and thought that they just might make some pretty great DIY cotton stems. And might I say, they did! I simply love how these turned out and they are a fraction of the price if you were to buy a cotton stem from the Market. I'm excited to show you how to make them.
farmhouse style, magnolia market


I started by gathering some sticks that I found on the ground while walking home from school. The best sticks to use are ones with several branches.


Then, I gathered my pistachio shells and some cotton balls and was ready to set to work.

farmhouse style

Step 1: use hot glue to glue two cotton balls together and then glue those two balls together creating a cluster of four cotton balls.

Step 2: using hot glue, glue one pistachio shell on each of the four cotton balls

Step 3: place your finger in the center of the cotton ball cluster and open it up

Step 4: add a drop of hot glue in the hole that you created and insert your stick. Squeeze the cluster together adding more glue as needed to gather the shells into the center close to the stick.

use pistachio shell and cotton balls to create a cotton stem

You now have a completed cotton stem.


Create as many cotton stems as you want and use them all around the house.

pistachio shell, farmhouse style, magnolia market

farmhouse style

I think these look pretty authentic. Who would have thought that they were made from dollar store cotton balls, sticks from the ground and pistachio shells?

how to make a farmhouse cotton stem with pistachio shells

Now go and create your own! If you need a reason to collect some pistachio shells don't forget to try one of my favorite recipes
dislaimer: this post may have affiliate links. By clicking on them and purchasing through them, I may receive a small commission. These small purchases help me to continue to keep writing content and creating at Holy Craft. Thank you!
0

20 Patriotic Crafts for Kids

The Fourth of July is just around the corner. Now is the perfect time to start crafting those patriotic crafts with the kids. I've gathered 20 fun crafts that you can make in the next few weeks to help you celebrate the Fourth of July.

fourth of July, military homecoming


  1. Patriotic String Art Craft - This Mama Loves
  2. DIY Vintage Book Page Pinwheel - The Pinning Mama
  3. American Flag Collage Craft - Little Family Fun
  4. DIY Sparkling American Flag Pillow - The Pinning Mama
  5. American Flag Craft with Dot Paints - Meaningful Mama
  6. Uncle Sam Beard {Craft} - Glued To My Crafts
  7. Popsicle Stick Flags - Ginger Snap Crafts
  8. Easy 4th of July Flag Kids Craft - TheSuburbanMom
  9. Firecracker Noisemakers - Mom Endeavors
  10. Patriotic Hat Paper Plate Craft - Tutus and Tea Parties
  11. Red, White & Blue Napkin Rings Kid Craft - Coffee With Us 3
  12. Uncle Sam Mask - Busy Bee Kids Crafts
  13. 4th of July Pinata Balloons - The Gunny Sack
  14. Red, White, and Blue Canvas Stars - Coupons are Great
  15. 4th of July Coffee Filter Fireworks Pom Poms - TheSuburbanMom
  16. Patriotic Eagle Craft - Coupons are Great
  17. Patriotic Recycled Tin Can Wind Chimes - Creative Green Living
  18. DIY Handprint Flag Patriotic Shirt - Glued To My Crafts
  19. Pool Noodle Fire Cracker - Coupons are Great
  20. Patriotic Craft for Kids: Painted Toilet Paper Roll Fireworks - Coupons are Great
   
dislaimer: this post may have affiliate links. By clicking on them and purchasing through them, I may receive a small commission. These small purchases help me to continue to keep writing content and creating at Holy Craft. Thank you!
0

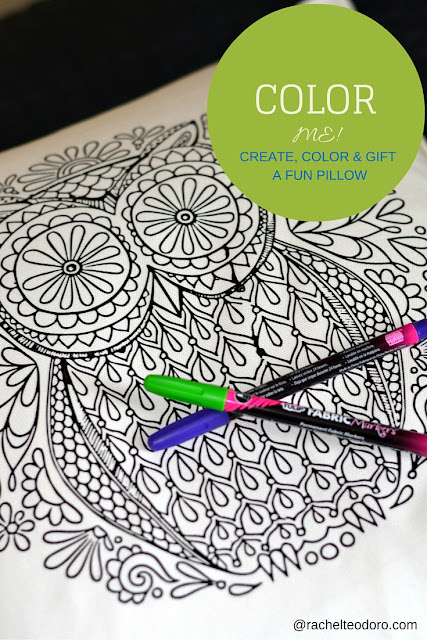
Create a Pillow That you can Color

When I was younger if you asked me what I wanted to be when I got older, I would have told you that I wanted to work as a professional colorer. I don't know if it's a thing, but I'm fairly certain I got the idea when I was at Disneyland one time peeking in on the illustrators as they worked. That ship sailed, but the adult coloring phase hit and I rekindled my love of coloring. 

I shared a round up of free coloring pages last year and have continued to enjoy coloring and thought that I would take it one step further and create a fun image to color on fabric. I have a step by step tutorial for you to follow so that you can create a pillow {or t-shirt, tote bag or whatever}to color for yourself or it would make a great gift idea for you to give.

silhouette and heat transfer vinyl owl to color, adult coloring gift


I started out with an image that had great white space. I measured the area that I wanted the image to go on and increased the size of my owl to fit that space. I mirrored the image and used my Silhouette to cut it out using heat transfer vinyl. It took me some time, but I weeded the image as best as I could. You may need to use a special weeding tool to help you get the really small spaces. 


Heat up your iron and iron on your image following the instructions on your heat transfer vinyl. Follow this tutorial on how to cut and use heat transfer vinyl like a pro.


Peel back the plastic layer from your transfer and you will have your image transferred on to your pillow.


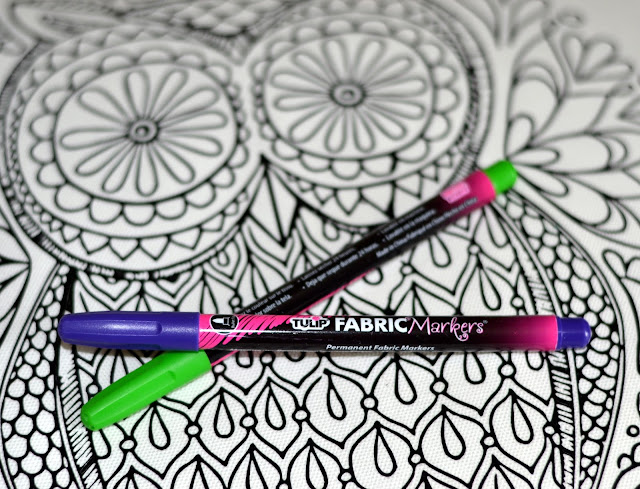
These Tulip Fabric Markers make a great addition to the gift {or for you} so that you can color in all the great white spaces.

adult coloring gift

The best part about putting an image on a pillow is that it sits so nicely and comfortably on your lap.


We are actually going to wrap this one up and give it as a gift.

use fabric markers to color in this gift

dislaimer: this post may have affiliate links. By clicking on them and purchasing through them, I may receive a small commission. These small purchases help me to continue to keep writing content and creating at Holy Craft. Thank you!
0

The Essential Guide to Going Out of State for College

This is a sponsored post written by me on behalf of CORT for IZEA. All opinions are 100% mine.

My husband did it, and now my son is following in his footsteps. After high school graduation, he's packing up and moving thousands of miles away from home to attend college. There are a few reasons he’s decided that an out of state college is right for him and I have to agree that they outweigh the reasons to stay, but don't think for a second that I didn't try to talk him out of it! One of my biggest attempts to convincing my son to stay in state for school (or at least in driving distance) was how logistically easier it would be to live part time in two places. As a college student, you are a resident of the university for the majority of the year, but most kids wander back home to the comfort of their old bedroom and the posters they tacked up on their walls back in junior high for a few months as well.
In my head, it's far easier to pack up the minivan and take a few hours drive than it is to figure out how to pack your earthly treasures in a few suitcases. In my heart, I know that the school he's selected is by far the best option for him and even though we will be thousands of miles apart, those logistical details are easy enough to work through.

With my husband's past experience, and with us currently ironing out the details of what it looks like to move out of state for college, I've created an essential guide to moving out of state for college with six tips for you to help ease the stress of that transition.

high school graduation, how to pack for college, dorm living, first apartment


1. Sort out What You Want to Bring

If you are flying, you are limited in the amount of luggage that you can bring. You have to really pick and choose what is important to you. Start a list a few months before you move out with items that you think might be helpful to have with you. When you think of something, add it to the list. Writing this list gives you time to really think about the item and then decide if it's really worth the limited luggage space that you have or if it's something you can box up and keep at home. 

Once moving day nears, start a pile with those items and reevaluate. Ask yourself a few questions. Are they going to be useful to you in your new home? Will you use it more than one time? Will it cost more to replace than it will to bring? 

2. Coordinate with Your Roommate

Chances are you are going to be sharing a living space with someone while you are in college. Spend some time coordinating with them ahead of time about what items you plan on bringing or providing and which communal items you can share. 

3. Familiarize Yourself with Sites That Offer Free Shipping 

My husband tells the story about how he shipped a huge bottle of laundry detergent from his home to campus just before the start of classes. The bottle exploded en route and made a huge mess causing several hours of clean up. That's when he realized that he didn't have to ship everything from home! 
Ordering on-line is so easy and many sites offer free shipping. This is beneficial to those of you that don't have many transportation options.

4. Know Your Area

I grew up in the Midwest and spent my elementary years learning what to do in case of a tornado. Not even six months after moving to the west coast, we had a 6.8 earthquake. I had no idea what to do in an earthquake! A tornado, sure, earthquake, nope. My husband tells the story of watching his first tornado warning unfold on TV his freshman year. Again, he was caught off guard. Familiarize yourself with your area and know what to do in an emergency.

5.  Consider Furniture Rental

Calling two states home requires some flexibility. We don't have the luxury of storage space during the summer months. What our son can't fit in a suitcase under 50 pounds, just won't make the cut. That bed? Nope. A sofa? No way! But that doesn't mean we don't want him to be comfortable while he's living at school. CORT Furniture Rental provides furniture on-demand. It's there when he needs it, gone when he doesn't. CORT has student packages starting at $119/mo.

Trust me, I'm not against used furniture. Craigslist is one of my favorite buying sites, but when you have limited time as a student to get adjusted to a new living space, not to mention limited transportation options, this is a no brainer for me. Plus, at the end of the year, he can simply call them and have the furniture removed. That's one less thing he needs to worry about when he should be studying for finals. I'm all for exploring your options to rent furniture.

6. Work Smarter Not Harder

College kids have enough to worry about. The kids going to school out of state have an added layer of responsibility. They are learning to be independent in totally new territory.  Sign up for apps that can help organize and take on the burden of some of those new responsibilities. CORT has a partnership with SimpleBills that is pretty amazing! SimpleBills has an app and on-line feature that allows you to split and pay bills easily with roommates. SimpleBills receives the utility bill, can pay it and will invoice your roommates for their portion of the utility bill once a month. It's as easy as that!

This time of life is exciting! It's full of possibility and the future is bright. Best of luck to you on this next chapter.


Visit Sponsors Site
0
Back to Top