Showing posts with label home improvement. Show all posts

Master Bedroom Makeover in a Historic Mansion

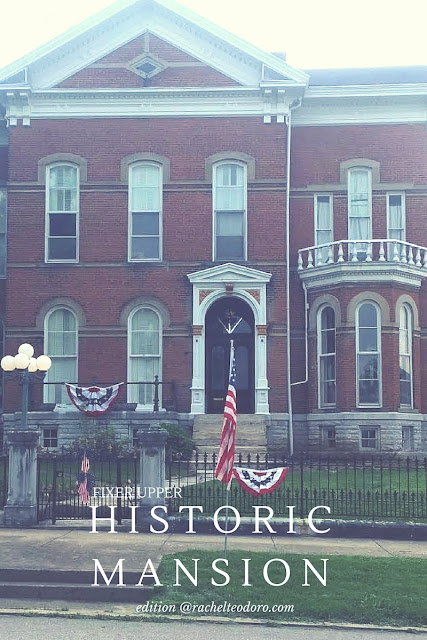
In case you missed it, we've been following along with a young couple as they rehab a historic mansion in small town Indiana. The home was built in 1871 by Bright B. Harris, a scout for the civil war. I introduced you to Dea and gave you a little bit more information in this post

fixer upper, rehab addict, nicole curtis, historic home

You can see the beautiful rehab of the foyer in all it's glory {even decorated for Christmas} here

historic home, rehab addict, fixer upper

A few weeks ago, we were able to take a step inside and see the update of their living room. While they were removing the wallpaper, they found a little surprise that changed the whole design of the room. Come see what they found and how they incorporated it.  It's genius actually.


fixer upper, rehab addict, historic home

Today, I want to take you inside this couple's master bedroom. With Victorian doll wallpaper and floral carpet, I am curious to see how Dea could look past the dated decor and see potential, but she did and the final result is amazing!


The previous owners really seemed to like painted walls, borders and wallpaper but thankfully, Dea has an eye for design and has been able to incorporate some beautiful color and design while still keeping the integrity of the historic home.  

Here's a little side by side of the before and after. It's hard to believe that it's even the same room!


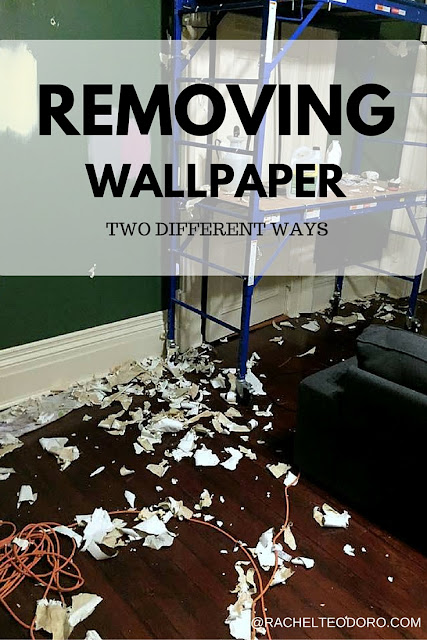
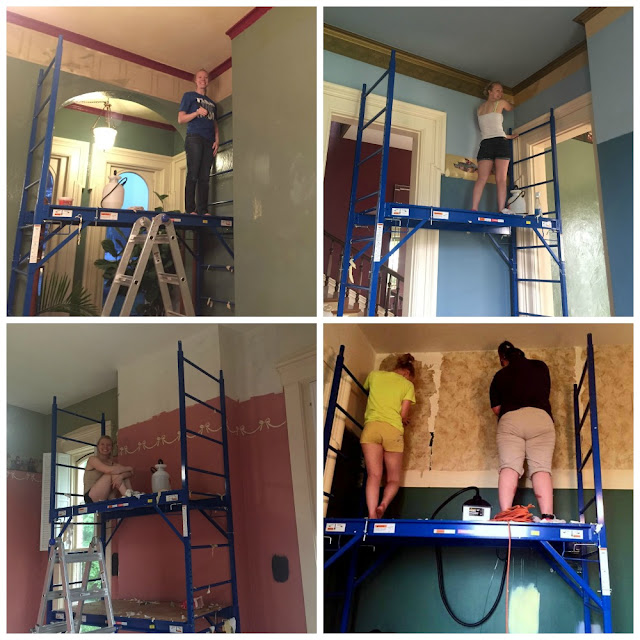
The first step was to remove the wallpaper.  The home has 14 foot tall ceilings and the couple realized pretty early on that owning their own scaffolding would be a good investment. Actually purchasing your own isn't as expensive as you might think.

Last month, Dea helped provide tips for removing wallpaper two different ways.  Before removing the carpet, the couple painted the walls. The carpet acted like a drop cloth so they weren't worried about paint spills.


Before the couple moved into this home, Dea has started work on a quilt that would end up in the master bedroom. I don't know many people under the age of 80 that quilt, but Dea makes me totally want to start!

She also wanted to jazz up a plain duvet cover and pillow shams by adding grosgrain ribbon to them. She had a little help from her pup.


The couple was making progress and working on various furniture placement. The challenge with tall ceilings and large rooms is that furniture can get dwarfed quite quickly and look off scale.


Another challenge with older homes is storage space. Most historic homes don't come with large master closets like we have grown accustomed to. Dea switched out the small settee for this armoire which has a nice grand scale to it and serves to function as a wardrobe for her husband Christian.


I love the way all of the colors blend together in the bedding. The coral with the navy blue is amazing in this space but the real show stopper is that quilt. 


Let's take a closer looks at the pattern and the fabric in the quilt. Seriously, doesn't that make you want to start quilting?


The chalkboard sign that the ring bearer walked down the aisle with at Dea and Christian's wedding has handles on it and has now become a tray on their bed. 

chalk art, wedding, ring bearer


Every room needs a cozy nook for a cup of tea.


Isn't this just the most lovely space?


One more before and after. I am swooning! Another job well done Dea.

In case you missed it and want to check out the other rooms that have been redone, you can find the
foyer here and the sitting room here. Pretend you are sitting in this chair sipping some tea so that you can catch up on what this couple is doing to make their historic mansion come back to life.


dislaimer: this post may have affiliate links. By clicking on them and purchasing through them, I may receive a small commission. These small purchases help me to continue to keep writing content and creating at Holy Craft. Thank you!
0

How to Remove Wallpaper Two Different Methods

If you own an older home, chances are you will find a layer or two of dated wallpaper hanging on the walls. Wallpaper is making a comeback, but not all papers stand the test of time. 

removing wallpaper two different ways


Removing wallpaper while standing on scaffolding is what Dea Rust does best! She's becoming quite the pro at stripping wallpaper since she and her husband bought a historic mansion this past year. I thought that maybe she could offer us some tried and true tips for removing wallpaper.

removing wallpaper two different ways in a historic home


How to Remove Wallpaper

Method 1

Step 1: Score the paper

Use a scoring tool like this to help poke holes in the paper so that the wallpaper remover can soak through the paper to the glue. Don't score too hard because you don't want to be left patching up the wall when you are done.

Step 2: Spray on DIF

Anyone who has removed wallpaper before swears by this product. DIF is the best wallpaper remover to use. The solution dries so only spray the area you are working on. 

Step 3: Wait


Allow the DIF solution to soak in for 15 minutes. This is a good time to move back to the area that you sprayed and is waiting to be removed.

Step 4: Spray DIF again

You want your wallpaper to be moist so that it slides right off the wall.

Step 5: Scrape


Scrape the wallpaper off of the wall. I've found that a tool like this works the best.

Step 6: Repeat


Repeat this whole process until all of the glue backing is removed.


Method 2

{Dea's preferred method for wallpaper removal}


 Step 1: Prep your steamer


This steamer from HomeRight works double duty. Not only can you use it around the house for cleaning {check out my lazy housecleaning tricks for a spotless home}, but you can use it for wallpaper removal. Fill up your steamer with water and let it heat up.

Step 2: Start steaming


Hold the steamer in place for 30-40 seconds to give the steamer time to penetrate through the glue.

Step 3: Scrape off the paper

While the paper is damp from steaming, use your scraper to scrape off the wallpaper.

Step 4: Repeat

Repeat the whole process until all of the glue is removed off of the wall.
I've given both a try but our resident expert Dea swears by the steamer method even for the toughest wallpaper removal jobs. Do you have any wallpaper removing tips? I would love to hear them.
dislaimer: this post may have affiliate links. By clicking on them and purchasing through them, I may receive a small commission. These small purchases help me to continue to keep writing content and creating at Holy Craft. Thank you!
0

Fixer Upper A Young Couple Takes on a Historic Mansion and Finds A Surprise

Hey guys! Remember last month when I introduced you to Dea, a young bride taking on the process of rehabbing a historic mansion in small town Indiana? Dea is back at it again with another remodeling project. She's walking us through The Mansion's doors to see the living room before, during and after their remodel. You guys won't believe what she found under some wallpaper and what she choose to do with it. Come check it out!

Fixer Upper Mansion Edition A young couple takes on rehabbing a historic mansion see their latest remodel

One of my favorite things about The Mansion are the plantation shutters and the huge floor to ceiling windows. While wallpaper is making it's comeback, it isn't usually a permanent decorating solution. While Dea hasn't shied away from using wallpaper {you can see it in her foyer here} she wanted to start fresh in this room and remove the wallpaper that was hanging on the upper half of the walls. She was in for a fun surprise when she started peeling the paper away!


It's not uncommon in historic homes to find layer after layer of wallpaper. No one likes to remove wallpaper. Usually it's just as easy to layer another coat on top. Thankfully, in the living room, Dea found only one layer of paper. But that layer proved to be the most difficult wallpaper she's ever removed. If you find yourself in the same situation I will be providing tips from Dea on how to remove wallpaper tomorrow.  


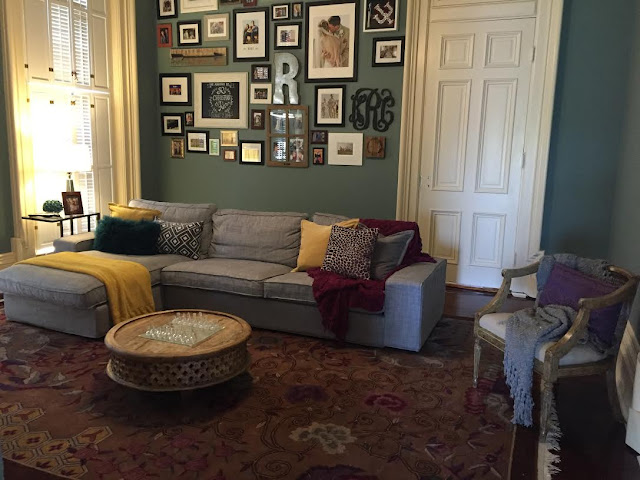
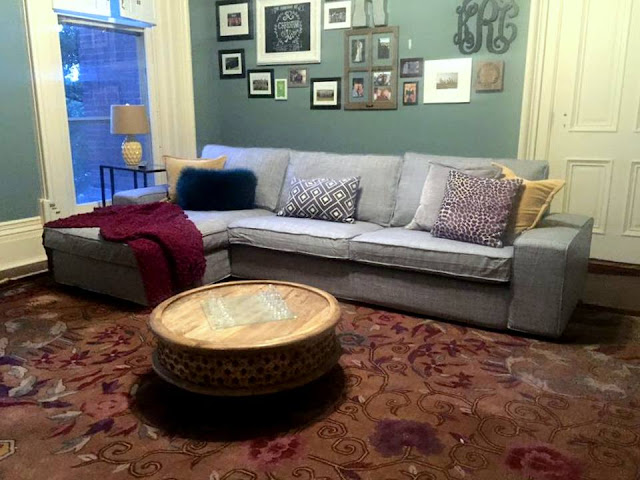
After the wallpaper was removed, Dea used the rug that her in-laws gifted her for inspriation choosing a new paint color for the walls. As you can see, they selected Benjamin Moore Sioux Falls.
When decorating a room from the ground up, it's always good to use a large piece as inspiration for your paint colors. You can use a piece of art that you love or a rug like Dea did to inspire the color you want for the room.


Remember how I told you that Dea found a little surprise underneath the wallpaper when she was removing it?  Inch by inch as the wallpaper was stubbornly removed, Dea found signatures at the top of the wall in order from newest to oldest dating all the way back to 1911!

I know I mentioned before that I grew up in a historic home myself, which is why I love old houses as much as I do. When I was three, we moved into a home that was built in 1860. Like Dea, there was a lot of wallpaper and one summer, we tackled removing and re-wallpapering the hallway. We found signatures on the walls as we removed the paper, and my mom let us take a pencil to draw on the walls before we put new wallpaper up. I remember doing this in nearly every room we put wallpaper in {it was the 80's so there were a lot of them!}.

Several years ago, my family went back to my old town and I found that the home I grew up in was for sale. I knocked on the door and explained that I had lived there growing up and the owner was kind enough to give me and my family a tour.

On that tour, I found these drawings on the wall in the upstairs hallway. Like us, he was re-wallpapering and had removed the paper and found some of the drawings that my little brother Ben and I had made back in 1987. How fun is that?!


My guess is, he wasn't quite as enamored by his findings of our drawings as Dea was. So much so, that she decided to go in a totally new direction with her decorating plan for the room. The names Dea found were names of known painters in the area. Her original plan was to paint all of the walls, but once the signatures were revealed she wanted to come up with a plan so that she could salvage the signatures and keep a little fun history of the room but still make sense of the design.

Dea thought about a few options.

Option one would be to wallpaper the entire wall leaving the signatures in tact for the next owners to uncover.

Option two was to take a picture of the signatures and frame them to hang lower on the wall since they were found by the top of the wall.

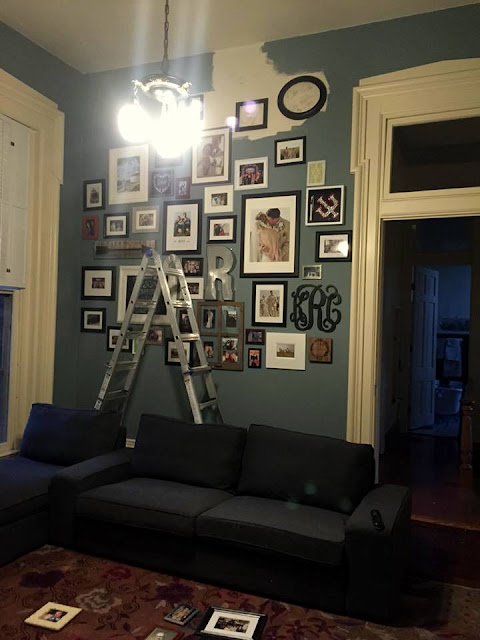
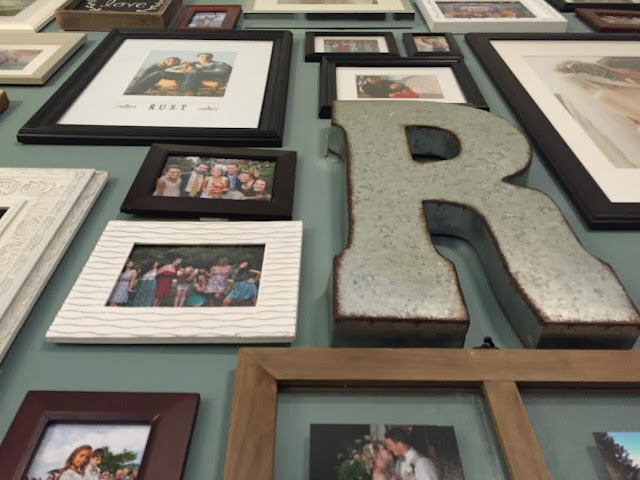
Option number three was what seemed like the best option and that was to frame the signatures where they were and cut in with paint around them. Knowing that it would be awkward to have five framed signatures along the top of the wall, Dea decided to create a full gallery wall, which ended up being the perfect solution for the family room.

As a newlywed they had plenty of gorgeous frame worthy pictures to hang too!

I've never hung a gallery wall so I asked Dea if she could give you all some tips.  She said,

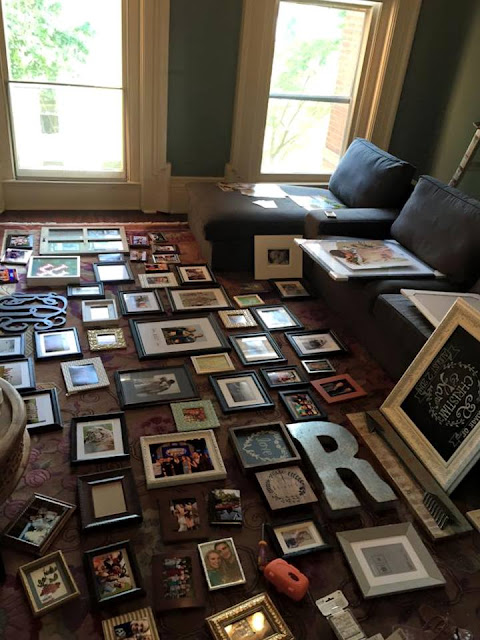
"Typically I would plan a gallery wall by placing all of my pictures on the floor in front of the wall to get a good layout with them and consider spacing. Because I had so many pictures to hang with this wall I practiced a new method. I laid all of the pictures on the floor first, just so I could see what all I had to choose from. I then began hanging the pictures starting with the largest. I spread the larger pictures out throughout the gallery wall. Then I spread the non-picture artwork so that they would be spread throughout the wall. Then worked my way to the smallest frames. I did keep an eye out for color of the frames to spread out colors as well as content of the pictures. I didn’t want all of the wedding pictures grouped together for instance. Normally I would worry about having the same spacing between every picture, but with this project I didn’t so much worry about that." 

planning out a gallery wall

See how the paint is cutting in around the frames at the top? Those are the signatures that Dea was working on keeping in tact to restore. I just love that idea don't you?

Ever wanted to know the easiest method for hanging those pictures in a gallery wall? Command Strips or Hooks. Who knew? There is far less guesswork in using Command Strips and it's so much easier than putting a nail in the wall for every single photo. Once they are set {usually 24-48 hours}, they are there for good or until you decide to take them down.

planning out a gallery wall

After the gallery wall was hung it was time to start digging into the details. Dea gave me a great tip when decorating with pillows.

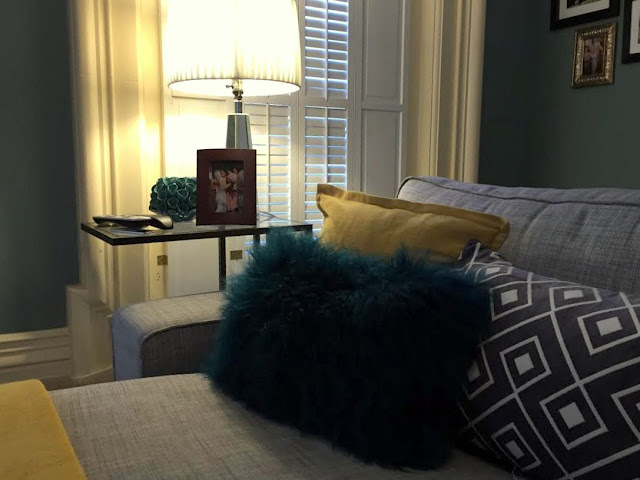
The eye naturally gravitates towards odd numbers. I would recommend when placing pillows on a couch, use 3 or 5. For this room I arranged two groups of three because the couch is so long. With a smaller couch you can spread 5 pillows across or group three in one corner and two in the other with a blanket to give you the third item. 

historic mansion rehab and remodeling project

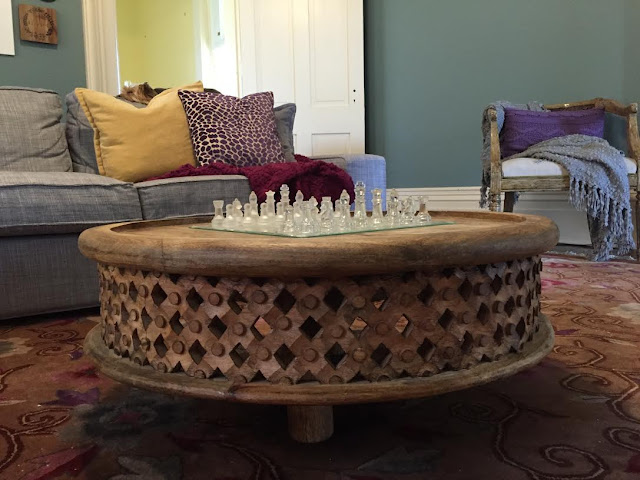
This coffee table from West Elm is one of my favorite pieces in the room.

historic mansion rehab and remodeling project with west elm coffee table

historic mansion rehab and remodeling project with Ikea sectional

historic mansion rehab and remodeling project

gallery wall


gallery wall

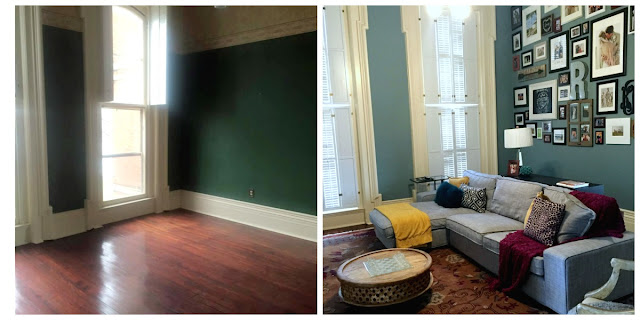
It's hard making a really large room with very tall ceilings feel warm and cozy but I think Dea did just that don't you? I just love the space and I love how she was able to shift her design focus a bit to include such a fun historic element.

historic mansion rehab and remodeling project before and after

In case you missed the foyer remodel and the big reveal, you can find it here.

historic mansion rehab and remodeling project

Don't miss a post! Sign up for the Holy Craft newsletter and get all the latest blog posts delivered right to your inbox. 
dislaimer: this post may have affiliate links. By clicking on them and purchasing through them, I may receive a small commission. These small purchases help me to continue to keep writing content and creating at Holy Craft. Thank you!
0

Fixer Upper-Mansion Edition: Follow a Young Couple on Their Journey to Rehabbing a Historic Home

I spent the first ten years of my life growing up in a small town in Indiana. The home we lived in was built in 1860. Brick houses were common and I fell in love with the charming details old homes have that you just can't find in new construction.  I went back to that small town recently and met up with my childhood best friend, who grew up in a beautiful Craftsman home across the street from me. Her youngest brother and his new bride recently purchased a brick home at auction that I remember admiring when I was a kid. 

Fixer Upper mansion edition-follow a young couple on the journey as they restore a historic home in Indiana

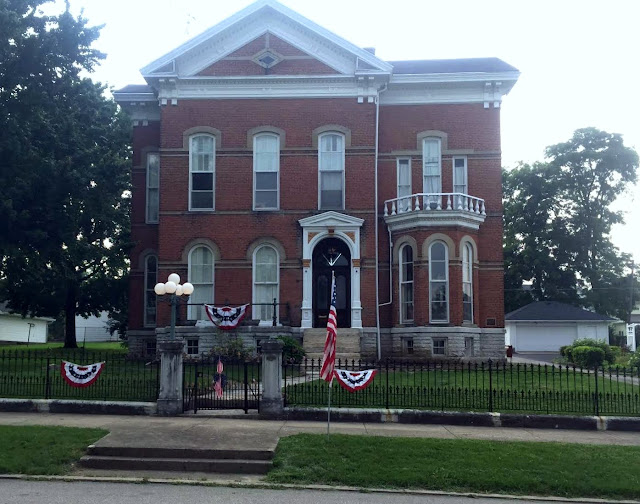
The house the couple refers to as "The Mansion" is close to the town square. As kids we would often ride our bikes past it and I remember loving the statuesque qualities of the home. I never got a glimpse inside as a kid but always wanted to. It's exciting now to know the current owners Christian and Dea. Dea is willing to take us along on the ride as this newlywed couple renovates and restores this fixer upper. 

I think you are really going to enjoy seeing the restoration process in a series of blog posts. While you may not be brave enough to take on a historic home renovation {I know I wouldn't be!}, seeing this historic home come back to life is going to be fun. I promise you, you are going to love Dea's style! There will be DIY's, tutorials, and glimpses inside the process of this fixer upper.  But first, let's find out why this young couple wanted to take on an old home and what their vision is for it. Don't miss out on the first big reveal. You are going to love seeing this couples completed foyer!


Tell me a little about yourself.
I am 26 years old, recently married to my husband Christian. I work during the day as an internal auditor for an automotive plant in small town Indiana and fill my evenings with hobbies such as quilting, decorating, painting, and cleaning the mansion. 


Is this your first home? What drew you to a very old fixer upper?

This is the second home we have owned together. We bought our first home on a whim so-to-speak based on location proximity to his job. Our first home lacked all of the charm and character of an older home that we both love. We actually had seen this home up for auction while living in our first home and in passing mentioned that it was too bad we had just bought a home or it would be nice to put an offer in. Once my husband left his job we were left with the decision to stay in our current location or move in to town. We decided moving into town was the best for us. Luckily this home was still up for auction when we were house hunting the second go-around. We both decided it was a once-in-a-lifetime opportunity and we went for it. I remember admiring this home from afar when I was younger like most people in town had. We both love the character of older homes; the tall ceilings, the elaborate woodwork, and the large formal spaces. We just feel lucky that we were able to scoop it up when the time was right. 

Fixer Upper mansion edition-follow a young couple on the journey as they restore a historic home in Indiana


Tell us a little about the history of your home.

The home was built in 1871 by Bright B. Harris, a scout for Morgan’s Raiders during the Civil War. Once the war was over Harris returned to Greensburg, Indiana and opened a limestone quarry and called it Harris City Stone Quarry. He used the limestone from that quarry to build the foundation of the home and for several architectural accents like stairs and walkways. The previous owners have also given us several stories of the homes’ history along with artwork and news clippings which has been a lot of fun. One interesting fact for instance is that there is a cistern located in the attic which was used to fill and flush the first indoor toilet in Greensburg!


Have you ever done any DIY before? 

I have in fact participated in my fair share of DIY projects. For example: I was recently featured on a billboard in Time Square for a kitchen remodel project I completed in our first home. 


I painted the cabinets gray, replaced the counters with butcher block, installed an apron sink and faucet, and added a white subway tile backsplash. I’ve also tackled many DIY projects such as: installing closet organizers, painting, laying wood flooring, building a dining table and bench, hanging light fixtures, wallpapering, and installing sinks and plumbing. I grew up watching HGTV and DIY shows like trading spaces, design on a dime, and HGTV’s next design star, so one could say I was bred for DIY!


Your goal seems to be to restore the home rather than gut it and renovate it. Why?

What drew us to the older home was the character and charm. We couldn’t imagine gutting those qualities only to replace them with cheap or builder grade materials. We want any fix we do to be seamless to the original so that when people walk through it feels authentic to the period. That being said, the home also needs to function for our lives today. For instance, could you imagine living in a period kitchen? It’s just not practical. We also enjoy some of today’s amenities like heating and air conditioning.


Old construction is a lot different than new construction, how are you learning how to restore the home?

We are researching online, talking with local contractors, and a lot of trial and error. Many small projects end up quickly becoming large ones with many trips to the local hardware store. For example, Christian recently wanted to change the light bulbs in the front lamp post. When all was said and done a 30 minute project turned in to eight hours of work and three trips to the hardware store because he had to complete a total rewire. 

Do you see The Mansion as your forever home or are you interested in rehabing multiple historic homes in your area?

We definitely see the Mansion as our forever home. Especially after we put all of our love and sweat equity into it, I couldn’t imagine us deciding to sell and start over. I wouldn’t mind, however, rehabbing several other historic homes in our area. I have always wanted to flip houses or fix up property to rent.


It's fun to do the lipstick projects (the painting and the decorating) but I'm sure with a very old home like The Mansion, you have had to pay attention to some of the not so fun projects (wiring, roofing, heating). Tell me about some of those.

Of course the lipstick projects are my forte and I love doing those, but we’ve actually had more expenses poured into the not-so-fun projects so far. When we bought the house last year it needed a new roof, box gutter repair, a new electrical box put in, new plumbing throughout, attic vents, and hearths put in for the fireplaces. There are still some projects that need to be done though, like installing a dehumidifier, plastering the kitchen walls, and upgrading the heating and cooling systems. 


Are there any projects you and your husband won't tackle on your own?

Some projects we won’t do ourselves, like electrical, plumbing, and wall repair. Everything else is fair game in my book. 


You and your husband both have full time jobs, how do you find the time to work on the house and the many projects you have in mind for it?

I usually take on a large project every couple months. During project time everything else gets put on hold, the laundry, dishes, cooking, cleaning, EVERYTHING! A project usually takes me a week or two from demo to finished product and then I will usually spend the next month or so getting everything caught up. My husband and I live by what is typically known as “burning the candle at both ends.” Even when we don’t have a large project to occupy us we are either cleaning the mansion, working in the yard, or playing with our hobbies.


What are some of the original features of the home that you are most excited about bringing back to life?

I’m really excited to showcase the marble floors in the entry, the marble fireplaces, the high ceilings, and the wood floors. I plan to pick paint colors that will make those elements pop. 


What are your biggest challenges when it comes to decorating and remodeling your home?

One of the largest challenges right away was how tall the ceilings are (14 feet!). This makes it difficult to just change a light bulb or clean the cob webs out of the corners. We realized very early on that even our extendable ladder wouldn’t suffice. We quickly invested in scaffolding which has been a huge help during all of the remodeling. Another large obstacle we have run into is that the floors are filled with concrete. This concrete barrier makes it difficult to have plumbing done on the second floor or to invest in in-floor heating as a heating solution. There are also very small areas of opportunity to run things to the second floor because the walls are all solid brick.


Tell me about some of the rooms of the home and what your vision is for those rooms.

I have a vision for almost every room in the house at this point, the grand parlor I imagine having very sophisticated, feminine, chic stylings where as in the drawing room (where men draw on their pipes) I want to have the feel of an old library or study with stacks of books laying around and adorned with masculine leather furniture. 

Some of the other rooms like the Foyer, dining room and master bedroom I would like to design around furniture that we have acquired from my husband’s Grandmother’s estate or the furniture that we have already and love. I’ve also found little bits of inspiration which I’d like to work into the design like this fabulous charcoal floral wallpaper which I want to incorporate somewhere. 

The family room, which will be upstairs, is going to designed around a brightly colored rug of Christian’s mother’s and I think it will give the room an overall more fun and relaxed comfortable feel. 

The bedroom will also be designed around a rug which was Christian’s grandmothers. I have an idea to make custom bedding to match in the bedroom. 

children's bedroom


The children’s bedroom, however, I am designing from scratch. This is the project I am looking forward to the most. I got the inspiration from a set of Eastlake furniture that was his grandmothers.  It looks like it has a fox in the woodwork. That gave me the idea to do a woodland animal theme kids room with foxes, raccoons, deer, bear, & rabbits. I want to make the bedding for that room as well, along with several other DIY projects which I will keep to myself for now.


fox detail in the furniture


Buying a historic home isn't for everyone. What would you say to someone who was thinking about buying a historic home?

I would definitely tell them to plan for the expenses of an older home. Not only do things break more often, but they also tend to cost more to replace. I would try to plan any fixes needed into the purchase of the home so that the worry isn’t there when you move in. One thing I wish we would have done is try to get the kitchen updated when we first bought it. Now we are realizing that kitchen renovations are very expensive, especially in an older home with 14’ ceilings. 

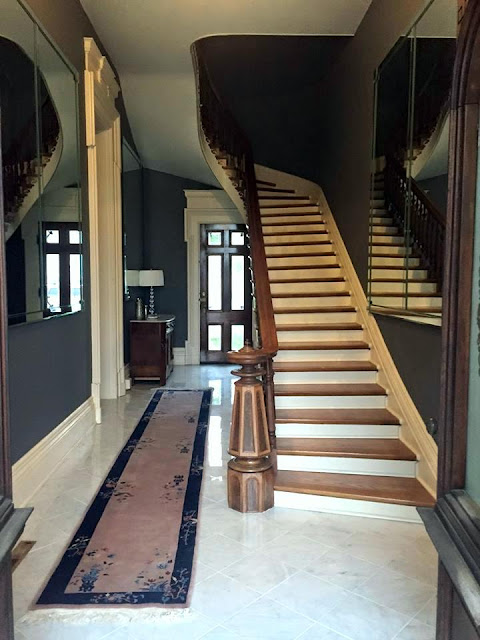
One of the first projects Dea tackled was completing the foyer. I love the grand staircase and marble floors and can see huge potential here. Heck, it's pretty amazing as it already is but wait until you see the after!


There were a few different paint options, but I love what Dea ended up settling on. She tells me that she basically laid down the color chip wheel and picked the color closest matching the veins in the marble. She said she was "tired of running back and forth to the paint store and the gamble paid off"! 


This was no small project! 


If you have a home with 14 foot ceilings, owning your own scaffolding is a must!


In the home I lived in growing up, we had an entry way like this one. There was a beautiful curved stairway in the front and a servants stair case in the back of the house. I lived there in the 80's when wall paper was king and my mom hired a few guys to wallpaper the whole house. I remember there being a little bit of a stall in just about the same place at our house. Think about it. You have 14 foot tall ceilings and it's two stories tall, you are looking at 28 feet to the top at least. The guy who finished our wall paper project a few days later ended up dying of a heart attack. My mom blamed herself and our high ceilings on his death!


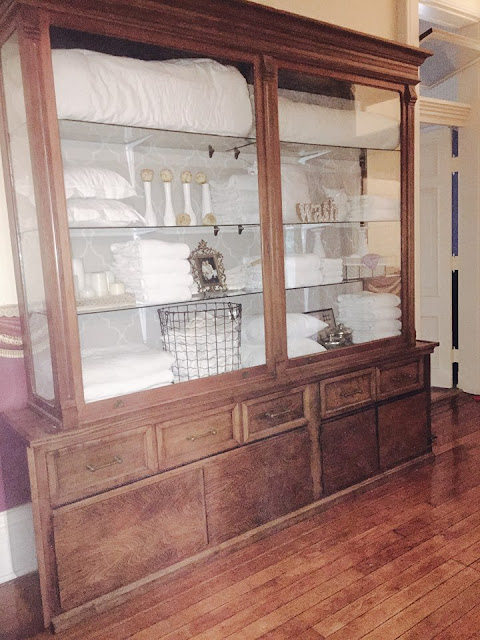
Can we stop for a hot minute and look at that huge linen cabinet in the upstairs hallway. Restoration Hardware is feeling bad about all of it's knock offs that can't hold a candle to this original piece!


I have all the heart eyes for this piece.  I can't even! There are no words so let's just stop and stare at this piece. 

linen cabinet in historic home

Remember that charcoal floral wallpaper Dea was mentioning in her vision? She took this space under the stairs and decided to hang it there.


I just love the print!


I think it makes for an unbelievable accent wall don't you.


I know Christmas has passed but one of my favorite parts of living in a historic home was how beautiful the home was when it was decorated for the holidays. Dea's home is a stunner!

historic home decorated for Christmas

And since you can't celebrate Christmas all year round, here is the foyer when they aren't celebrating the holidays. Isn't it stunning?

foyer with curved staircase and marble in historic home in Indiana

One last before and after side by side. I think the dark grey paint is a major winner. What a difference it makes. 

foyer with curved staircase and marble in historic home in Indiana

I'm so looking forward to more before and after fixer upper projects from Dea. Until then, go check out her etsy shop. She's an amazing quilter and has an eye for a great print! 

Are you like me and have a soft spot for a historic home? They really don't make them like they used to! I can't wait to tour the rest and see the vision that Dea has come to life in The Mansion.

dislaimer: this post may have affiliate links. By clicking on them and purchasing through them, I may receive a small commission. These small purchases help me to continue to keep writing content and creating at Holy Craft. Thank you!
0
Back to Top