Showing posts with label vinyl. Show all posts

Create a Pillow That you can Color

When I was younger if you asked me what I wanted to be when I got older, I would have told you that I wanted to work as a professional colorer. I don't know if it's a thing, but I'm fairly certain I got the idea when I was at Disneyland one time peeking in on the illustrators as they worked. That ship sailed, but the adult coloring phase hit and I rekindled my love of coloring. 

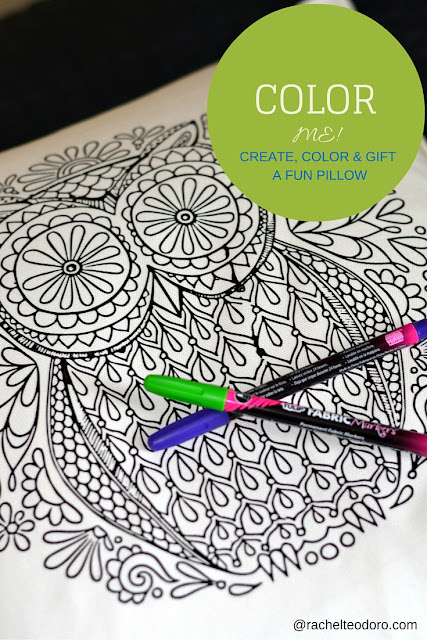
I shared a round up of free coloring pages last year and have continued to enjoy coloring and thought that I would take it one step further and create a fun image to color on fabric. I have a step by step tutorial for you to follow so that you can create a pillow {or t-shirt, tote bag or whatever}to color for yourself or it would make a great gift idea for you to give.

silhouette and heat transfer vinyl owl to color, adult coloring gift


I started out with an image that had great white space. I measured the area that I wanted the image to go on and increased the size of my owl to fit that space. I mirrored the image and used my Silhouette to cut it out using heat transfer vinyl. It took me some time, but I weeded the image as best as I could. You may need to use a special weeding tool to help you get the really small spaces. 


Heat up your iron and iron on your image following the instructions on your heat transfer vinyl. Follow this tutorial on how to cut and use heat transfer vinyl like a pro.


Peel back the plastic layer from your transfer and you will have your image transferred on to your pillow.


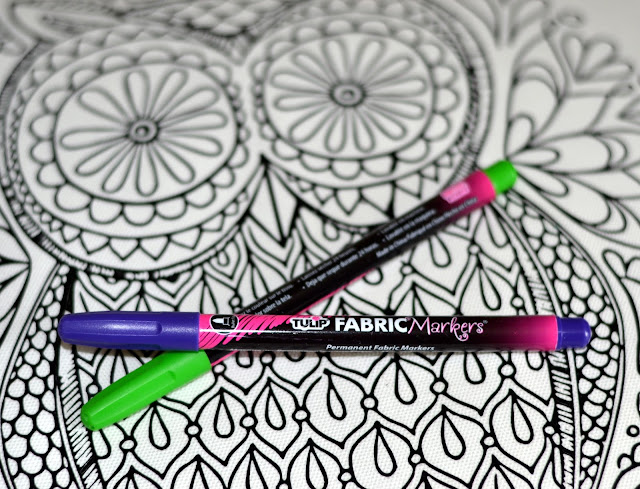
These Tulip Fabric Markers make a great addition to the gift {or for you} so that you can color in all the great white spaces.

adult coloring gift

The best part about putting an image on a pillow is that it sits so nicely and comfortably on your lap.


We are actually going to wrap this one up and give it as a gift.

use fabric markers to color in this gift

dislaimer: this post may have affiliate links. By clicking on them and purchasing through them, I may receive a small commission. These small purchases help me to continue to keep writing content and creating at Holy Craft. Thank you!
0

How to Use Vinyl Like a Pro- A Step by Step Guide

I'm a crafty gal, but sometimes I need to give myself a little refresher course on the basics. This happened to me just recently when I was trying to use vinyl {regular vinyl, not my go to heat transfer vinyl} on a project. Things weren't working the way I thought they should and it's because I was doing it all wrong! I spent some time reading the manual and going on the suppliers page and I finally figured out what mistakes I was making. 

I actually personally reference my blog quite a bit. So even if they rest of you don't read this post, I know that I will go back to it next time I need to use vinyl. So here you go, how to use vinyl like a pro, a step by step guide just for you {or maybe, just for me}.
silhouette cameo, expressions vinyl

I picked up some plain wood blocks at a garage sale for next to nothing. They were already cut, they just needed to be painted and I knew that they would look great with some vinyl. My go to medium when I use my Silhouette is almost always heat transfer vinyl. I'm a sorority girl, what can I say, I like a t-shirt for everything!

This is how they turned out, but this isn't how they started. And it took me a few attempts to remember just how to use regular vinyl, which is why we are all where we are now, following this step by step guide. 

Are you ready? I know you want to learn how to use adhesive vinyl like a pro!


silhouette cameo

How to Use Adhesive Vinyl Like a Pro

Step 1: start with your work surface

paint or prepare if needed

Step 2: design and cut out the vinyl

using your Silhouette software, design and cut out your image. I simply used text. There is no need to reverse your image if you use adhesive vinyl {heat transfer vinyl is another story}. Peel off your cut area. 

Step 3: you will now have a negative space and positive space area

Sometimes you can be creative and use your positive space area as a stencil.

Step 4: use transfer paper

Use a piece of transfer paper just a little bit bigger than your image and place it on top. You can use a spatula to rub down the transfer paper to make sure the vinyl sticks.

Step 5: peel off the transfer paper

You should have transferred your image on to the transfer paper and it's ready to go on your prepped work surface

Step 6: center and line up your transfer

Line up the transfer paper and the image where you want it and use a spatula to transfer the vinyl on to the final surface. Slowly peel back the transfer paper and your adhesive vinyl should be stuck on your work area.


silhouette cameo full tutorial


I just love how these small signs turned out. They were so easy once I figured out how to use my adhesive vinyl properly. You can't go wrong if you follow this step by step guide.

silhouette cameo, tutorial how to use vinyl

I've also made these other projects with adhesive vinyl.

expressions vinyl, silhouette cameo

You & Me gold foiled sign
Restoration Hardware Knock Off Sign
I Like You Sign
Travel Wet Bags
Vinyl Bible Song Sign
Driftwood Beach Sign
Let me know if you have any helpful tips to add. I would love to have them included to reference.
I've partnered together with some other fantastic bloggers as part of the June Silhouette Creators challenge. Go check out all of the great projects from them this month!
1. Crochet Hook Box - Dwell Beautiful
2. How to Repurpose a Table into Wall Art - DIY Passion
3. Silhouette Etching Vinyl and a DIY Farmhouse Breadbox - Creatively Southern
4.Silhouette Challenge Wood Slab Plaque - My Life From Home
5.Watercolor Patriotic Napkins & a Simple 4th of July Tablescape - Pocketful of Posies
6. How to Use Vinyl Like A Pro Step by Step - Holy Craft
7. DIY Team Banner - Morena's Corner
8. DIY Wooden Slice Dishwasher Clean-Dirty Magnet - Simply {Darr}ling
9. Custom Wall Plates Using Your Silhouette Machine
dislaimer: this post may have affiliate links. By clicking on them and purchasing through them, I may receive a small commission. These small purchases help me to continue to keep writing content and creating at Holy Craft. Thank you!
0

Easy to Make School Mascot from Vinyl

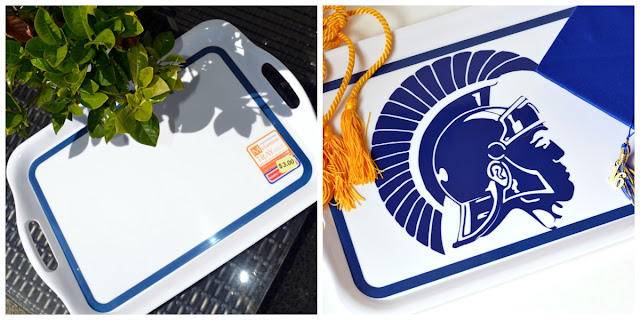
It's a big year. My oldest son is graduating from high school in just a few short weeks and the preparations have been underway! We've been getting senior pictures taken, printing up graduation announcements and photo books and I've been prepping for his open house graduation party.  His school mascot is a Trojan and I found some plain trays that I thought I would use some Expressions Vinyl on because when you have a Silhouette machine and some vinyl, no blank surface is safe in my house!
easy to make school mascot tray

I found these trays at our local Japanese dollar store. It was $3 for the tray. I used a dark blue series 51 gloss outdoor vinyl sheet and jazzed it right up.

Using a high school mascot cut out of vinyl to create a custom tray for a graduation party

I have a full tutorial on how to use any image to cut in your silhouette. You can find that here. It's as easy as finding an image {I used the image from the school website} and selecting the trace feature in your Silhouette software. It's as easy as that!

Simply cut and apply your vinyl to your tray. This vinyl is waterproof and weather resistant so it's perfect to be used on a tray outside with and around food items.

Using a high school mascot cut out of vinyl to create a custom tray for a graduation party
It's fun to be able to personalize just about anything with vinyl. Expressions Vinyl is my favorite vinyl supplier. You can find vinyl for every surface and every project. Now go, vinyl all of the things!
dislaimer: this post may have affiliate links. By clicking on them and purchasing through them, I may receive a small commission. These small purchases help me to continue to keep writing content and creating at Holy Craft. Thank you!
0

Customized monogram slippers

As a thrifty crafter, I'm always on the look out for plain surfaces that are cheap so that I can customize them and make them my own. If you hadn't noticed, sometimes finding plain items to use can be hard. Finding plain items that are cheap can be even harder! But, I'm always up for the challenge! Some of the best places to look are in the clearance rack {Target has some great tank tops I love to use HTV on} and of course, my favorite, at garage sales. 

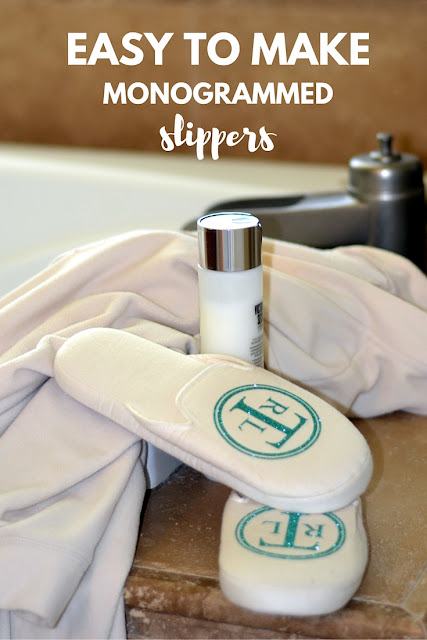
easy to make monogrammed slippers using heat transfer vinyl

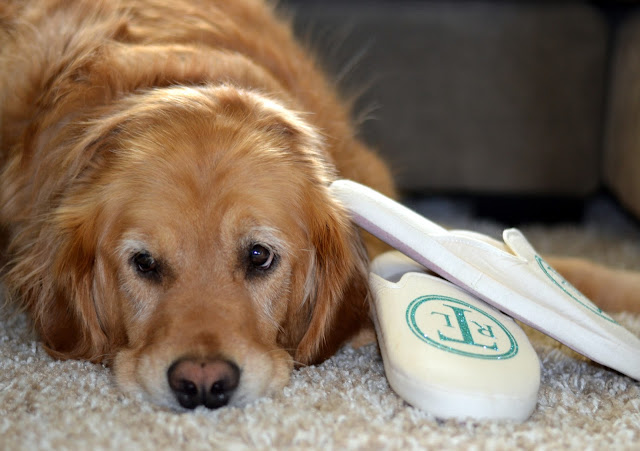
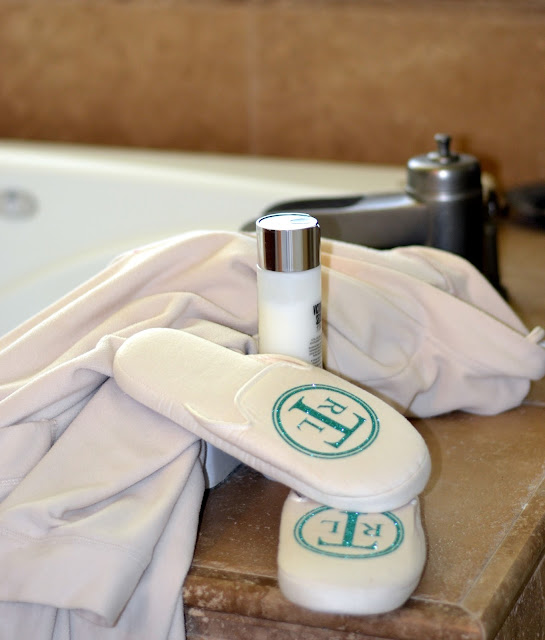
I found this plain pair of slippers {they were originally from Victoria's Secret} for $3 and couldn't wait to get some sparkly heat transfer vinyl on them. I'm showing you how to make them today.

easy to make monogrammed slippers using heat transfer vinyl


I'm always a big fan of showing you before and afters. The plain slippers were just fine, but, they needed a little something don't you think?

easy to make monogrammed slippers using heat transfer vinyl

I used my Silhouette design software to create a monogram. Don't overthink it. You can follow Melissa's tutorial on how to create a monogram here, or simply do what I did and create two circles and make your letters different sizes. Easy peasy. I'm telling you this because I overthought it. Not all letters look good in a monogram. Trust me.

Cut your heat transfer vinyl out. I used this glitter HTV from Expressions Vinyl. I've never used it before and I thought that maybe it would be harder to use, but it cut like butter and didn't have any problems transferring to my slippers. I'm sold!

If you have never used HTV before you can find a full tutorial on how to cut it here.


Some HTV tips for you:

Always reverse your image
Put your HTV shiny side down into your machine
Always double cut and use a mat
Use a lightweight piece of cotton to iron your transfer on
Press your iron firmly and for at least 20 seconds in each area
Let your transfer cool and then peel {unless otherwise noted on your medium}


I think Sophie is thrilled with me trying to teach her how to fetch my slippers for me.

easy to make monogrammed slippers using heat transfer vinyl

These monogrammed slippers would be great for a wedding shower gift, for a hard to shop for teenage girl, or really, for just about anyone.

easy to make monogrammed slippers using heat transfer vinyl

Keep your eyes peeled for those blank items that you can jazz up a bit with your Silhouette machine. Think outside the box. You don't just need to put heat transfer vinyl on t-shirts. The possibilities are endless!

easy to make monogrammed slippers using heat transfer vinyl

dislaimer: this post may have affiliate links. By clicking on them and purchasing through them, I may receive a small commission. These small purchases help me to continue to keep writing content and creating at Holy Craft. Thank you!
0

Small Box Turned Into A Custom Sign

It's gearing up for my favorite time of the whole year. It's nearly garage sale season! Is anyone else excited? I'm dying. I can't wait for Friday and Saturday mornings to be spent looking for good deals, future projects and other crap I just can't live without.

Last week, I got a little garage sale teaser when a random sale popped up just down the street. I stopped in and picked up a small wooden box for a quarter. I was thinking outside of the box {see what I did there?} and crafted a little handmade sign simply by turning the box on it's side, painting it and adding vinyl. 

Plus I added my new favorite, Deco Foil! I kind of want to foil all the things. Come on over and see how I made this. You won't look at a box the same way again!


You might look at this and see a wooden box. Heck, I did at first.


But once I turned it on it's side, I noticed a little lip on the bottom creating the perfect frame for a fun vinyl saying. Do you see it? So I slapped on a coat of paint and narrowed down what I wanted my new sign to say.


I love my Silhouette machine. If you don't have one, you seriously need one. If for nothing else than to cut out vinyl to create custom projects. It's a crafting game changer. You can find a great price on this starter kit with a whole bundle of supplies to get you started.

I used my favorite vinyl from Expressions Vinyl. I've never tried the glitter vinyl but I love it! I measured the space that I had and made a rectangle in my Silhouette design software. Then I found a font that I liked and the rest is history.

I used my transfer tape to transfer the glitter vinyl on to the box.


If you haven't tried Deco Foil yet, you totally should. It's my favorite new craft thing. I used double sided adhesive and cut that out on my Silhouette machine in an ampersand. I removed the back paper to make it sticky and put it on the box and then followed the directions for the Deco Foil.


easy to use gold foil

It was so easy. I promise, you will be obsessed! And then all the things in your life will start to get foiled.

you & me custom wooden sign created with vinyl

The best part about garage sales is stocking up on new supplies you can use for creating. Sometimes all it takes is to start thinking outside of the box.


I'm joining in with some other bloggers to share our Silhouette projects. Make sure you go check them all out!


1. My View From Home - Teacher Apprecation Watering Can

2. Holy Craft - Easy Vinyl and Foil Sign From Old Box

3. Patina Paradise - Painted Wood Mason Jar Door Hanger

4. Dwell Beautiful - Customized Coldplay Song Lyric Tote Bag

5. C'mon Get Crafty - Silhouette Shirt: Silhouette Monthly Challenge

6. Tried & True - Teacher Appreciation Travel Mug

7. Morena's Corner - Silhouette Wall Art

8. Simply Darrling - Easy DIY World Map with Hymn Quote

9. DIY Passion - DIY Cake Toppers and Birthday Banners

10. Dream Design DIY - Hangry Kitchen Tray

11. Pocketful of Posies - Thonet Yardsale Chair Makeover into One of a Kind Office Chair

dislaimer: this post may have affiliate links. By clicking on them and purchasing through them, I may receive a small commission. These small purchases help me to continue to keep writing content and creating at Holy Craft. Thank you!
0

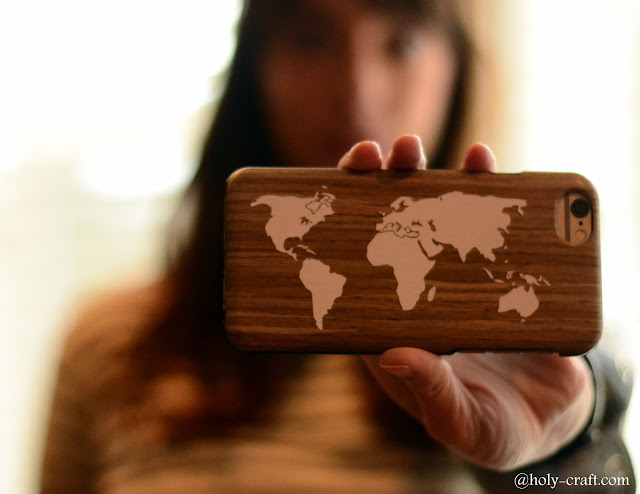
DIY custom phone case using your Silhouette Cameo

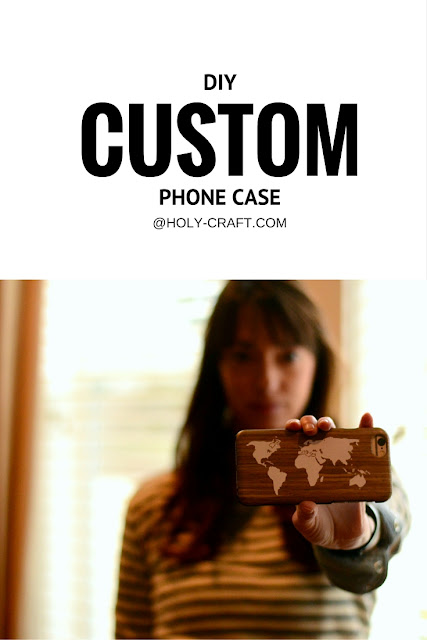
I think the best part about having a Silhouette Cameo is that you can use it to create custom anything... custom t-shirts, custom invitations, custom home decor. You can pretty much customize anything you can think of. I recently picked up a plain phone case on super clearance {it was marked down 90% off!} and I decided that it needed a little jazzing up. So here you go friends. A tutorial on how to make a DIY custom phone case using your Silhouette Cameo.
DIY custom phone case with vinyl and your Silhouette cameo

The best part is, the vinyl isn't permanent, so I can change it out anytime I would like to update and create a new custom phone case. Are you ready? Let's get started.


For this project you will need:
Silhouette Cameo
vinyl {my favorite is from expressions vinyl}
transfer paper
plain phone case

I love the look of the wood phone case so I was happy to find it at a local shop for $3.75. Quite a deal. I just knew that it needed a little design on it, which is where this whole project comes into play.


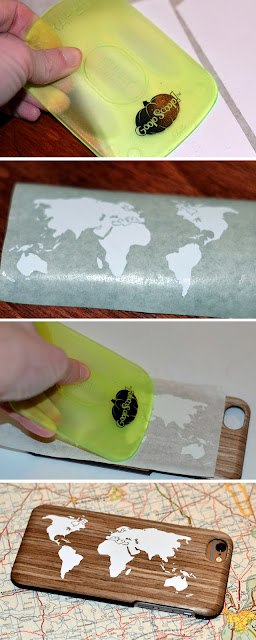
I started by finding a design that I wanted to use. I went with an image of the world that I wanted to use. Make sure the image you want to use isn't copyrighted before you save it. Open up your image in your Silhouette design software. One of my favorite features in the design software is the trace feature. I use it all the time because it allows me to use just about any image that I want any way that I want. 

You can find the full tutorial on how to use the trace feature here. Because I have the full tutorial, here is just a quickie run down. Open your image, select trace area, use the trace settings to highlight the features you want and then select trace or trace outer edge. Then drag the original image away and you will be left with you image that you just traced. It should be outlined in red. Those will be your cut lines. I use the eraser feature to get rid of any extra lines or small spots that aren't necessary in the design and then send it to my Silhouette to be cut.

I love Expressions Vinyl and highly recommend their products. They cut like butter in your machine and weed super easily.  Once you have your cut image, use your transfer paper and a fancy straight edge {I use this pumpkin scoop} to make sure your image transfers to your transfer paper.  Once your image transfers to the paper, line it up on your surface that you want to put it on. In my case, my cell phone case. Use your straight edge again to transfer the vinyl from your transfer paper to your case and you are done!

DIY custom phone case with vinyl and your Silhouette cameo

I love my new custom phone case! I also have a clear phone case and am working on using my Silhouette to update that as well so stay tuned.


DIY custom phone case with vinyl and your Silhouette cameo

I'm part of a group of bloggers who are sharing their Silhouette projects once a month. We are calling ourselves The Silhouette Creators. I always love the inspiration I find from other people's projects. It always gets my wheels turning! Make sure you go and visit them and give them each some love.

silhouette creations from The Silhouette Creators


Hobnail House - Spring Cutout Banner

Pig and Rabbit - Princess Party Favor Bags

Pocketful of Posies - DIY Paper Olive Plants

DIY Passion - Wood Shim Wreath with Paper Flowers

C'mon Get Crafty - Sleeping Baby Delivery Sign

Tried and True - Easter Bunny Carrot Plate

Holy Craft - DIY Custom Phone Case

My Life from Home - Easter Candy Bucket

Knock It Off Kim - Bunny Paper Cut Vase

Dwell Beautiful - Harry Potter Accio Coffee T-shirt

Morena's Corner - Custom Flocked Birthday Card

Simply Darrling - Upcycled Nautical Anchor Serving Tray

Green With Decor - Making Food Party Labels Using Silhouette Machine

Creatively Southern - How to Make Chalkboard Sign with Silhouette Vinyl

Craving Some Creativity - Print and Cut Silhouette Closet Organization Tags

Vintage Romance Style - How to Create Your Childs Silhouette

dislaimer: this post may have affiliate links. By clicking on them and purchasing through them, I may receive a small commission. These small purchases help me to continue to keep writing content and creating at Holy Craft. Thank you!
0

Using a photograph to make a custom t-shirt with your Silhouette plus 17 inspiring silhouette crafts from other bloggers

I am so excited about today's post! I not only have an awesome project to show you with my favorite heat transfer vinyl, I also am giving away the chance to win one of my favorite craft products of all time...a Silhouette Cameo! EEEKKK! Want to know what the cherry on top is? 16 other amazing bloggers coming together to show some pretty amazing Silhouette crafts. If you don't have a Silhouette yet, you will be adding one to your list!

My oldest son has become a pretty amazing photographer. He mostly uses his iphone for photos because it's what he has on hand. Last week, he was downtown Seattle with some friends at snapped a photo of the Space Needle.

seattle space needle

Not only is the Space Needle iconic to Seattle, it also holds a special place in my heart because that's where my husband proposed.
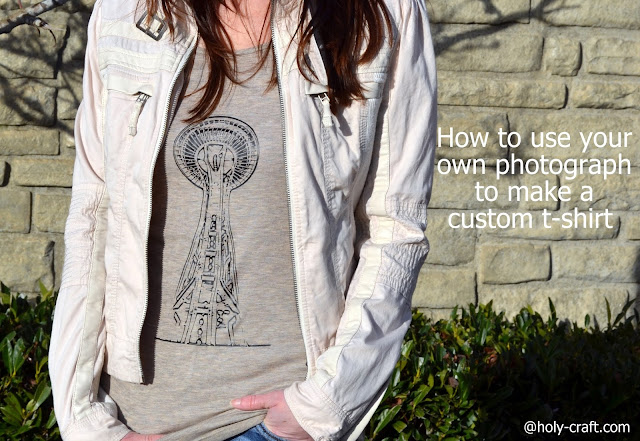
I'm going to show you how I took his photograph and turned it into a custom t-shirt by using my Silhouette machine.

using a photograph to make a t-shirt

I also can't wait to share with you 17 pretty amazing Silhouette crafts made by some pretty awesome bloggers! Make sure you check them out! 

If you don't have a Silhouette, read on to find out how you can win a Silhouette Cameo II of your very own!
Cheeky Snack and Dip Cup SetI have found the one whom my soul lovesSilhouette Came ProjectSilhouette Cameo Tote BagSilhouette CraftPaper Boxwood WreathSilhouette Wall ArtDIY Shirt using Silhouette MachineDIY CoastersDIY Makeup Organizer using Silhouette DIY Milk Bottle Glasses using Silhouette MachinePrincess Cupcake Toppers DIYDIY Shirt Silhouette MachineChalkboard Workout Schedule using Silhouette MachineTribal faux embrodery pillow Silhouette MachineValentines Day / St Patricks Day Sign Silhouette MachineImage Map
Pocketful of Posies - Sultry and Saucy One of a Kind DIY DIP Cups

Hobnail House - Silhouette Craft Blog Hop: Cut Vinyl Art Upcycle

In The Loop - How to Create a Silhouette Using the Silhouette Cameo

Craving Some Creativity - Silhouette Project Challenge: Distressed Laundry Room Sign

DIY Passion - Cheeky DIY Tote Bags that will Make You Smile

Domestic Abiliy - Paper Boxwood Wreath

Our House Now A Home - A Silhouette Giveaway and Creating New Wall Art 

My Life From Home - Silhouette Challenge: What's Cooking? Recipe Holder

Holy Craft - How to Use a Photograph to Make a Custom T-Shirt with Your Silhouette

Knock it Off Crafts - DIY Otomi Coasters using a Silhouette Machine and Silhouette Giveaway!

One Project Closer - DIY Princess Party Decorations 

Dream Design DIY - Chalkboard Workout Calendar and Silhouette Giveaway

The Country Chic Cottage - Makeup Organizer

Refresh Living - Custom Word Throw Pillows with Vintage Fabric

The Deans List - Scalloped Milk Glass for Valentine's Day

Tried & True - "Life Is Good" Bicycle Lover's Tee


So many great projects out there, but first...how to use a photograph to create your very own custom t-shirt. This tutorial uses a few of my favorite silhouette software features.
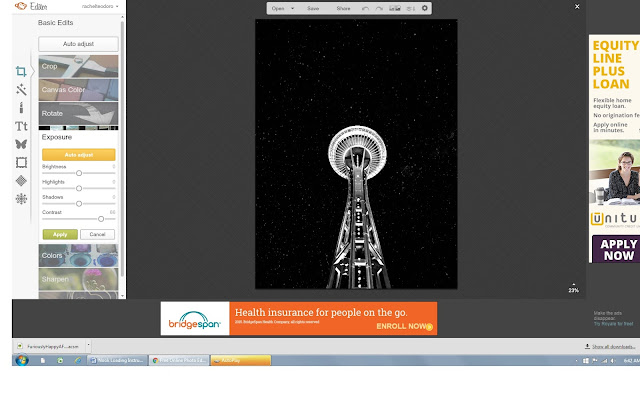
I started by taking the photo and opening it up in PicMonkey. I wanted to change it to black and white since you really need the contrast for our next step.  While you are in PicMonkey, go to exposure and auto adjust your contrast as high as you can go and still have your necessary details.
picmonkey editing features to create silhouette
Once you have that done, save your image and open it up in your Silhouette software. If you want to know how to use any image with your silhouette software, you can see this tutorial. I love the trace feature and if you don't know how to use it yet, you are going to love it!

This is just a partial tutorial since you can find the full tutorial on how to trace above, so sorry if I miss any details, this will cover the high points.  Select trace area, highlight what you want traced, 
make sure high pass filter is selected and move it until your image is lit up like a Christmas tree, and then click trace. 

trace feature on silhouette

Once you have done that, you can move your original image over and you are left with your red cut lines. Amazing right!

silhouette trace feature
I used the erase tool to clean up some of the lines, but really, I like most of them being there and with the exception of a few random strays, I didn't erase too much.

This image didn't really have a "right" side so I didn't need to mirror it, but if you are using an image that has lettering or a true left and right don't forget to mirror it!

I keep my eyes peeled for sales on plain t-shirts throughout the year. I found this tank top on clearance at Target for $3.50.  I also buy blank t's at garage sales and if you would believe it, the dollar store even has then sometimes.

Target clearance blank t for crafting

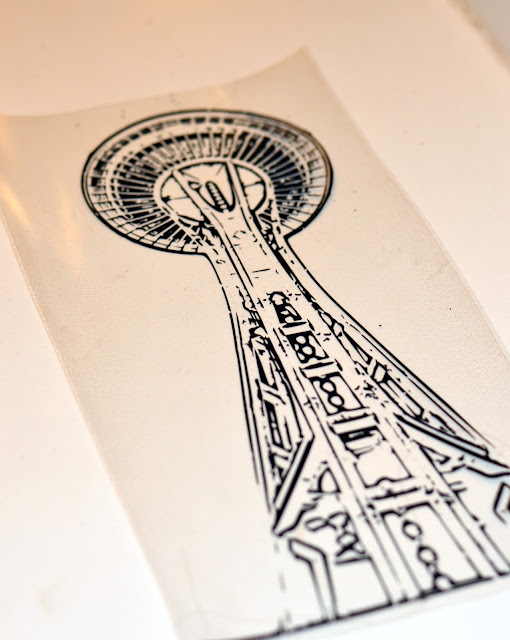
I am not going to lie, this design took a LONG time to cut out on the Silhouette. It has a lot of detail that I didn't want to skimp on. If you notice some of the lines are missing on some places. I actually really like that in the design. I think it makes it look more screen printed.

I expected this design to also take a really long time to weed, but it didn't. I love Expressions Vinyl their heat transfer material works amazingly and cuts like butter.  But the last time I made an intricate design it took me a few hours to weed the design, so I was prepared and if you do the same thing, you should be prepared too, just in case!

space needle HTV


I love using heat transfer vinyl and wrote a post on how to cut heat transfer vinyl like a pro. I'm assuming you have already read it and know all the tips so you are ready to iron on your cut image. 

I always set my iron to a cotton setting and once I get my design placed just right on my t-shirt {or whatever blank medium you are using}, I have a thin cotton scrap of paper that goes on top of my design before I iron it. I have learned that you need to press hard with your iron and keep it in place for at least 30 seconds. I always go over and up and down my design several times. 

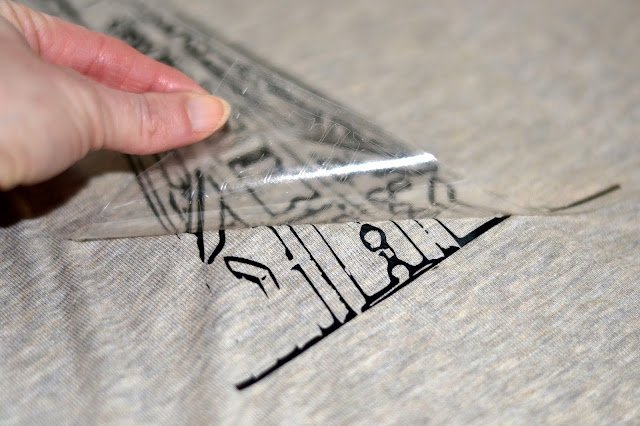
Another tip is to let your plastic cool and then use the back of your hand to rub the top of the design to make sure it's firmly in place. Then simply peel back your plastic cover and your design should be adhered to your shirt.  I always use my iron with the cloth and take one more sweep over it all to make sure there is no peeling vinyl. We want that design to be stuck there for many washings!

HTV image on t-shirt

That's it! It's super easy to take any image and create your own design. {Not so easy to open your eyes all the way when staring into the sun apparently.} 

space needle tee shirt

I think it's pretty cool that I was able to use a photograph that my son took and created something wearable out of it.

heat transfer vinyl space needle shirt

space needle tank top

You might also like these other silhouette tutorials


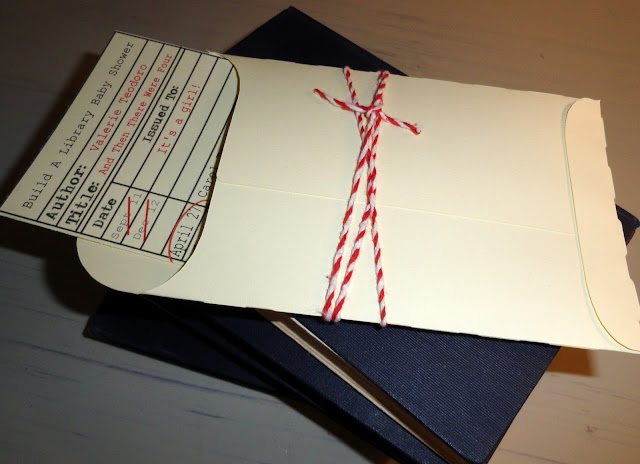
baby shower invitations that look like library date cards


silhouette project ideas

How to use any image using your silhouette software
super hero cape

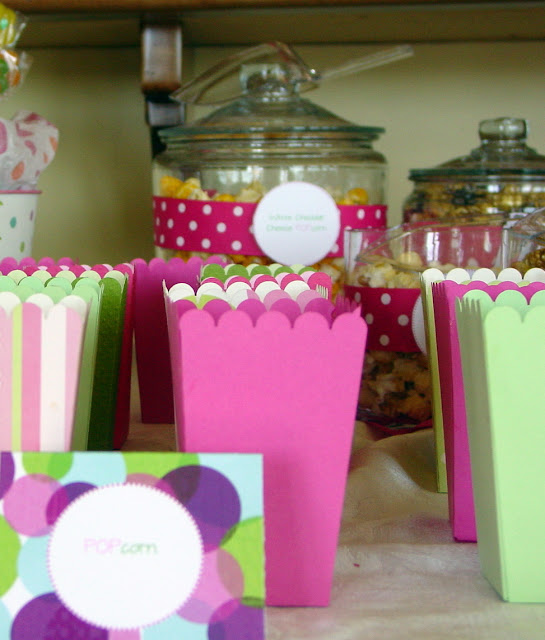
Silhouette popcorn containers
popcorn treat boxes
You can also use my search bar right on over there on the right to find other silhouette projects. 
If you don't have a Silhouette machine this post and all the other cool projects by bloggers is probably making you drool and wish you had one. Seriously people, it takes crafting to a whole new level! If you don't have one, put it on your wish list! This is the one I just got to replace my original one. It will change how you create!
disclaimer: there may be affiliate links in this post
0
Back to Top