Apple Chutney recipe

Part of the reason why I love blogs and blogging is that you get to meet people from all over the world and you get to learn all kinds of new things.

Today, as part of my small blogger guest series
I am excited to introduce to you Jude from the other side of the pond as they say.
Jude can normally be found blogging at Cocojude
but today, she is here showing us how to make an apple chutney.


My name is Jude and I live in Brighton, South East England.  
I enjoy all sorts of craft, and tend to dabble! 

 Each year, I have got into a routine of making apple chutney, which I then palm off to as many people as I can. The reason for this is that my grandma has a very old apple tree in her back garden. Most years it produces masses of cooking apples. Last year there were no apples at all, probably down to all the rain we had in the UK, but this year the tree was back on form. So when we went home the other week, I came back with a huge bag full to make apple chutney. I have been waiting for a full day to tackle the job properly, as it involves a lot of peeling and chopping and mess!

  jars of chutneyIngredients (This makes around 10 jars of chutney)
  • 1.5 kg cooking apples
  • 500 g onions
  • 500 g sultanas
  • 750 g demerara sugar
  • 500 ml cider vinegar/white wine vinegar
  • zest and juice of 2 lemons
  • 1 small chilli
  • 1 tsp ground ginger
  • 1 tsp ground all spice
  • 1/2 tsp cinnamon
  • pinch of ground cloves
  • 1/2 tsp salt
  • 8 pepper corns
  • 1 tbsp mustard seeds
Recipe
  1. Wash, peel, core and chop the apples into fairly small chunks.
  2. Peel and chop the onions.
  3. Measure out and then add all the ingredients into a big pan and bring to the boil slowly. Stir until the sugar is dissolved.
chutney ingredients

Simmer gently until thick, stirring occasionally. The chutney is done when you can drag a spoon along the top and it leaves a track mark. It should take over an hour.
Pour into sterilized jars while both chutney and jars are still hot, and seal.
    To sterilize the jars 
     Preheat oven to around 130 degrees
     Wash out the jars with liquid and water, then rinse them in really, really hot clean water. 

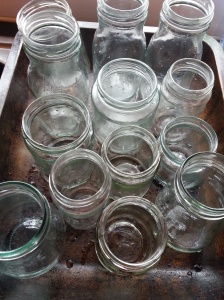
    sterilising jars


    Put the jars on a baking tray in the oven for around 15-20 minutes, until the water has dried off. I put the lids through the same process. The chutney stores for years, and is best when you leave it for a few months. It is really good with sausages and cheeses like cheddar.

    Oh my goodness, doesn't that look fantastic!
    If you are looking for a hostess gift or a holiday gift for your neighbors, I think this would fit the bill!
    Thanks Jude for sharing.
    Please head over and see what other things Jude is doing on her blog.

    0

    My picks for the 12 best books for boys

    I'm a big reader.
    In fact, I've shared with you a ton of my book recommendations over the past few years, but I don't think I have ever shared with you my recommendations for books for kids.

    We do a lot of reading in our house
    and it's translated into kids who love to read.

    My youngest son {8} has been on a huge reading kick, so I thought I would share with you a few of the books that we have read together and some that he has read on his own.

    All kid tested!
    All would make perfect gifts this holiday season.
    So pin this, and get your list started!
    1. Treasure Hunters by James Patterson was a page turner.  My son would ask multiple times a day to sit down and snuggle just so we could read a few chapters.  Treasure Hunters is a story of four siblings raised on a boat whose parents are under sea treasure hunters.  The Kidd kids work together to solve the mystery that their father left them before being swept off of the boat in a storm.

    2. The One and Only Ivan by Katherine Applegate is probably one of my all time favorites!  I read it out loud with my son, we passed it on to my husband and then to my daughter.  Ivan is a story that has been inspired from a true local story of a silverback gorilla that was locked in captivity for 27 years.  It's told from Ivan's perspective and it's an interesting look at the relationship of humans and animals.

    3. Leonardo the Terrible Monster by Mo Willems is a story about a monster who isn't so good at being scary.  It's a picture book, but one we don't get tired of!

    4. The Thief Lord by Cornelia Funke is a story of two orphaned brothers who run away to Venice and find a friend in the leader of the lost children that calls himself the Thief Lord.  The boys enter into a life of petty crime and end up with a detective hot on their trail.  But not for what you would think!

    5. Diary of a Wimpy Kid series by Jeff Kinney is a series that all three of my kids have devoured more than once!  It's a hard book to read out loud but it's a great book for the kids to get their feet wet with chapter books.

    6. Gregor the Overlander series by Suzanne Collins...yes, the Suzanne Collins of The Hunger Games fame.  Gregor is a young boy in New York on a mission to find his father.  He falls into a grate in the laundry room of his apartment and falls into an underworld full of large bats, cockroaches and evil rats.  Through the series Gregor grows and matures as he faces new challenges and becomes a warrior in this Underland.

    7. The Notebook of Doom by Troy Cummings is a new book series that we picked up last week at the Scholastic book fair.  Owen just ate the book up in one sitting, got the next book in the series from the library and finished that in record time too!  I just love a series that engages kids and gets them reading.  
    8. The Hardy Boys by Franklin W. Dixon is a series that my husband and son keep coming back to.  My husband grew up on this series and my son is loving the many adventures that these brothers go on together.
    9. Double Fudge by Judy Blume is one of my favorite books to read out loud to the kids.  In fact, I love the whole series!  Fudge is the hilarious kid brother of Peter Hatcher and the real life drama is something that all kids can relate to.
    10. Holes by Louis Sachar follows a boy named Stanley who has unjustly been sent to a youth detention center where the boys have to dig holes all day in the hot sun as punishment.  It doesn't take long to figure out that there is more that is being looked for in digging these holes than just character improvement.  It's a great story with a fun twist on the curse that Stanley has been given by his Great Great Grandfather.
    11.  Junie B. Jones by Barbara Park is hands down my favorite book series of all time!  The writing and improper use of grammar takes a bit to get used to as a reader, but once you can figure out how to read the books, Junie B. Jones is hilarious!  We can all relate to this outrageously sassy 7 year old.
    12. The Dangerous Book for Boys by Hal Iggulden is the complete book of skills every boy should know.  From building a tree fort, to tying knots and learning to fish, this book has anything and everything your little man needs to know or might be interested in knowing about!
    Those are my recommendations.
    Hopefully I found a book or two you can add to your gift list for that favorite little guy in your life.
    Do you have any you would add?
    0

    10 minute skirt from a dress I paid for by the pound!

    On Monday I shared with you my latest thrift shop excursion.
    One of the stops on our shopping trip was to the Goodwill Outlet.
    If you aren't familiar with the Goodwill Outlet, 
    it's the final attempt at selling donated goods at Goodwill.
    Most of the items are priced by the pound.
    There are no fitting rooms or mirrors,
     so you sometimes end up with items that don't fit or don't look right.
    You may like the feel of a fabric, the look or the brand, 
    either way, you are usually taking a gamble.
    When I gambled on a grey and black striped dress
    {I thought it would be cute with leggings, boots and a sweater}
    I ended up losing out on the dress but I won when I made this easy 10 minute skirt!
    This is the dress.
    It had an empire waist with elastic, which actually ended up giving me more fabric for the skirt to work with.

    I started by detaching the top from the dress bottom and cut just below the elastic on the top.


    I folded the top over to make the casing for a waistband and to shorten the skirt to an appropriate length.


    I pinned the fabric down when I had a consistent spacing all along the top.
    I just eyeballed this measurement, but if you want, you can use a hem gauge.


    I sewed around the waistband leaving enough room for my elastic and also leaving a small opening for me to thread my elastic.


    I got out my elastic, measured it around my waist and cut the length I needed.
    I used a safety pin to help me thread the elastic through my skirt waistband.
    This step probably takes the longest, and really, it doesn't take that long!

    One the elastic is in place, sew your elastic together and then stitch the hole closed that you left open in your waistband.


     The skirt literally took me 10 minutes from start to finish!

    Check out that scarf.
    Does it look familiar?
    It should!

    It was the infinity scarf that I showed you on Wednesday that I made from a twin sheet.


    Do you ever remake your clothes?
    Take ill fitting to awesome?
    I want to hear about it!
    0

    Infinity scarf tutorial...you will never guess what kind of fabric I used!

    On Monday, I shared with you my latest thrift store experience.
    One of the things I picked up at the Goodwill Outlet was a grey twin sheet made out of jersey material.

    Today, I'm going to show you how I took this paid for by the pound sheet and turned it into this infinity scarf.


    When you are at the Goodwill Outlet and searching in bins with hundreds of clothing items, sometimes your hands do the picking for you.  
    I felt this soft grey fabric and thought it was a t-shirt.
    I pulled it out and found that it was a twin sheet.
    There were no holes in it, the seams were all in tact and the sheet was free from stains.
    I immediately thought I would use it to make an infinity scarf.

    I started by folding the sheet in half with the fold on the far left side of this picture.


    I literally just bought a new scarf a few days prior and used that as my pattern.
    **tip: making patterns is easy if you use an existing item that you like as your guide**

    I laid the scarf out on my sheet.
    I used my measuring tape {for my readers at home}
    and cut the sheet in half at 32" wide.


    Next, I went to the long end on the opposite side of the fold and cut the sheet down to 36".


    There you have it
    1 sheet makes 2 scarves


    If you cut on the fold, you will only need to sew one seam.
    You will be sewing the end closed that is on the opposite side of your fold.
    I don't do anything fancy to finish the seam, though you could sew a french seam if you were feeling snazzy.


    That's it!
    A new infinity scarf you wouldn't believe came from a 50 cent twin sheet from the Goodwill Outlet!


    Check back on Friday to see how I upcycled another of my Goodwill Outlet finds.
    0

    Thrift shopping in Tacoma

    Last week, I went thrift shopping with my friend Mandi.
    You know, the Mandi from Persnickety's Awesomeness Emporioum.
    Earlier this year, Mandi and I visited the Goodwill outlet in Seattle for the first time.
    It was an experience!
    I may or may not have gotten spoken to {in a loud voice} about following the rules of the Outlet and been threatened by the Goodwill security.
    Since hearing that they opened a Goodwill outlet a little closer to home in Tacoma, we decided we were going to go together to see how they compared.
    It took us about 6 months to schedule a day that worked for both of us.
    Yikes!
    Mandi needed to fill her shop, and I needed to find some bargains.
    Here are a few of the places we shopped at.

    Deseret Industries in Federal Way
    While I can't say I have found the best finds at the store, I really haven't given it a fair chance.
    I think if you are going to be serious about thrifting, you need to go to a store multiple times a week to find the good stuff.  
    People tell me all the time that they never find anything good at garage sales, but if you only go to one garage sale on a Saturday, you aren't going to find the good stuff that I find by going to 20 garage sales.
    I digress...
     Deseret is less expensive than my local Goodwill and has similar donated merchandise.
    The clothing prices confuse me and the powers that be that make up the prices seem a bit confused on the quality of brands.  The Wal-Mart brands seem to be priced higher than some of the "better" brands.  
    Some of the clothes on the racks make me shake my head because I'm not sure who would buy the out of date 90's romper or the t-shirt with the armpit stains and name inscribed on the back.
    To each his own though.
    The household items and furniture are worth taking a look at because the price is right most of the time.

    Our next stop was the 
    Tacoma ReStore
    I've been in a few Habitat for Humanity ReStores and haven't been impressed, however, this Tacoma location was one of the better stores I have been in.
    The furniture prices were expensive {that large hutch was over $2,000} but there were some good finds to be had.  Mandi picked up a huge antique mirror for $25.  And if you are looking for building supplies for a small area, and you aren't too picky, the ReStore is a good place to start.
    We made our way to the 
    Goodwill Outlet
    just down the road from the ReStore.

    Compared to the Seattle location, this Goodwill outlet seemed to have less vintage finds.
    However, the shoes were rubber banded together {easier to find a match}
    and the clothes seemed to be in better condition {no crotch holes}.
    There were similar rules {and I was told more than once that the Goodwill employees had the right to kick me out and ban me from the store for up to a year if I didn't follow them}
    and just as many regulars.

    One guy I chatted up was recovering from an injury at work and he said that he stopped in a few times a DAY to shop for bargains.  He said he mostly gets things to take with him to Mexico to resell.  

    I found that this Tacoma location had better prices than the Seattle location.

    Final stop
    Bargain World
    I've driven past this store about 100 times and never stopped in.
    Bargain World gets mixed reviews on Yelp, some people swear by the great finds they get {Joe's jeans for $10} while others think of it as a ghetto Goodwill...and that's saying something!
    I was unimpressed.
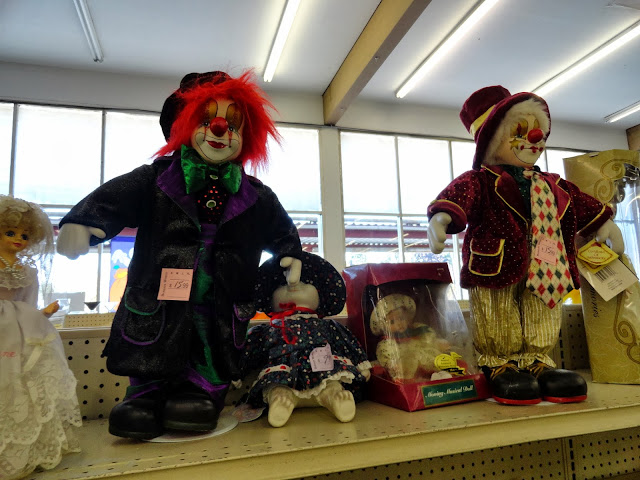
    What always makes me wonder is why these creepy clowns are priced at $15.95

    and this tufted headboard is only $5.95?
    The stock seemed low and the prices for most of the items seemed too high.

    If I had a gun to my head and could only pick one thrift store in Tacoma to go to for the rest of my life, it would be the Goodwill Outlet.
    The cheap prices and good quality merchandise I walked out with make it worth a stop another day.
    I'm still not a willing thrift store shopper.  
    I love my garage sales.
    But if I get the itch for a deal, I know where to go.
    What are your favorite thrift stores?
    Maybe I can be converted.
    0

    I ate a bug and I liked it!

    This is a Sponsored post written by me on behalf of The Orkin Ecologist for SocialSpark. All opinions are 100% mine.
    My husband and I attended Purdue University.
    Every spring, they host a bug bowl.
    Just before we graduated and moved from Indiana to Washington state, we spent some time at Purdue's bug bowl with our 1 year old son.  
    The events of the day, even inspired us to host our own cricket spitting contest.
    The bug bowl also had the culinary arts department whipping up some lovely bug delicacies, which is when I first became aware of eating bugs as food.  
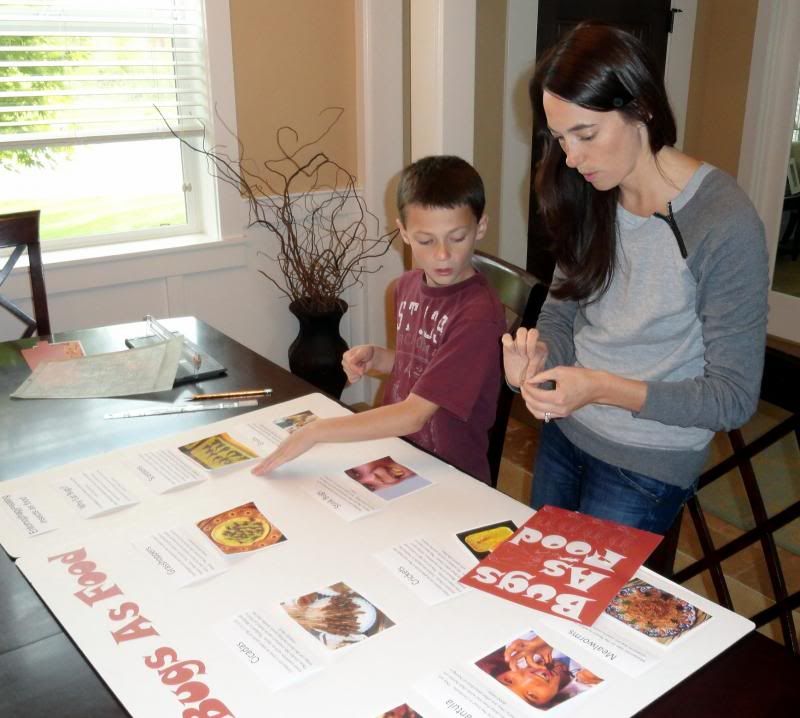
    Recently, I had the opportunity to work on a science fair research project with my 8 year old son.  The only guideline was that it had to be bug related.
    We both immediately remembered our cricket spitting days last summer and decided to research using bugs as food.  Turns out, eating bugs are quite common in other countries.
    We spent a few hours researching bugs that could be food on the internet.
    We found some great facts and some even better pictures of the food that was created with the bugs.
    http://i19.photobucket.com/albums/b176/teomom/bugsasfood.jpg
    In true science fair style, we made a tri-fold board that collected all of our research in one place.
    One of the websites that we found most helpful in our research was the The Orkin Ecologist.  We all know and trust the Orkin name as the leaders in pest control so who better to turn to to find out more fascinating facts about those creepy crawly bugs that they work with and have studied for over 100 years!
    Did you know that meal worms take on the flavor of the item they were cooked in?
    Scorpions are often eaten dead or alive, almost always skewered and grub worms have a gooey center that tastes a little bit like peanut butter!
    Eating bugs provides you with a great source of protein and good fat.  They are also extremely efficient to raise and more ecological!
    Once we were finished with our poster board, we thought we would give some bugs a try!
    Our local toy store carries these larvetes {meal worms} and crick-ettes in lots of different yummy flavors {bacon and cheese anyone?}
    My daughter and I tried the sour cream and onion crickets and my son chose the BBQ meal worm.
    They were crunchy!

    My kids are always fascinated by the critters that they find.  I will definitely be using the The Orkin Ecologist website again to find out more about the critters that my kids are observing, catching and playing with on their bug hunts.  
    We may not be whipping up any tarantula stew or scorpion skewers anytime soon, but we did find out a lot about the delicacies of these bugs in other countries!  And next time I'm offered a meal worm, I probably won't jump back in disgust but will open up wide and take a bite!

    Visit Sponsor's Site
    0

    My thoughts on Martha and bloggers...

    I finally had a chance to watch the Martha Stewart interview that is making waves in the blogging community.
    In the interview Martha {yes, we are indeed on a first name basis} questioned "who are these bloggers?  They aren't trained editors at Vogue magazine."
    This comment had me curious.  Was Martha an editor at Vogue? What is her degree in?  According to biography.com Martha Stewart has a degree in European and Architectural history {a degree I would probably steer my kids clear of, because really, what does one do with that?}.


    Martha Stewart is a gourmet cook who taught herself the skill from Julia Child's cookbooks.  She used this knowledge to start a catering business and then turned her skills at entertaining into publishing books on the same topic.  She's a smart business woman, who by all accounts is an expert with life experience, but no formal training.
    I think that Martha seems intimidated by bloggers taking over a niche that she once was so darn good at and ultimately seemed to have cornered.
      Martha Stewart is a brand.  
    She's a company, she's got many people who work for her and who appreciate and scour non-expertly written blogs.  {Her people have stumbled upon my blog more than once.}
    She features bloggers on her show and she caters to them.  We provide revenue for her, we support her products, we test them and then we pimp them out.  Martha even features something called Martha's circle which showcases the latest news from her community of bloggers.
    For her to downplay how important bloggers are in our social media driven world is a bit one sided when in the interview she just talked about how Twitter is a good business move for her.  Supporting bloggers and these everyday moms and women would have been a better business move for her than trying to discount how important talented every day people are who just so happen to have the guts to put themselves out there and write about the process.  
    Her comment is very Martha Stewart.  She's not known as a sensitive caring individual.  She's known as a cut throat business woman.  I used to TiVo her show and when I watched it, I always felt like I was watching a train wreck.  There was more than one occasion that she made her guests feel awkward on the show {so much so that I was cringing at home} .  Martha Stewart isn't the most humble person.  She looks out for herself and is happy to plow down anyone who gets in her way.
    People are mad at Martha.  I'm not mad at Martha because her comment isn't out of character. 
    I never really liked her as a person.  She's a smart business woman with great style and talent, but I would never want to go to coffee or spend time with her.
    {probably a good thing because I'm cutting out all of my chances to 
    be a guest on her show by writing this}
    To say that I respect her less would be more like it.
    What do you think?
    0

    Dressing up Dollar Store pumpkins

    This post was originally seen on Joyful Home and Life where I am a monthly contributor.

    I love The Dollar Store!
    There are so many great finds and for only a dollar, you can take some risks.


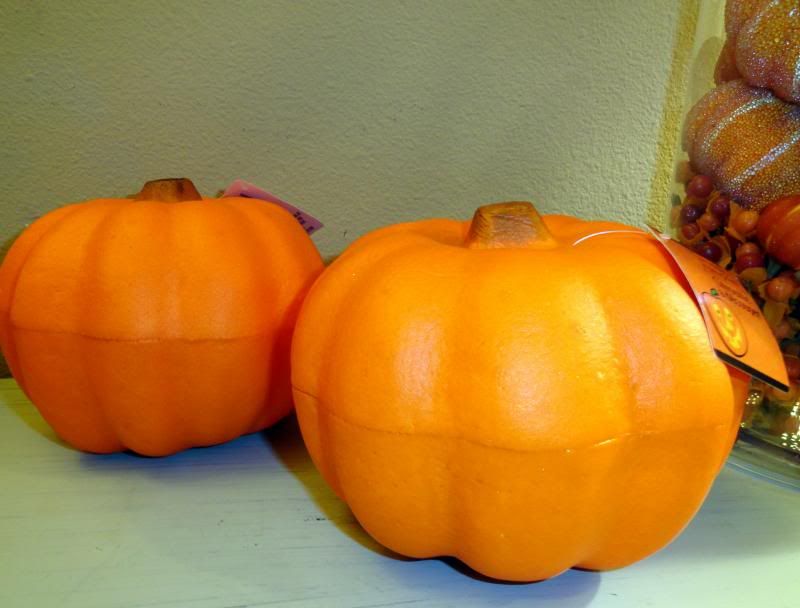
    One of my favorite seasonal items to buy are these pumpkins.
    Each year, I try to come up with something new to do with them.


    Last year, I made book page and twine pumpkins.


    The year before that I made silver glittered pumpkins


    This year, I wanted to try my hand at painting and glazing the pumpkins.
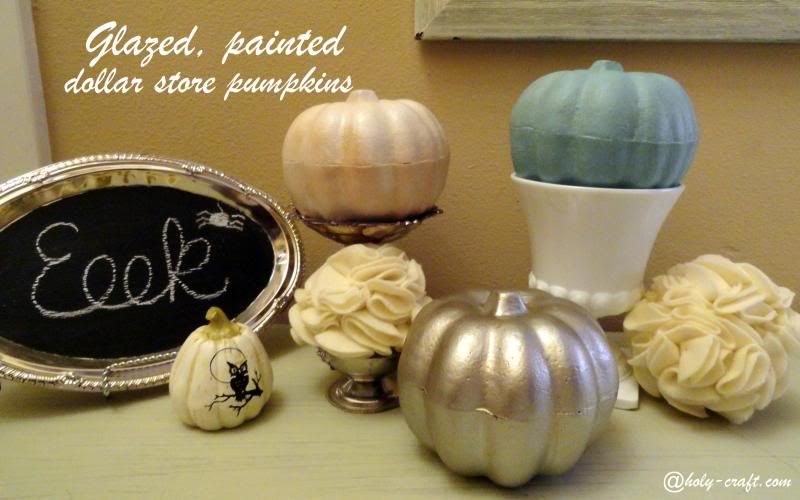
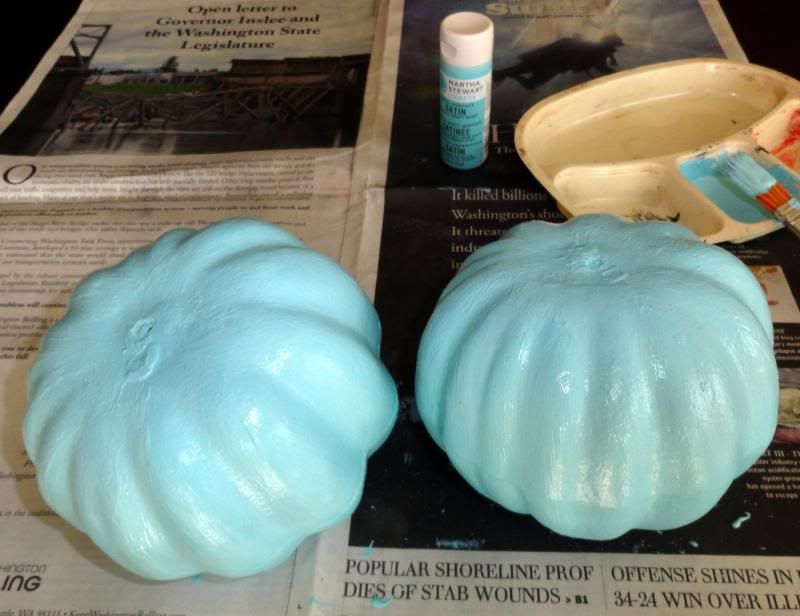
    I used Martha Stewart paints and hand painted a few pumpkins blue,


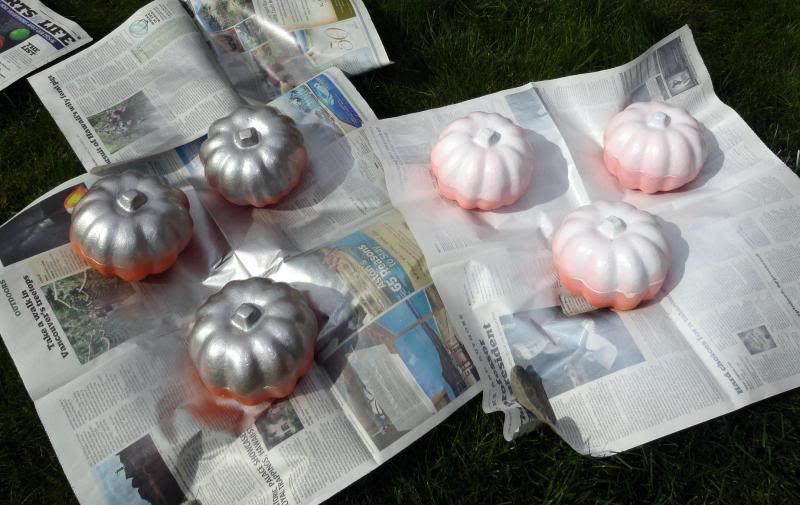
    and I spray painted a few pumpkins silver and white.


    I felt like after the paint, the pumpkins were lacking just a little dimension, so I used some dark wax to give them a little umph.
    **As a side note, I hate the line in the middle of the dollar store pumpkins.**
    I attempted to get rid of them so I sanded them down.
    DON'T DO THAT!
    It pulled the outer coating away and the paint doesn't adhere to the foam underneath.
    I learned the lesson for you!


    I ended up putting ribbon around the middle to make the seam look better.
    I also used ribbon stacked as a stem.


    There are so many possibilities for your dollar store pumpkins.
    Glazing, painting and adding ribbons are just a few of them.


    How do you dress up your faux pumpkins?

    0
    Back to Top