Best of Holy Craft 2015 a year in review

I can't believe how quickly this year came in and now it's nearly over! I've been doing this Holy Craft year in reviews since I started my blog back in 2010. It's hard to believe that I'm going on six years of blogging! That's a lot of projects a lot of random thoughts and a lot of garage sales!  In case you missed it, you can find the best of year in reviews here:
2014
2013
2012
2011
2010
This is always one of my favorite posts all year because it's fun to look back at the projects that I worked on this year. Won't you take a look back on 2015 with me and see some of those projects?
I made my first video tutorial {it also happened to be my last!} and showed you how I created this heat transfer vinyl LOVE sweatshirt from a $1 garage sale sweatshirt. I still love wearing it today.

In case a new Silhouette machine made it under your tree, and you want to try your hand at heat transfer vinyl, you can follow my tutorial on how to cut {and use} heat transfer vinyl like a pro.


When I started writing Holy Craft, I was hoping to use my blog as an outlet for my long days as a stay at home mom of three littles. Now those littles aren't so little anymore, and this blog offered me a really amazing opportunity to travel with several journalists on a media relations trip to Zambia, Africa. After my first trip to Africa in August 2014, my heart burst for the people of that continent. I have been given the unique opportunity to share the stories of those people who I met and who have changed my life forever. You can find links to all of those posts from my most recent trip here.


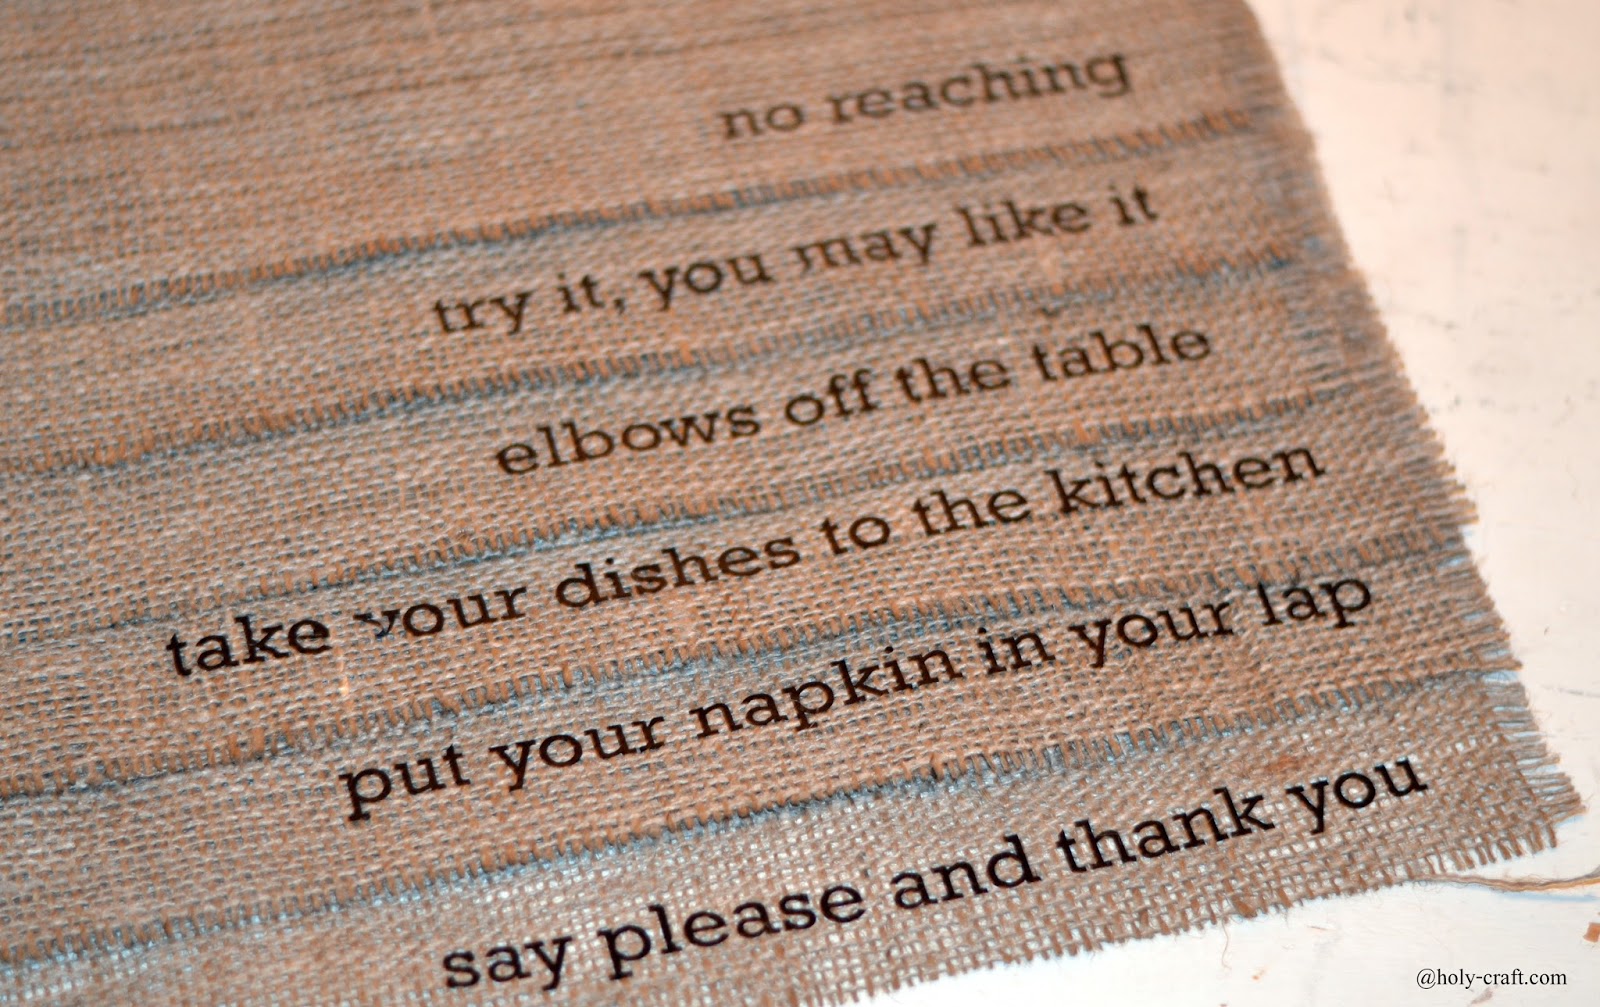
I always knew I was a bit of a wanderlust, but parenthood has kept me from traveling excessively. Thankfully, my kids are getting older and they are much easier to travel with. I made this zippered travel bag with some great quotes on them for next to nothing.


I haven't strayed away from my love of upcycling and you can find project after project of worn or boring items I have taken from blah to awesome.  This painted bowl is one of my favorites from the year.


Apparently, my love for metallic runs deep and I also upcycled this $10 secretary desk with some silver paint. 

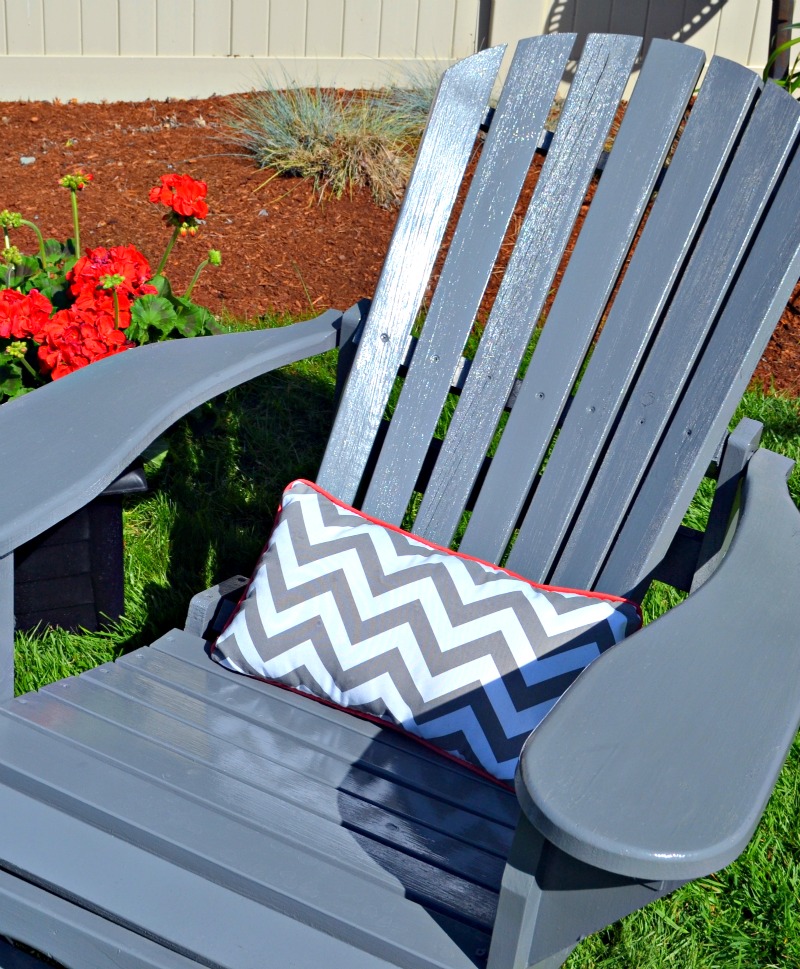
I also gave this Adirondack chair that I had had for years a little refresh with a new coat of paint and my favorite paint sprayer.


My daughter had a tie dye party with her friends and we refashioned the t-shirts six different ways. I had no idea it would be quite so popular on Pinterest, but you should see the shirts and how they were upcycled yourself.


I jumped on the adult coloring page bandwagon {or came out of the closet...whatever}, and put together a little round up of free printable coloring pages you can use. Go ahead and bust out those markers!


It's never too early to start thinking about teacher appreciation. This pencil vase was so easy to make but it looked like a million bucks!


I wrote this as a sponsored post, and I really can't tell you enough that while I love the opportunity to make money for the long long hours that I put into writing this blog, I really do only accept posts for things that I love. This chicken burrito bowl recipe is a family favorite that has made it into our dinner rotation.


I participated in a few craft challenges this year. One of my favorites was this one from Wayfair where I took boring cutting boards and made them into something that would wow in the kitchen.


I live by the beach, but not by the kind of beaches that have shells. They are mostly lined with driftwood. So I created a few projects with driftwood this year. This succulent planter is probably my favorite.


I didn't do as many sewing projects as I have done in the past, but the one that I did sew took the cake! I love this infinity scarf with snaps and wear mine quite often. You can find the full tutorial here. Make one and we can be twinsies.


I made this fall grass wreath that was inspired by the African Juju hat trend. If I make it back to Africa, that's one of the things that's top on my list to find. In the meantime, I love my wreath.


I also offered quite a few free printables this year. This thankful chain printable is probably my favorite one. 


Followed closely behind by these free K cup printables.


I also brought on a fun contributor this year. Her name is Kate and she has provided us with some great recipes like this green bean bacon side dish.


I also got to talk about things that were near and dear to my heart and share a little bit about consumerism versus compassion and what that looks like. It pretty much made my month when Patricia Heaton retweeted my post on this. I super love The Middle!


And of course, I finished off the year sharing six days of handmade ornaments. You can find links to all six tutorials here. 


I know there is so much more to share, and I hope you have read along with me through this year. If you are new here, welcome. I'm happy to have you. 

I started a newsletter this year so that you can subscribe and get all the new content delivered right to your inbox.  You can find me on instagram, twitter, Facebook and Pinterest too.  I'm looking forward to this new year and new projects as well as new transitions as we prepare to launch our oldest son off to college. Bear with me, it's going to be a tough one!

0

Vinyl sayings on burlap placemats

Several years ago I saw some pretty darn cute place mats at a local store. I didn't buy them and sort of regretted it. You don't ever do this do you? I'm sure I'm the only one.
I found out that they were available from One Kings Lane, but once I went to find them, they were no longer available to purchase. Story of my life.
So, I made some of my own, because that's what a good cheap person does with not a lot of budget but a whole lot of style.


I had some of my favorite Expressions heat transfer vinyl on hand {I always have black and white HTV on hand because you can almost always find a use for it} and found a font that I liked {I used the Rockwell font}. 

Don't forget to reverse your image in your Silhouette design software. Cut out your design and iron it on to the burlap place mats that you cut that are 20x14. I made a set of 6 with 6 different sayings.

These place mats are not spill proof. {perhaps that's why they are no longer available?}, but they are pretty darn cute.  You can easily wash HTV but burlap is another story. So keep that in mind. You may want to pick a different material to make your place mats out of if you think you may need to wash them often.

They were fun to create and will be a great conversation starter on your table.  Enjoy!
0

Merry Christmas

For unto you is born this day in the city of David a savior who is Christ the Lord. Luke 2:11

Merry Christmas from our family to yours!


0

Last minute crafty gift ideas

I know, I know, Christmas is in two days, but I couldn't help but squeeze in a few last minute gift ideas that you can make in case you have a few last minute presents to whip up.

I actually had all of these supplies on hand, so no special trip was required to a craft store. But I am a craft supply hoarder, so perhaps you are much more organized and less in need of craft supply intervention than I am.

Regardless, these gift ideas can all be whipped up in under an hour and most of them can be made in under twenty minutes.


I found these burlap canvases with black frames on sale at my local craft store a few months ago. I was holding onto them until I found the perfect project.  After I made a few scarves for a local craft bazaar, I had some plaid fabric left over. I found a few silhouettes on google images and printed them out. I used wonder under on the backside of the fabric and then cut the image out. Remember, your image will be reversed, so if it matters {like for your state} reverse your image.

Then, I simply ironed the fabric onto the canvas.
Project time: under 20 minutes


When I see blank canvases or canvases that can be painted over, I usually buy them. I got this one for fifty cents and painted it blue. I then found a world image {again on google images} and cut that out using a vintage atlas that I had. You want to find the most simple image that you can.

Once you cut it out, brush mod podge onto your canvas. Lay down your continents and then brush mod podge over it to secure it in place.  You can use scrabble letters to spell out peace on earth, or just leave it as is.

Project time: 1 hour


I have big ideas for these framed map signs. My son will be graduating this year, and I think these would be fun graduation gifts for his friends. Simply find a map of an area you want to highlight {I used a few different college towns} and slip it inside your frame. On the outside glass part of your frame, place your cut vinyl. I used the saying "adventure awaits" that I found for free as a cut file from Dawn Nicole.


You could give this to a couple who is adopting, or a friend serving on a mission trip or a couple going on their honeymoon.  The possibilities are endless!

Project time: 10 minutes


Several weeks ago, Target had these grey plates on super sale. I picked a few up and decided to put some vinyl on them that could be displayed in your home. I actually bought the verse as a download from the Silhouette store {couldn't have been easier!} and then resized it to fit my plate.

Project time: under 10 minutes


Now stop reading and start crafting. You have things to make!
0

Easy chalkboard art secret for those of us that aren't hand lettering artists

I'm a huge fan of chalkboards. I love the chalk art trend and wish that I could say that I was an expert chalk art hand letterer {I'm sure that's an actual thing...maybe} but alas, I am not.
However, I have learned how to fake it.  I shared with you a tutorial several years ago and then got slapped with a lovely copyright infringement notice and well, in the end, I took my tutorial down. Earlier this year, I redid the tutorial {with images that I am pretty sure are safe} and what better time to revisit chalk art than right before the holidays.
With the exception of the Washington state cut out, all of these are frames that I found at local garage sales. I had my husband cut down pieces of scrap boards that we had and then I painted them with a few coats of chalkboard paint. 

I have tried a few different chalk pens, but my favorite by far has been the American Crafts brand one from Target. It doesn't bleed and the ink comes out consistently. I love it!

This frame is my favorite! It's old barn wood, so I thought I would put my favorite Christmas song in the frame, you know, since it's my favorite and all.


This wood cut out was bought for $6 at our local Art Co craft store. I simply painted a few coats of chalkboard paint and then wrote home sweet home on it.


I have a tendency to rush and go and always stay busy, so I like the gentle reminder that this verse gives to just be still. It's in a vintage gold frame that I muted with some white paint that was dry brushed on.


Remember my favorite Christmas song? Well, I thought this line needed it's own framed chalk art. I actually don't enjoy Christmas songs. Which is funny, because I love everything Christmas. I think that after 37 years in the church, the songs that we sing over and over have pretty much just become songs that I know by heart and just sing to sing. I don't focus on the words {be still much Rachel?} and so in the past few years as my disdain for Christmas songs got worse, I started to be intentional about focusing on the words of the Christmas songs. This line stuck out to me last year almost like it was the first time I had heard it. Wow! Yep. It needed it's own chalk art sign.


Outside of a little hand cramping, I was able to create all of these signs in one evening. It doesn't take too much time and I think the end result looks pretty darn professional looking don't you think?
Don't let chalk art intimidate you. Give it a shot! You can find the full tutorial here.
0

Snow and Christmas trees to make a fun holiday decoration

Last year, one of my favorite Christmas crafts that I made were these die cast cars with snow and mini Christmas trees. They were huge hits at my local craft bazaar last year, so I kept my eyes peeled this year as I did garage sale and thrift store shopping for more things that I could add faux snow and trees to.


I found a few things, and this time, they were even bigger than the little die-cast cars I used last year!


Just a refresher, the faux snow is made from Plaid Collage Clay. It doesn't take much. In fact, I'm still using a tube from last year. Just make sure you seal it up well because it will dry out.

I found a miniature Radio Flyer sled that was about eight inches long. It's pretty sweet. I added collage clay to the parts that snow would likely stick and laid a faux tree inside. Easy peasy.


I love this green wooden truck. It looks vintage, but it's not. I have seen them at stores like Home Goods, but I bought it at {where else?} a garage sale.  Again, I added the snow around the edges of the truck. This time, I tied the tree down to the back with some bakers twine.

This is becoming one of my favorite holiday decorating techniques. The faux snow is my favorite touch. If you want to see the full tutorial go here.
0

Vintage tablecloth turned into Christmas tree skirt

I love Christmas! I love decorating for Christmas and I love unpacking my Christmas boxes every single year. Every year I add to the boxes with handmade ornaments like I featured all last week in my six days of handmade. Sometimes, I add big items, sometimes I add small items.

This year, one of the new items I added to my Christmas decor was a new tree skirt. But not just any tree skirt. It's a tree skirt that I made out of a pretty amazing vintage round tablecloth that we got from my husband's grandmother's estate just after she passed away this summer.

I actually see round tablecloths like this at garage sales and estate sales quite often, so in case you are like me, you can pin this or tuck this away and remember when garage sale season starts back up again to keep your eyes peeled for a round tablecloth to make a no sew Christmas tree skirt.


It took me under 5 minutes and I promise, there is really no sewing to make this tablecloth into a Christmas tree skirt. Want to see how?

This is the tablecloth that I started with. It feels like velvet on top and has these neutral pom poms already sewn all around the edge. It's pretty much perfect!


I laid my tablecloth out on the floor and was thankful for the natural fold lines that helped me find the center of the tablecloth.

Then I took one of my dinner plates and laid it in the center. I needed something to help me make my circle. I drew around the plate with a pen.


Then, I cut up one of the fold lines that was already in the tablecloth {if yours doesn't have the fold lines, you will need to iron them in to make this easier} and cut around the circle.


That's it! Now you have a tree skirt that you can use year after year.


For us, this tree skirt carries the memory of our Geigy and we are thankful for it this year since she isn't with us any longer.

Five minutes or less, that's all it takes! Next time you see a vintage round tablecloth, now you know what you can do with it. What kinds of Christmas keepsakes do you make every year?

0
Back to Top