From Pin to Reality


A few weeks ago I gave myself the challenge to start taking my pins off of Pinterest and start making them a reality. I came to report back to let you know how I did.  
I tried this and didn't have the best results. I looked all over to find cleaning vinegar and finally found it at my local Lowe's.  I made the salt and vinegar solution and let it sit for several hours. Unfortunately, I didn't really notice a difference. Thankfully, it wasn't an expensive failure, and I can use the cleaning vinegar for other things.

One of my goals was to try a new hair tutorial.  I was able to follow this braid tutorial and I made a really cute waterfall braid.  
Easy Braided Headband Hairstyles - hair tutorial

I really wanted to make a water bottle that would encourage my daughter and I to drink more water, but the tumbler I had on hand didn't have a removable insert for the vinyl.  I tried, so I consider that a success.  My daughter has been writing her own timeline on a disposable water bottle.  Same idea, and it works for her.

I was also able to get a book page project done.  I saw these hydrangea flowers made from book pages last year and loved the idea.  I finally made some of my own.  Thanks to Muslin and Merlot for the idea.
I started on the floating shelves that I mentioned in the last from pin to reality post. Here's hoping I can get those completed this weekend.  I didn't get to the photography tutorials this month, though I am hoping to sift through some next month.
I loved the accountability of this and am looking forward to seeing what I can conquer next month in the pin to reality series.  Won't you join me?  Simply create or make something that you have pinned on your Pinterest board, then take a picture of it and share it on instagram. Use the #frompintoreality and tag @holycraft1.  
0

Washi and felt heart arrows


I have become obsessed with arrows. I don't know what it is, I just love them!  If you missed my DIY love shirt {with arrows} you can see it here.  As a follow up to that, I decided to take some dowels that I had in my craft supply box and used some supplies I had on hand to create these felt and washi heart arrows.


I started by painting my dowels white.


I had all of this washi tape on hand.  I've been hoarding it for awhile and just now I am finally getting around to using it.  I used it to make these Dr. Seuss night lights and it was perfect for decorating these dowels.


Once I decorated the dowels, I cut out pieces of felt.  You will need two heart shaped arrows for each dowel and one long rectangle.


I used my hot glue gun and put a long strip of glue down the center of the rectangle.  I laid the dowel about two inches into the felt and folded the felt on top.


Then I used my scissors to cut the angles into the felt at the base and the "feathers" into the edges.


I used hot glue to glue to heart arrow tips on and pressed the two pieces together to close them.


I made all six of these arrows in under an hour.
I love how they turned out.  They would make great party favors!

0

A choice

I was barely nineteen. Not much older than he is now. 
I was faced with a decision that would not only affect me, but a decision that would directly affect the lives of two others and that would create a ripple, affecting countless others.
I knew almost right away. Several negative pregnancy tests did nothing to alleviate the nagging suspicion of what I already realized. 
I was a sophomore in college.  I had a future and nothing but possibilities in front of me. And now, I was faced with a decision that felt like it would limit my future and hinder those possibilities.
I came back to school after a long Christmas break with a secret. In one hand I physically held a list of phone numbers.  People that would allow this "problem" to be silently swept under the rug. A moral dilemma was raging. 
I had concrete beliefs about how I felt about abortion, but I would be lying if I didn't tell you that in this situation, cracks were forming in that belief system.  
I was fortunate to know that the man who was in this situation with me was the man I had already planned on spending the rest of my life with.  I received that first positive test and then confirmed it with another and tearfully called my boyfriend. "We will get through this," he said. 
I think back on those five little words and find so much comfort in them. I know a lot of women in the same situation hear "it's your choice." In different circumstances those words are very empowering.  In a situation like this, they are the three loneliest words you can hear.
It's been seventeen years since I had to make the hardest decision of my life. 
We were gathered together, three families around a large table.  The hostess gave us the task of saying one thing that we were thankful for. I don't know if he said it in a flippant way, but when the time came for my son to answer what he was thankful for he said "I'm thankful for my life." He had no idea the weight that those words carried for me.
I have never regretted my decision to carry my son to term.  In fact, more often than not, I am reminded of how thankful I am that I made that decision.  I became a mom far sooner than I ever expected, but sometimes, those unexpected bumps in the road provide us with the most blessings.
I love you my Aidan T. Tyler!
love, Mom
0

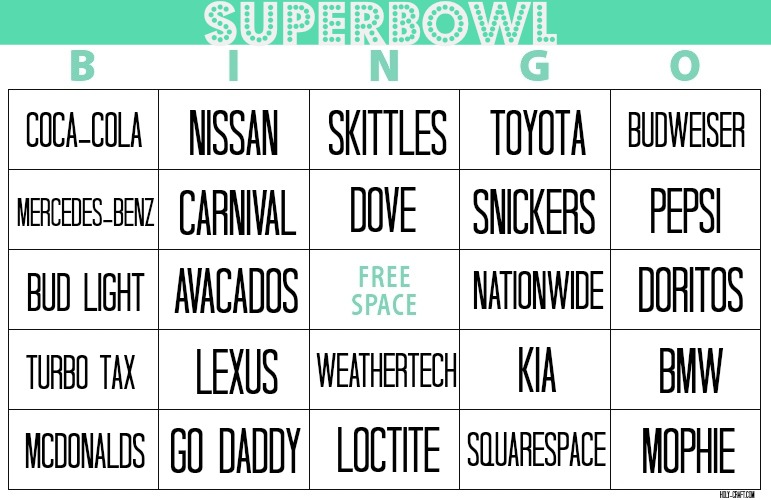
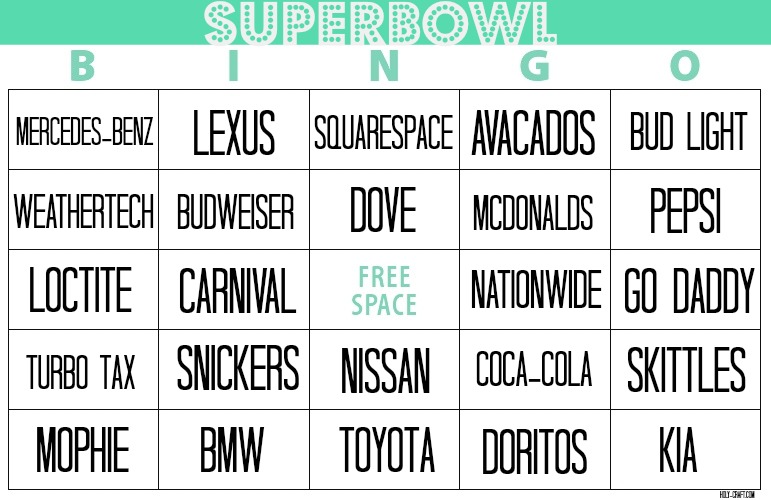
Free Superbowl bingo printable


The big game is coming up! If you are anything like me, I half pay attention to the game and mostly pay attention to the food.  The commercials are the thing that usually draws my attention, so I thought it would be fun to make a Superbowl commercial bingo game.


I used Skittles as markers of course, though you could use any candy of your choosing.


Seattle loves their Seahawks!  Skittles, especially blue and green ones have become a staple during game watching.  I found that if you get the wild berry pack, you can pick out the blue and green Skittles and you are left with Valentine's day colors.  A win win.


You can choose the prize that your winner gets.


Simply right click on the image {there are four different ones to choose from, make sure you have a different one for each player or you will have a lot of bingo's all at the same time!}, save the file to your computer, print and cut.  For personal use only.


Have fun watching the game!

0

What to watch this month

It's been a busy month for us.
We got off of the high of the holidays, and pretty much all of us hit a wall.
It's been hard to get back into a routine.
The older kids have finals and the oldest is not only cramming for finals, he's also studying for the SAT's that are conveniently on the weekend following finals week.
We are all looking forward to a long weekend {the kids have Monday off to celebrate the end of the semester} so we can recharge.
I fully expect lots of snuggle time with the littles and some down time with some Netflix.
I haven't watched a Netflix original series that I didn't like yet {Orange is the New Black and House of Cards are both amazing!}, so I can only imagine what's in store for us with Puss in Boots.


The very first movie I saw in the theater was Annie.  I loved it! It was my Frozen.  I'm pretty sure I can still remember every line. The kids will be super impressed I'm sure.


It's hard to believe but it's been twenty years since Friends came out. That was such a great series! I remember watching it every Thursday night! While the little kids are busy watching a show, I like to sneak a show or two in with my sixteen year old.  I think he will love this series!  Plus, it will get him out of his Top Gear rut.  Not that he's complaining!


What are you watching now?  I'm always curious to hear!
0

Custom LOVE sweatshirt


I bought this H&M sweatshirt for $1 at a garage sale this summer knowing I wanted to put my own spin on it. I don't know about you, but I tend to hoard craft supplies until I have the perfect craft, and even then, I go back and forth with ideas second guessing myself.  


I had a few different ideas all of them involving arrows of some kind. I'm sort of obsessed with arrows right now.  In the end, I like the idea that I settled on and was able to make the image using picmonkey.com and then transferred the file into my Silhouette software. 
You can follow this tutorial on how to use any image in your Silhouette file.
I made my first video tutorial.  Next time I will fire the videographer.  All he did was roll his eyes at me the whole time.  He was far too busy to be bothered to get my head in the shot.  Teenagers...

Let me know if you have any questions.  Would you like to see more video tutorials? I can't get any worse at them!
0

What is our common denominator?

I'm not much of a sports fan.  I follow along enough to make occasional comments, but sports just aren't that fun for me when I don't actually know the people that are playing.  

I've lived in the Seattle area for nearly 15 years and in case you missed it, Seattle Seahawks just played an amazing game of football this past Sunday.  Well, the whole game wasn't amazing, just the last 20 minutes or so of it!  They showed up when it mattered, made some amazing plays and ended up pulling off a win when things didn't even look close.
I was at the gym the next day and what started out as one guy making a comment to another guy about the game the previous day and it became a whole cluster of sweaty men gathered together talking about football in the most animated and excited way possible.
Men have sports as a common denominator.  
We've seen it all before.  It could be as simple as a guy waiting for a layover at the airport in Kansas city.  One guy is sharing a bar stool next to another guy and the only thing they have in common is that they are drinking a beer.  Their faces glance up at the TV screen and one guy makes the comment "Wow! That guy is fast!" That's all it takes for a whole conversation to start.  Sports is a common denominator.
What do women have as their common denominator? 
Not to be sexist, but most women I know are just not that into sports.  The women I know who love sports typically have their sports focused conversations with men.  I don't know if I have ever heard a group of women swapping stories about the latest baseball stats.
Which had me thinking.  If a man's common denominator is sports, what is a woman's?  
My first thought was that it would be her kids or her family, but even then, I don't think that those conversations can span the gaps the way that sports does. If I enter a conversation with a bunch of new moms, I can barely hang anymore. 
Could it be shopping {too shallow?}, travel {not everyone loves it}, or perhaps something totally different.  I'm just curious. What do you think women have as their common denominator?
0

Dr. Seuss Curious Crandalls nightlight

Our family are huge Dr. Seuss fans, so when I saw this 15 minute craft lightning challenge, I jumped right on board!


One of our favorite books by Dr. Seuss is the Sleep Book. I love the part about the Curious Crandalls. Those Curious Crandalls sleepwalk on hills with assorted sized candles.  They stay asleep even with dripping wax falling on them!  But not to worry, there is no dripping wax from these candles.  They will make the perfect nightlight for your littles after you read the Sleep Book and they head off into dream land.


I found my LED candle lights at the Dollar Tree, and I used washi tape that I already had in my drawer to decorate the candle sticks.


I can't even give you a tutorial, because this project is too easy!  You literally just wrap tape around your plastic candlestick in whatever pattern you want.  The more random the better!


Once you are finished, you can snuggle up with the Sleep Book and your kids will be delighted to have their own personal candlestick to help them light up the night as they drift off to sleep.

Do you have a favorite Dr. Seuss book?
0

My dream job

In July of last year, I had the chance to go to Uganda, Africa. It was a lifelong dream of mine and no joke, it lived up to everything that I would have ever expected or wanted.

This video still brings tears to my eyes as I watch it because it's everything about the trip that I imagined.  You can read the re-cap here and a reflection from a month later here.

I look back at pictures and I can remember the joy that I felt being on the ground in a country that somehow captured my heart as a child and hasn't let it go.  In fact, now it's grasp on me is even tighter!

{me with my sponsored child Moses and his father Richard and the chicken I was given as a thank you gift}

Which is why, when I saw that World Vision was running a contest for a dream job to Africa, I got excited! I know that one day God will bring me back to that country, but I'm human, sooner is always better!  

Please take a second to view my application and vote for me
If you would, leave a comment, since those are read for consideration as well.
This truly is my dream job and I would love to be the voice of the children who are celebrating access to clean water and I would love to advocate for those who are still waiting.

You can vote daily.
I would appreciate your vote!
0

easy leather bead bracelet

Before Christmas, I had the chance to shop House of Gems, an on-line wholesale bead and jewelry making supply shop.  I was like a kid in a candy shop!  Expect to see more projects soon, but for now, these leather bead bracelets are the first thing I tackled.

I don't wear a lot of jewelry, but when I do, I like it to be small and subtle. Sometimes small and subtle is hard to find in the stores, so after hunting, I decided to make my own.


You will need:
8-12 beads for each bracelet
20 gauge wire
2 jump rings
clasp
1.5 mm leather
2 crimping beads with ring
needle nose pliers
round nose pliers
end cutters


Start by cutting about six inches of your wire.


Hold your round nose pliers about an inch from the end and bend your pliers in a circle.


You will make a loop and will have a tail that will then be wrapped around the wire 2-3 times.


Cut as close as you can with your edge cutters and use your needle nose pliers to press the end as close as you can to the wire so that it isn't sharp.


String your beads on in whatever pattern you want.  Once you have enough beads to stretch about two inches, take your round nose pliers about an inch from the end of the beads and make your loop, this time in reverse of the last one.


The wrapped wire should be closest to your beads.


Measure out about five inches of your leather. You will need to cut two pieces of leather for each bracelet.


Fold the leather in half and push the folded end through one of the looped ends.


Take the ends of the leather and thread it through your folded leather loop. Pull tightly.


Do this to both ends.


Take out your crimping bead and your needle nose pliers.  Crimp the end of the leather {with both pieces being captured} together.  Do this to both sides.


On one side, open your jump ring and slide your lobster clasp and the crimped end into the jump ring.  Use your needle nose pliers to close the jump ring. On the other end, open a jump ring and secure it to the crimped end and close the ring again.


Your bracelet is completed!


I kind of got carried away!


This two little beaded ones are probably my favorite!


I'm anxious to get started on some matching earrings!

All of the supplies were provided by House of Gems. All opinions are 100% my own.
0
Back to Top