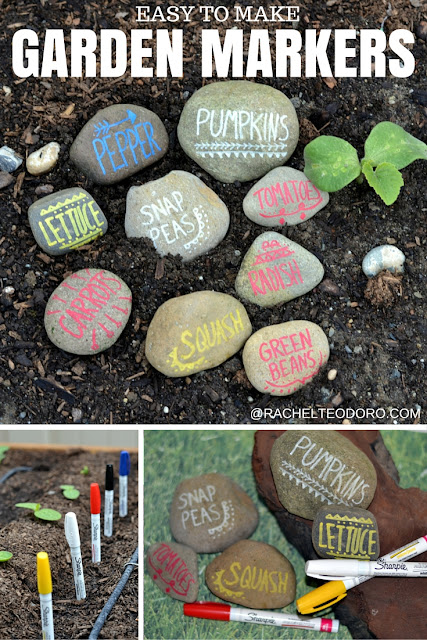
Easy to Make Garden Markers

This post is part of a social shopper marketing insight campaign with Pollinate Media Group® and Sharpie Paint Marker, but all my opinions are my own. #pmedia #SharpiePaintCreate http://my-disclosur.es/OBsstV

Every summer for as long as I can remember, I have planted a vegetable garden. Some summers we have quite the bounty, other summers, not so much. I usually have a helper or two in the garden. My kids love to watch the seeds that we plant sprout up and turn into food that they can eat. It's such a great learning process for them and it does get them to eat their veggies. There is something about growing your own food that will make even the pickiest of eaters try the fruit of their labor.  
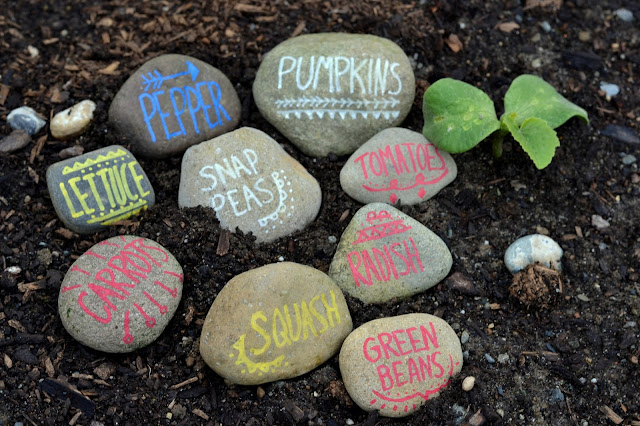
Before those little seeds sprout up though, it's always nice to mark the place that we planted them so that we know what we are looking for as those sprouts pop through the ground. With the help of my youngest son, we collected rocks from our local beach and I used new Sharpie oil based paint markers to write on them. It's such an easy, inexpensive and fun way to liven up that garden.
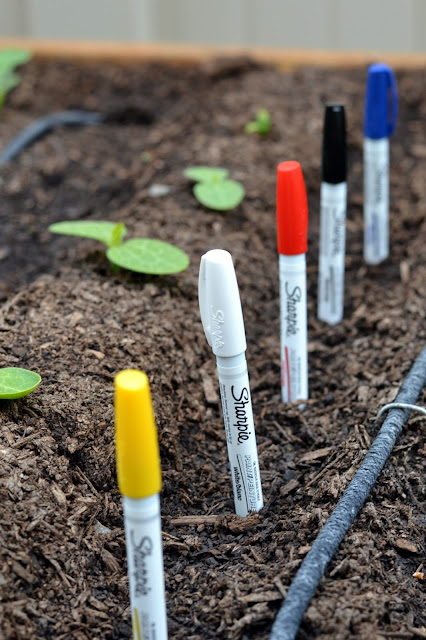
Sharpie oil based paint pen markers

I started with a variety of colors of Sharpie markers from Michaels. Don't forget to check your local paper or go on-line for coupons while supplies last!

paint pens

And then, I just simply doodled on the beach rocks that we found.

Sharpie paint markers

It was as easy as that. The oil based markers are permanent so they are resistant to water and fading and they will hold up all season long. If painting on rocks isn't your thing, these Sharpie paint markers will also write on metal, pottery, wood, rubber, glass, plastic and so much more! The possibilities are endless!

Sharpie oil based paint pens

I sure hope growing this garden was as easy as it was to paint these garden markers!

sharpie paint pens

 What's growing in your garden? I want to hear it!

This post is part of a social shopper marketing insight campaign with Pollinate Media Group® and Sharpie Paint Marker, but all my opinions are my own. #pmedia #SharpiePaintCreate http://my-disclosur.es/OBsstV
0

DIY Didn't I Think of This Sooner! The Easy Way to Get Rid of Dog Hair in your Car.


There are times in my life when I wonder, why the heck did I not think of this sooner! Please tell me that I'm not the only one! This literally happened to me last week when I was cleaning out my car. Our golden retriever Sophie likes to go with us in the car where ever we go. In fact, if I say let's go for a walk, she usually runs towards the car because she would rather drive anywhere than go on a walk! But, our big hairy animal sheds. A LOT. And her nice blond fur gets left on all of the dark surfaces of my nice new mini-van, so something had to give. Either the dog had to stop driving with us as co-pilot {not going to happen, look at that face}, or I would have to find out a better way to clean that stubborn dog fur out of my car. I think I found the solution and it left me wondering why I didn't think of it sooner!

furminator helps to clean dog fur out of car


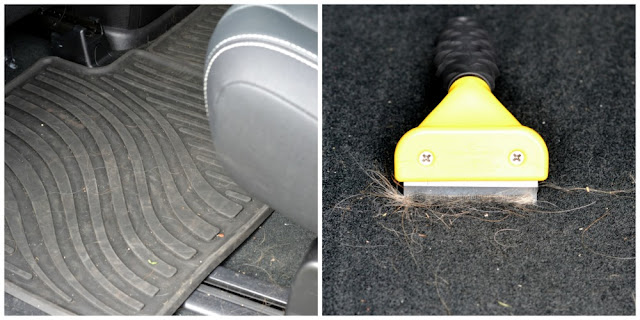
Today, I took my daughter to school and let the dog tag along. The car had been vacuumed and cleaned a few days prior so the dog fur you see in the car now, is the fur that she left on our short 20 minute trip. We do have rubber floor mats, but it doesn't seem to help. The fur gets everywhere! Even getting out my vacuum cleaner, the fine dog hair grabs on to the interior carpet of the car and won't get sucked up.

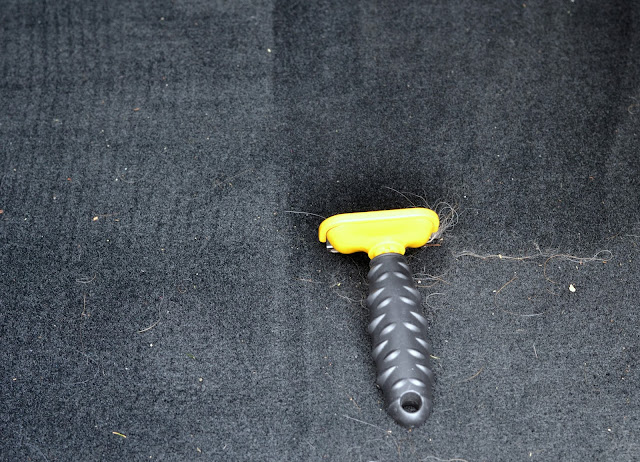
Have you heard of the Furminator? The Furminator is a deshedding brush that has these fine metal teeth and a sturdy plastic handle. I decided that if it worked to help pick up extra fur on my dog so that she sheds less, then maybe it would work to pick up the fur that had already been shed.  It did!

cleaning up dog fur in the car with a furminator

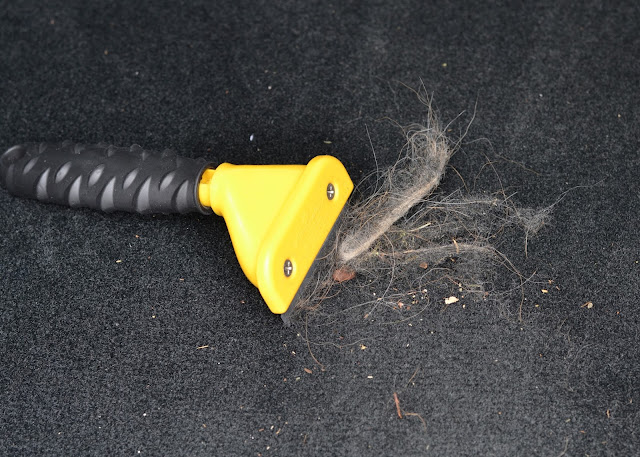
Simply take the Furminator brush and drag it along the carpet.

cleaning up dog fur in the car

Look at all that fur it picked up! I do this now before I vacuum the car out. That stubborn hair wouldn't get picked up before and now I can virtually remove any sign that our dog has been in the car with us!

cleaning up dog fur in the car
It's so easy! If you have a dog that sheds you can thank me later. Go try it now though and see how much fur it picks up. You won't believe how clean your car will be!
dislaimer: this post may have affiliate links. By clicking on them and purchasing through them, I may receive a small commission. These small purchases help me to continue to keep writing content and creating at Holy Craft. Thank you!
0

Easy to Make School Mascot from Vinyl

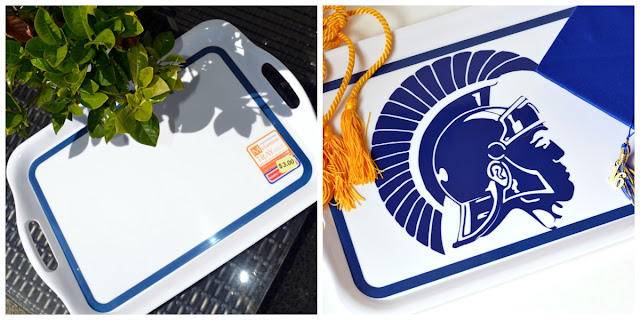
It's a big year. My oldest son is graduating from high school in just a few short weeks and the preparations have been underway! We've been getting senior pictures taken, printing up graduation announcements and photo books and I've been prepping for his open house graduation party.  His school mascot is a Trojan and I found some plain trays that I thought I would use some Expressions Vinyl on because when you have a Silhouette machine and some vinyl, no blank surface is safe in my house!
easy to make school mascot tray

I found these trays at our local Japanese dollar store. It was $3 for the tray. I used a dark blue series 51 gloss outdoor vinyl sheet and jazzed it right up.

Using a high school mascot cut out of vinyl to create a custom tray for a graduation party

I have a full tutorial on how to use any image to cut in your silhouette. You can find that here. It's as easy as finding an image {I used the image from the school website} and selecting the trace feature in your Silhouette software. It's as easy as that!

Simply cut and apply your vinyl to your tray. This vinyl is waterproof and weather resistant so it's perfect to be used on a tray outside with and around food items.

Using a high school mascot cut out of vinyl to create a custom tray for a graduation party
It's fun to be able to personalize just about anything with vinyl. Expressions Vinyl is my favorite vinyl supplier. You can find vinyl for every surface and every project. Now go, vinyl all of the things!
dislaimer: this post may have affiliate links. By clicking on them and purchasing through them, I may receive a small commission. These small purchases help me to continue to keep writing content and creating at Holy Craft. Thank you!
0

Summer Fun! Summer Activities for Kids

I used to break out in cold sweats when I would think about the last day of school. The kids were going to be home for weeks straight and unless I wanted our home to turn into The Hunger Games where only the strongest survived {and I'm fairly certain that wouldn't have been me}, then I needed to come up with a plan. I needed activities, I needed play dates, I needed things on the calendar that we could look forward to.

Those activities didn't have to be elaborate, they just needed to be something I could break out of my secret stash of mom goodies if I heard the words "I'm bored" or if I started to hear the rumblings of fighting between siblings. 

beat the boredom with these summer kids activities

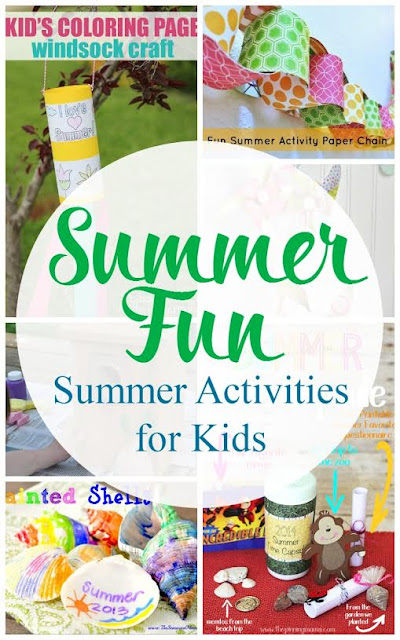
I've collected a few of those activities that you can have on hand to put in your back pocket to help you stay sane and to give your kids some fun activities this summer.

I find the best way to keep all of my kids activities in one place is to create a Pinterest board. I have two. You can follow them here and here. I'm always adding new kids activities. Happy summer!

  1. Water Balloon Baseball - Over Stuffed Life
  2. Kids' Music Sensory Activity - Home. Made. Interest.
  3. Pool Noodle Activities Fine Motor Fun - Learning 4 Kids
  4. Squirt Gun Painting - Fireflies and Mud Pies
  5. Summer Activity Paper Chain - The Pinning Mama
  6. Bubble Blower Painting - Childhood101
  7. Painted Shells - The Seasoned Mom
  8. DIY Moon Rocks - The Crafting Chicks
  9. DIY Solar Oven Smores {Kids Science Experiment} - Desert Chica
  10. Shaving Cream Rain Clouds - One Little Project
  11. Homemade Ice Cream in a Can - Home Cooking Memories
  12. Bubble Snack Maker - Mum in the Mad House
  13. DIY Pinwheels - Home. Made. Interest
  14. Easy Summer Craft for Kids: Garden Critters - The Seasoned Mom
  15. Giant Outdoor Memory Game - 123 Homeschool 4 Me
  16. Kid's Coloring Page Windsock Craft - The Pinning Mama
  17. Squirt Gun Races - Made from Pinterest
  18. Minion Flip Flops Summer Kids Craft - One Creative Mommy
  19. Soap Foam Sidewalk Paint - Teaching Mama
  20. Painting a Birdhouse - The Seasoned Mom
 
dislaimer: this post may have affiliate links. By clicking on them and purchasing through them, I may receive a small commission. These small purchases help me to continue to keep writing content and creating at Holy Craft. Thank you!
0

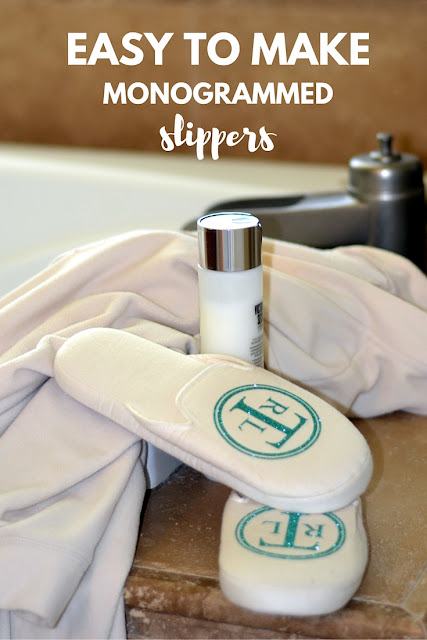
Customized monogram slippers

As a thrifty crafter, I'm always on the look out for plain surfaces that are cheap so that I can customize them and make them my own. If you hadn't noticed, sometimes finding plain items to use can be hard. Finding plain items that are cheap can be even harder! But, I'm always up for the challenge! Some of the best places to look are in the clearance rack {Target has some great tank tops I love to use HTV on} and of course, my favorite, at garage sales. 

easy to make monogrammed slippers using heat transfer vinyl

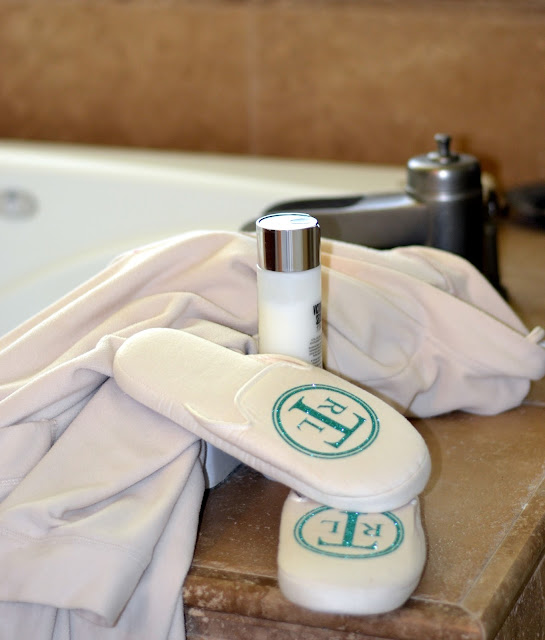
I found this plain pair of slippers {they were originally from Victoria's Secret} for $3 and couldn't wait to get some sparkly heat transfer vinyl on them. I'm showing you how to make them today.

easy to make monogrammed slippers using heat transfer vinyl


I'm always a big fan of showing you before and afters. The plain slippers were just fine, but, they needed a little something don't you think?

easy to make monogrammed slippers using heat transfer vinyl

I used my Silhouette design software to create a monogram. Don't overthink it. You can follow Melissa's tutorial on how to create a monogram here, or simply do what I did and create two circles and make your letters different sizes. Easy peasy. I'm telling you this because I overthought it. Not all letters look good in a monogram. Trust me.

Cut your heat transfer vinyl out. I used this glitter HTV from Expressions Vinyl. I've never used it before and I thought that maybe it would be harder to use, but it cut like butter and didn't have any problems transferring to my slippers. I'm sold!

If you have never used HTV before you can find a full tutorial on how to cut it here.


Some HTV tips for you:

Always reverse your image
Put your HTV shiny side down into your machine
Always double cut and use a mat
Use a lightweight piece of cotton to iron your transfer on
Press your iron firmly and for at least 20 seconds in each area
Let your transfer cool and then peel {unless otherwise noted on your medium}


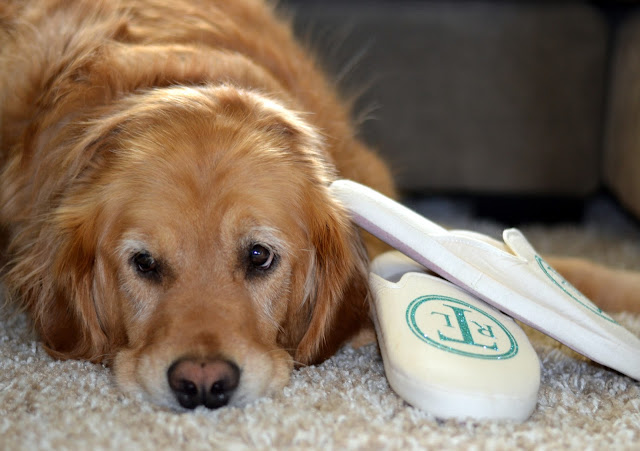
I think Sophie is thrilled with me trying to teach her how to fetch my slippers for me.

easy to make monogrammed slippers using heat transfer vinyl

These monogrammed slippers would be great for a wedding shower gift, for a hard to shop for teenage girl, or really, for just about anyone.

easy to make monogrammed slippers using heat transfer vinyl

Keep your eyes peeled for those blank items that you can jazz up a bit with your Silhouette machine. Think outside the box. You don't just need to put heat transfer vinyl on t-shirts. The possibilities are endless!

easy to make monogrammed slippers using heat transfer vinyl

dislaimer: this post may have affiliate links. By clicking on them and purchasing through them, I may receive a small commission. These small purchases help me to continue to keep writing content and creating at Holy Craft. Thank you!
0

Five Tips for Planning the Perfect Senior Photoshoot and What You Should Do With Them

My oldest son is a senior in high school this year. It wouldn't be a senior year without senior pictures! I went back and forth on when to do them. My kids grow and change {yes, even the senior!} so much during the year, that I decided to wait until the spring to have him meet up with a photographer. But sometimes, seniors meet up with a photographer as early as the summer before their senior year, so I want to make sure you are prepared with some tips from our amazing photographer Rebecca Anne. Rebecca has far more experience than I do and can give you her five tips for planning the perfect senior photo shoot.

5 tips for planning the perfect senior photo shoot


Prepping for your senior session can sometimes be overwhelming and you do not even know where to start. Well I want to share a few tips to help get you started to have the best senior portrait shoot possible with five of my favorite tips.

5 tips for planning the perfect senior photo shoot with Rebecca Anne photography

1. Plan your outfits


The number one question I get asked when starting to plan a senior session is what to wear?!  A few quick tips would be to start out with an outfit that makes you feel comfortable.  Maybe it's your favorite pair of jeans and a shirt you know you know makes you look great.  That way you start off the shoot feeling relaxed and yourself! Then take it up a notch.  Ladies, bring out that dress that just fits you perfectly along with some statement jewelry and fun shoes!  Gentlemen, layers are always so complimentary for you!  Don’t forget you can have fun with shoes too.  And you can never go wrong with a formal outfit.  

A couple notes on what to avoid: neon colors close to your face, clothes that are too tight (or way too loose) or clothing that is very short that might limit your ability to pose.  Overall, don’t overthink it and go with what you know you look good in!

5 tips for planning the perfect senior photo shoot with Rebecca Anne photography

2. Pick an epic location


The location of your shoot really depicts the feel of your images.  A city shoot will feel more modern and edgy. Woods or mountains will feel more adventurous.  Or the beach shoot may feel more relaxed.  

5 tips for planning the perfect senior photo shoot with Rebecca Anne photography

3. Bring fun props


It is always great to have props that help represent where you are at this stage of life.  Maybe playing that instrument for your school band or church worship team was one of your favorite parts of high school.  Or how about meeting your best friends on that team sport?  Your dog might be incredibly special to you and you want to remember them.  There are so many fun options to help show who you are right now and…well, they are fun!

5 tips for planning the perfect senior photo shoot with Rebecca Anne photography

4. (For the ladies) Have professional hair & make up done


Ladies, you can never go wrong having your hair and makeup professionally done!  It will make you feel special and pampered and plus you’ll look extra great!

5 tips for planning the perfect senior photo shoot with Rebecca Anne photography

5. Have fun!

Don’t forget to relax and enjoy the photoshoot!  Be yourself and just go for it and let yourself have fun!

Such great tips! Thanks Rebecca! If you are local you should definitely check her out. If you aren't local, go like her page on Facebook or Instagram or search her blog and website for some great eye candy! Her photos will inspire you.

Now that you have your senior photos, what should you do with them? 


That's always the next question isn't it? We had the option to buy some very impersonal graduation announcements from a company that the school uses every year. You know the ones. They have the school colors on them and are printed all fancy, but there is never anything unique about them. 

3 things to do with senior pictures

Why not use your senior pictures to create your own graduation announcements?  They are far more unique and provide the exact same information. In fact, they probably provide even more information. I used Mixbook to easily mock up several different designs that my son could choose from. Then, I put the information on the card and now we have a personalized graduation announcement that is not only a keepsake but an invitation for his graduation open house as well. I love killing two birds with one stone, especially right now since it's such a busy time!

Mixbook could not be easier. You literally upload your images and then drag and drop them in. You can find all of the fully customizable graduation designs right here. If you are feeling creative you can even design your own from scratch. 

senior graduation photo announcements

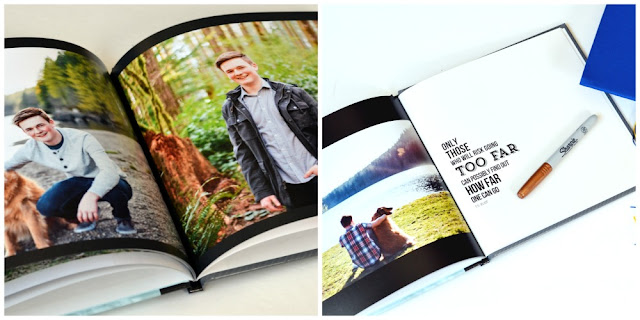
Since I already uploaded my son's senior photos into Mixbook, I thought that I would create a photo book that we could have at his graduation party. It's so fun to have all of his pictures in one place. 

senior graduation photo guest book

At the end, I left a few pages blank so that we could also use the photo book as a guest book at his open house.

senior graduation photo guest book

I love one stop shopping, and while I was on Mixbook.com, I also created these graduation thank you cards. I could not tell you how relieved I was to be able to get nearly everything I needed for graduation in one spot. Not to mention, everything came shipped to me that week and it was such high quality that I am so excited to send it out to all of our friends and family.

senior graduation thank you notes

Senior year is an exciting time. Now you have 5 great tips in your back pocket that you can use when you are ready to snap those senior pictures. And of course, once you have those pictures in your hands,  you will know just what to do with them!
dislaimer: this post may have affiliate links or links to products that I received in exchange for a review. These small purchases on affiliate links or product help me to continue to keep writing content and creating at Holy Craft. Thank you!
0

20 Summer Potluck Recipes

I don't know if this is a little known fact about me or not, but I love a good potluck. Like love it love it. I don't know if it's because I grew up going to a church that had potlucks once a month or if it's because I like to try as many new foods as I can at once, but if I hear potluck, you have my RSVP.

Memorial day is just around the corner and if the weather is right, that brings with it the first summer BBQ of the season. Which also brings the opening day of potluck season. Woohoo!

summer bbq or memorial day picnic

I've gathered 20 crowd pleasing summer potluck recipes so that you have a place to start. 

I will take one of each thank you very much! Happy potluck season!
  1. Cheesy BBQ Potato Chip Casserole - Penney Lane
  2. Chicken, Broccoli, & Pasta Skillet Casserole - Gal on a Mission
  3. Baked Penne - Hi! It's Jilly
  4. Dump and Bake Meatball Casserole - The Seasoned Mom
  5. Shrimp and Wild Rice Casserole - The Seasoned Mom
  6. Sausage Pasta Bake - Penney Lane
  7. Easy Baked Ziti Casserole - Tastes of Lizzy T's
  8. Easy Broccoli Rice Casserole Recipe - Home Cooking Memories
  9. Dump and Bake Pizza Pasta Casserole - The Seasoned Mom
  10. Easy White Cheddar ‘n Broccoli Mac and Cheese Shells Casserole - Eazy Peazy Mealz
  11. Easy Southwest Casserole Recipe - Penney Lane
  12. Creamy Turkey & Noodles - Mom's Messy Miracles
  13. Chicken Cheesesteak Casserole - Living La Vida Holoka
  14. Loaded Potato and Chicken Casserole - Love Bakes Good Cakes
  15. Chicken Parmesan Sliders Casserole - The Seasoned Mom
  16. Chili Corn Chip Casserole - Busy Being Jennifer
  17. Million Dollar Casserole - Cleverly Simple
  18. Chicken Ranch Tater Tot Casserole - My Kitchen Craze
  19. Chicken Pot Pie Casserole - CincyShopper
  20. Chicken Cordon Bleu Pasta Casserole Recipe - Snappy Gourmet
 

0

How to Remove Wallpaper Two Different Methods

If you own an older home, chances are you will find a layer or two of dated wallpaper hanging on the walls. Wallpaper is making a comeback, but not all papers stand the test of time. 

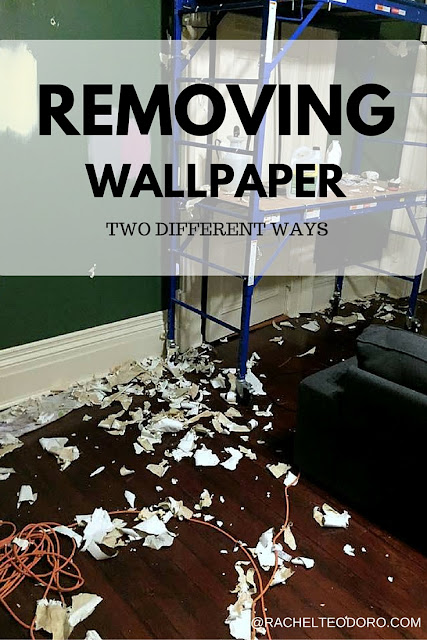
removing wallpaper two different ways


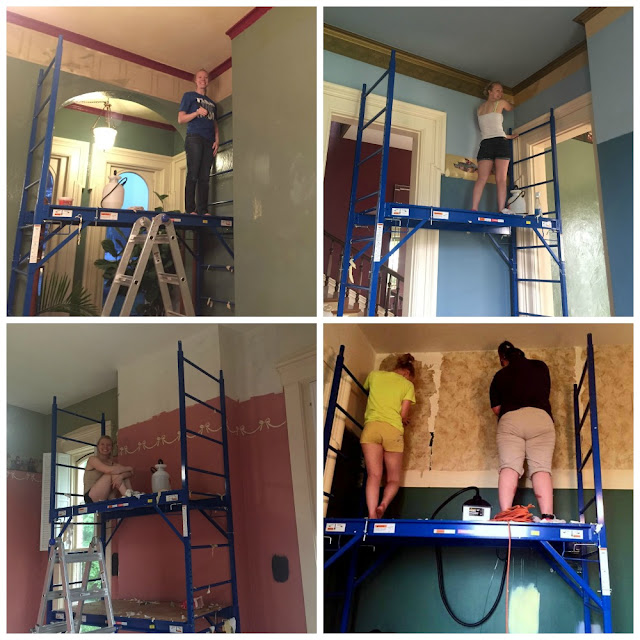
Removing wallpaper while standing on scaffolding is what Dea Rust does best! She's becoming quite the pro at stripping wallpaper since she and her husband bought a historic mansion this past year. I thought that maybe she could offer us some tried and true tips for removing wallpaper.

removing wallpaper two different ways in a historic home


How to Remove Wallpaper

Method 1

Step 1: Score the paper

Use a scoring tool like this to help poke holes in the paper so that the wallpaper remover can soak through the paper to the glue. Don't score too hard because you don't want to be left patching up the wall when you are done.

Step 2: Spray on DIF

Anyone who has removed wallpaper before swears by this product. DIF is the best wallpaper remover to use. The solution dries so only spray the area you are working on. 

Step 3: Wait


Allow the DIF solution to soak in for 15 minutes. This is a good time to move back to the area that you sprayed and is waiting to be removed.

Step 4: Spray DIF again

You want your wallpaper to be moist so that it slides right off the wall.

Step 5: Scrape


Scrape the wallpaper off of the wall. I've found that a tool like this works the best.

Step 6: Repeat


Repeat this whole process until all of the glue backing is removed.


Method 2

{Dea's preferred method for wallpaper removal}


 Step 1: Prep your steamer


This steamer from HomeRight works double duty. Not only can you use it around the house for cleaning {check out my lazy housecleaning tricks for a spotless home}, but you can use it for wallpaper removal. Fill up your steamer with water and let it heat up.

Step 2: Start steaming


Hold the steamer in place for 30-40 seconds to give the steamer time to penetrate through the glue.

Step 3: Scrape off the paper

While the paper is damp from steaming, use your scraper to scrape off the wallpaper.

Step 4: Repeat

Repeat the whole process until all of the glue is removed off of the wall.
I've given both a try but our resident expert Dea swears by the steamer method even for the toughest wallpaper removal jobs. Do you have any wallpaper removing tips? I would love to hear them.
dislaimer: this post may have affiliate links. By clicking on them and purchasing through them, I may receive a small commission. These small purchases help me to continue to keep writing content and creating at Holy Craft. Thank you!
0

Fixer Upper A Young Couple Takes on a Historic Mansion and Finds A Surprise

Hey guys! Remember last month when I introduced you to Dea, a young bride taking on the process of rehabbing a historic mansion in small town Indiana? Dea is back at it again with another remodeling project. She's walking us through The Mansion's doors to see the living room before, during and after their remodel. You guys won't believe what she found under some wallpaper and what she choose to do with it. Come check it out!

Fixer Upper Mansion Edition A young couple takes on rehabbing a historic mansion see their latest remodel

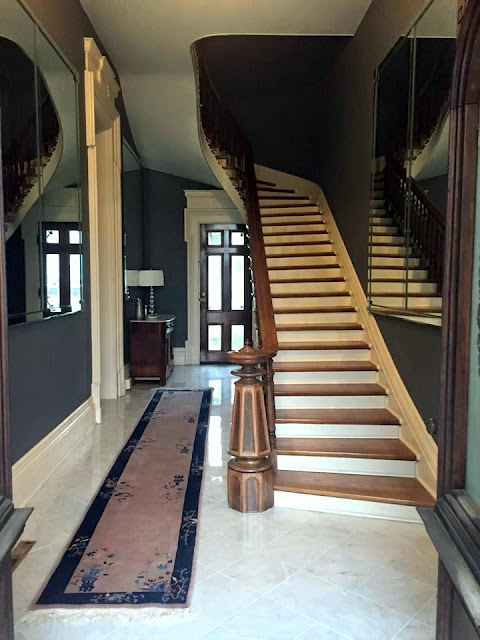
One of my favorite things about The Mansion are the plantation shutters and the huge floor to ceiling windows. While wallpaper is making it's comeback, it isn't usually a permanent decorating solution. While Dea hasn't shied away from using wallpaper {you can see it in her foyer here} she wanted to start fresh in this room and remove the wallpaper that was hanging on the upper half of the walls. She was in for a fun surprise when she started peeling the paper away!


It's not uncommon in historic homes to find layer after layer of wallpaper. No one likes to remove wallpaper. Usually it's just as easy to layer another coat on top. Thankfully, in the living room, Dea found only one layer of paper. But that layer proved to be the most difficult wallpaper she's ever removed. If you find yourself in the same situation I will be providing tips from Dea on how to remove wallpaper tomorrow.  


After the wallpaper was removed, Dea used the rug that her in-laws gifted her for inspriation choosing a new paint color for the walls. As you can see, they selected Benjamin Moore Sioux Falls.
When decorating a room from the ground up, it's always good to use a large piece as inspiration for your paint colors. You can use a piece of art that you love or a rug like Dea did to inspire the color you want for the room.


Remember how I told you that Dea found a little surprise underneath the wallpaper when she was removing it?  Inch by inch as the wallpaper was stubbornly removed, Dea found signatures at the top of the wall in order from newest to oldest dating all the way back to 1911!

I know I mentioned before that I grew up in a historic home myself, which is why I love old houses as much as I do. When I was three, we moved into a home that was built in 1860. Like Dea, there was a lot of wallpaper and one summer, we tackled removing and re-wallpapering the hallway. We found signatures on the walls as we removed the paper, and my mom let us take a pencil to draw on the walls before we put new wallpaper up. I remember doing this in nearly every room we put wallpaper in {it was the 80's so there were a lot of them!}.

Several years ago, my family went back to my old town and I found that the home I grew up in was for sale. I knocked on the door and explained that I had lived there growing up and the owner was kind enough to give me and my family a tour.

On that tour, I found these drawings on the wall in the upstairs hallway. Like us, he was re-wallpapering and had removed the paper and found some of the drawings that my little brother Ben and I had made back in 1987. How fun is that?!


My guess is, he wasn't quite as enamored by his findings of our drawings as Dea was. So much so, that she decided to go in a totally new direction with her decorating plan for the room. The names Dea found were names of known painters in the area. Her original plan was to paint all of the walls, but once the signatures were revealed she wanted to come up with a plan so that she could salvage the signatures and keep a little fun history of the room but still make sense of the design.

Dea thought about a few options.

Option one would be to wallpaper the entire wall leaving the signatures in tact for the next owners to uncover.

Option two was to take a picture of the signatures and frame them to hang lower on the wall since they were found by the top of the wall.

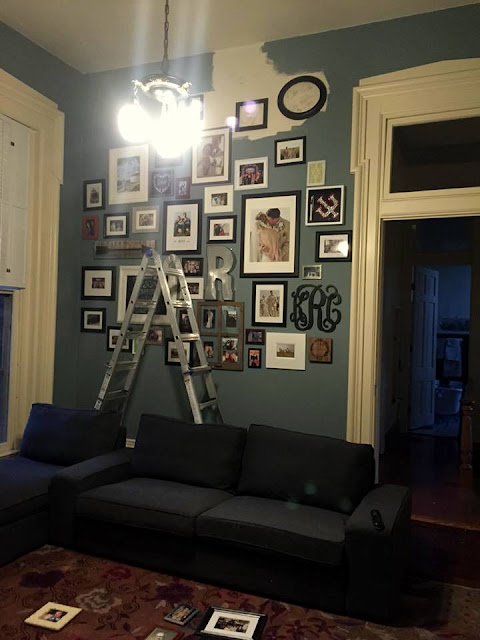
Option number three was what seemed like the best option and that was to frame the signatures where they were and cut in with paint around them. Knowing that it would be awkward to have five framed signatures along the top of the wall, Dea decided to create a full gallery wall, which ended up being the perfect solution for the family room.

As a newlywed they had plenty of gorgeous frame worthy pictures to hang too!

I've never hung a gallery wall so I asked Dea if she could give you all some tips.  She said,

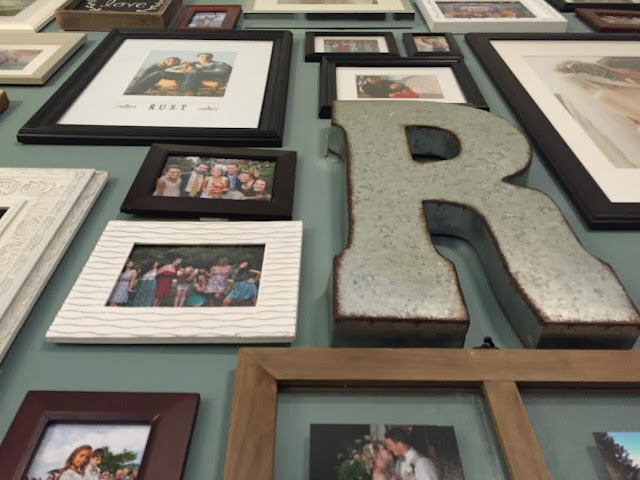
"Typically I would plan a gallery wall by placing all of my pictures on the floor in front of the wall to get a good layout with them and consider spacing. Because I had so many pictures to hang with this wall I practiced a new method. I laid all of the pictures on the floor first, just so I could see what all I had to choose from. I then began hanging the pictures starting with the largest. I spread the larger pictures out throughout the gallery wall. Then I spread the non-picture artwork so that they would be spread throughout the wall. Then worked my way to the smallest frames. I did keep an eye out for color of the frames to spread out colors as well as content of the pictures. I didn’t want all of the wedding pictures grouped together for instance. Normally I would worry about having the same spacing between every picture, but with this project I didn’t so much worry about that." 
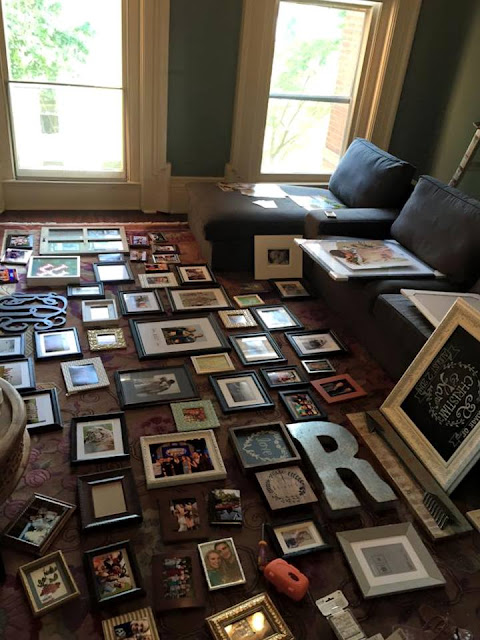
planning out a gallery wall

See how the paint is cutting in around the frames at the top? Those are the signatures that Dea was working on keeping in tact to restore. I just love that idea don't you?

Ever wanted to know the easiest method for hanging those pictures in a gallery wall? Command Strips or Hooks. Who knew? There is far less guesswork in using Command Strips and it's so much easier than putting a nail in the wall for every single photo. Once they are set {usually 24-48 hours}, they are there for good or until you decide to take them down.

planning out a gallery wall

After the gallery wall was hung it was time to start digging into the details. Dea gave me a great tip when decorating with pillows.

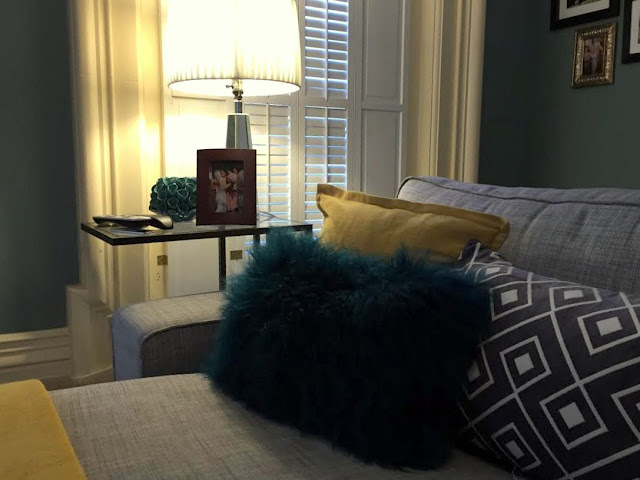
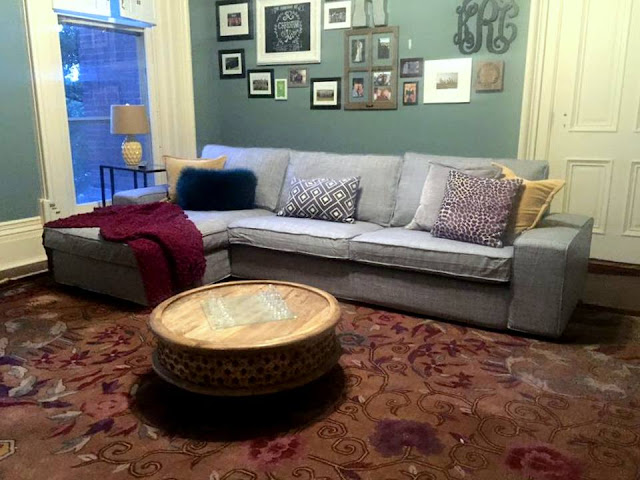
The eye naturally gravitates towards odd numbers. I would recommend when placing pillows on a couch, use 3 or 5. For this room I arranged two groups of three because the couch is so long. With a smaller couch you can spread 5 pillows across or group three in one corner and two in the other with a blanket to give you the third item. 

historic mansion rehab and remodeling project

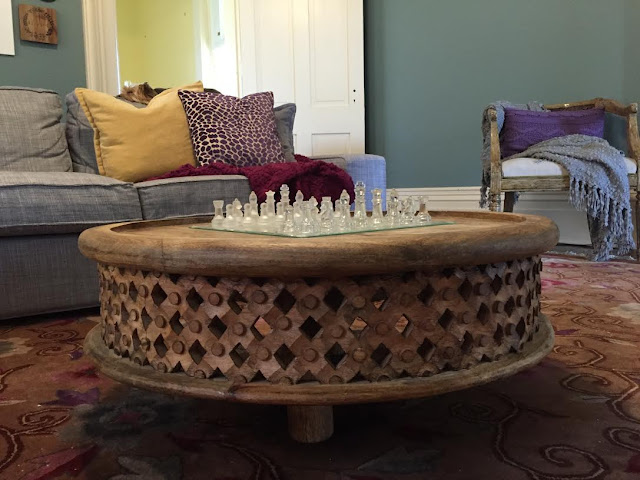
This coffee table from West Elm is one of my favorite pieces in the room.

historic mansion rehab and remodeling project with west elm coffee table

historic mansion rehab and remodeling project with Ikea sectional

historic mansion rehab and remodeling project

gallery wall


gallery wall

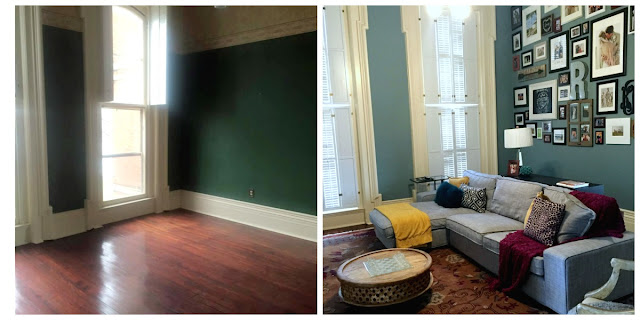
It's hard making a really large room with very tall ceilings feel warm and cozy but I think Dea did just that don't you? I just love the space and I love how she was able to shift her design focus a bit to include such a fun historic element.

historic mansion rehab and remodeling project before and after

In case you missed the foyer remodel and the big reveal, you can find it here.

historic mansion rehab and remodeling project

Don't miss a post! Sign up for the Holy Craft newsletter and get all the latest blog posts delivered right to your inbox. 
dislaimer: this post may have affiliate links. By clicking on them and purchasing through them, I may receive a small commission. These small purchases help me to continue to keep writing content and creating at Holy Craft. Thank you!
0
Back to Top